4. Chapter 4 Robot Dog
If you have any concerns, please feel free to contact us at support@freenove.com
This robot has rich functions, such as real-time video, LED, ultrasonic ranging. The server and client are established, based on Python3 and PyQt5. They communicate via TCP/IP protocol. The robot can be controlled remotely within a local area network (LAN).
4.1. Server
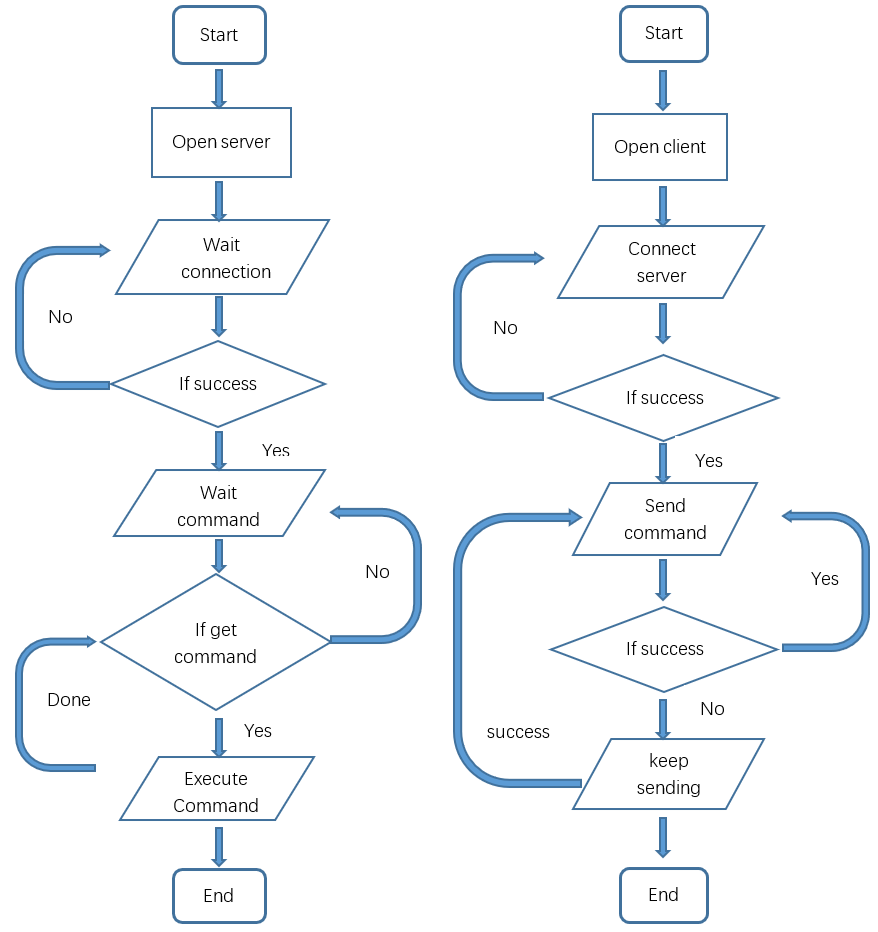
The server runs on the Raspberry Pi. It sends the camera data and ultrasonic module data to the client, and receive commands from client.
The code in the Server folder is used as an example.
4.1.1. Code
Part of server code is as below:
 1def get_interface_ip(self):
 2    s = socket.socket(socket.AF_INET, socket.SOCK_DGRAM)
 3    return socket.inet_ntoa(fcntl.ioctl(s.fileno(),
 4                                        0x8915,
 5                                        struct.pack('256s',b'wlan0'[:15])
 6                                        )[20:24])
 7def turn_on_server(self):
 8    #ip adress
 9    HOST=self.get_interface_ip()
10    #Port 8001 for video transmission
11    self.server_socket = socket.socket()
12    self.server_socket.setsockopt(socket.SOL_SOCKET,socket.SO_REUSEPORT,1)
13    self.server_socket.bind((HOST, 8001))
14    self.server_socket.listen(1)
15
16    #Port 5001 is used for instruction sending and receiving
17    self.server_socket1 = socket.socket()
18    self.server_socket1.setsockopt(socket.SOL_SOCKET,socket.SO_REUSEPORT,1)
19    self.server_socket1.bind((HOST, 5001))
20    self.server_socket1.listen(1)
21    print('Server address: '+HOST)
22
23def turn_off_server(self):
24    try:
25        self.connection.close()
26        self.connection1.close()
27    except :
28        print ('\n'+"No client connection")
4.1.2. Reference
For more code details, please open “Server.py” in Server folder to check.
- get_interface_ip()
This function can get the IP address of WLAN0 of the Raspberry Pi.
- turn_on_server()
This function is used to open TCP and wait for a client connection. The channel of port 5000 is mainly used to send and receive commands between the client and server. The channel of port 8000 is used to send video data to the client.
- turn_off_server()
This function is used to close TCP.
- send_data()
This function is used to send commands to the client.
- reset_serve()
This function is used to close TCP and restart.
- transmission_video()
This function is used to transmit video data to the client.
- receive_instruction()
This function is used to receive commands from the client
4.1.3. Open Server
4.1.3.1. Step 1 Login Raspberry Pi via VNC viewer
Because server and client use GUI. You need use VNC viewer as remote desktop way.
Download and install VNC Viewer according to your computer system by clicking following link:
https://www.realvnc.com/en/connect/download/viewer/
After installation is completed, open VNC Viewer. And click File -> New Connection. Then the interface is shown below.
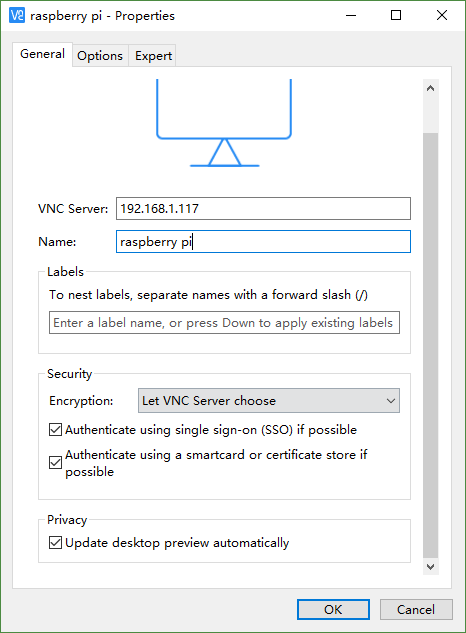
Enter IP address of your Raspberry Pi and fill in a Name. And click OK.
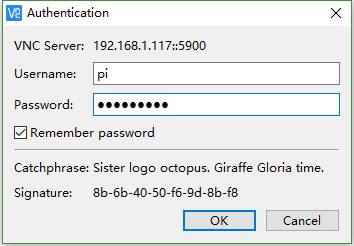
Then on the VNC Viewer panel, double-click new connection you just created, and the following dialog box pops up. Enter username: pi and Password: raspberry. And click OK.

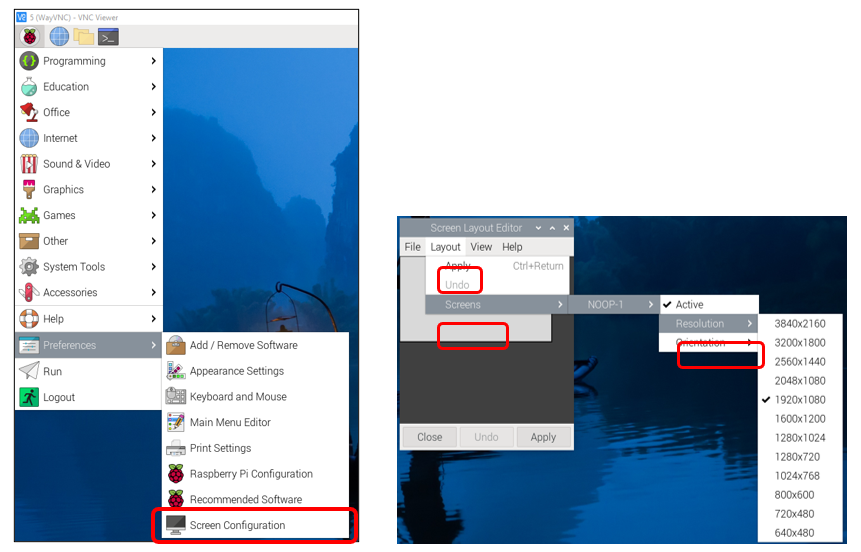
If the resolution ratio is not great or there is just a little window , you can set a proper resolution ratio via steps below.
Select Screen Configuration. Select the appropriate resolution in the new window. Click Apply.
In addition, your VNC Viewer window may zoom your Raspberry Pi desktop. You can change it. On your VNC View control panel, click right key. And select Properties->Options label->Scaling. Then set proper scaling.
4.1.3.2. Step 2 Run commands
Enter following command in the terminal.
Use cd command to enter directory where main.py is located:
$ cd ~/Freenove_Robot_Dog_Kit_for_Raspberry_Pi/Code/Server
Run main.py:
$ sudo python main.py

The interface is as below:
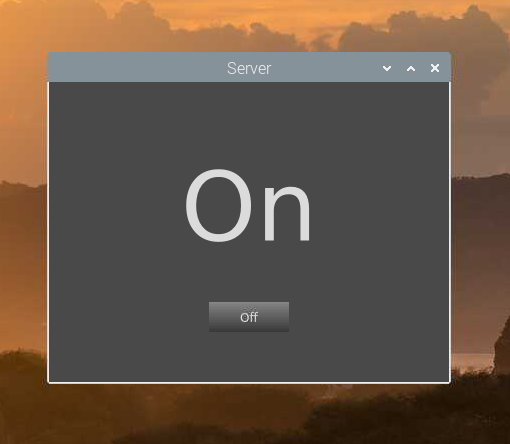
You will see your server address (Raspberry Pi IP), Which is the LAN IP address of your Raspberry Pi. In the next chapter, you will need to enter this IP address to connect the Raspberry Pi client with the server.

The robot will start from this posture. We define it as Relax mode. It will also be referenced later.

If you don’t like the interface, you can also enter the commands to open the server. It is more convenient.
Use cd command to enter directory where main.py is located:
$ cd ~/Freenove_Robot_Dog_Kit_for_Raspberry_Pi/Code/Server
Run main.py:
$ sudo python main.py -t -n
or Run main,py with following command:
$ sudo python main.py -tn
“-t” means open TCP communication. “-n” means don’t show interface.
4.1.3.3. Sever Auto Start
1 Open the terminal and execute the following two commands respectively to create a “start.sh” file.
cd ~
sudo touch start.sh
2 Open “start.sh”.
sudo nano start.sh
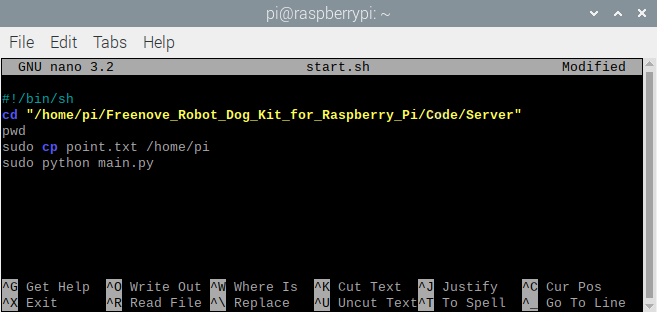
3 Add the following contents to “start.sh” file.
#!/bin/sh
cd "/home/pi/Freenove_Robot_Dog_Kit_for_Raspberry_Pi/Code/Server"
pwd
sleep 10
sudo cp point.txt /home/pi
sudo python main.py
Note that if you are a Raspberry PI 5, use the following contents.
#!/bin/sh
cd "/home/pi/Freenove_Robot_Dog_Kit_for_Raspberry_Pi/Code/Server-Pi5"
pwd
sleep 10
sudo python main.py
Press Ctrl + O and then press Enter to save it. Press Ctrl+X to exit.
4 Modify permissions.
sudo chmod 777 start.sh
5 Enter the following command to create a directory.
mkdir ~/.config/autostart/
6 create and open “start.desktop” file
sudo nano .config/autostart/start.desktop
7 Add the following content to “start.desktop” file.
[Desktop Entry]
Type=Application
Name=start
NoDisplay=true
Exec=/home/pi/start.sh
Press Ctrl + O and then press Enter to save it. Press Ctrl+X to exit.
8 Modify permissions.
sudo chmod +x .config/autostart/start.desktop
9 Finally enter the following content to reboot Raspberry Pi.
sudo reboot
Note
To cancel auto start, please delete the files “start.sh” and “start.desktop” created above.
4.2. Client
The client can receive video data and commands from the server, and can send commands to the server. And it can run on different systems, such as windows, macOS and so on. However, you need to install related software and libraries when running it.
Part of client code is as below:
 1def turn_on_client(self,ip):
 2    self.client_socket1 = socket.socket(socket.AF_INET, socket.SOCK_STREAM)
 3    self.client_socket = socket.socket(socket.AF_INET, socket.SOCK_STREAM)
 4    print (ip)
 5def turn_off_client(self):
 6    try:
 7        self.client_socket.shutdown(2)
 8        self.client_socket1.shutdown(2)
 9        self.client_socket.close()
10        self.client_socket1.close()
11    except Exception as e:
12        print(e)
13def receiving_video(self,ip):
14    stream_bytes = b' '
15    try:
16        self.client_socket.connect((ip, 8001))
17        self.connection = self.client_socket.makefile('rb')
18    except:
19        #print ("command port connect failed")
20        pass
21    while True:
22        try:
23            stream_bytes= self.connection.read(4)
24            leng=struct.unpack('<L', stream_bytes[:4])
25            jpg=self.connection.read(leng[0])
26            if self.is_valid_image_4_bytes(jpg):
27                if self.video_flag:
28                    self.image = cv2.imdecode(np.frombuffer(jpg, dtype=np.uint8), cv2.IMREAD_COLOR)
29                    if self.ball_flag and self.face_id==False:
30                       self.Looking_for_the_ball()
31                    elif self.face_flag and self.face_id==False:
32                        self.face.face_detect(self.image)
33                    self.video_flag=False
34        except BaseException as e:
35            print (e)
36            break
4.2.1. Reference
For more code details, please open “Client.py” in Client folder to check.
- turn_on_client()
This function is used to connect client to the server.
- turn_off_client()
This function is used to disconnect from the server.
- receiving_video()
This function is used to receive video data sent from the server.
- is_valid_image_4_bytes()
This function is used to check whether each frame of video data is complete.
- Looking_for_the_ball()
This function is used to find the small ball in the video image.
- send_data()
This function is used to send commands to the server.
- receive_data()
This function is used to receive commands from the server.
4.2.2. Run Client on Windows system
There are two ways to run Client on Windows.
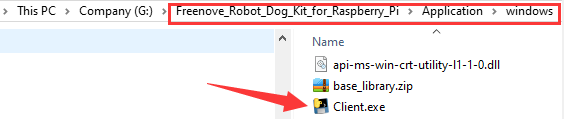
4.2.2.1. Option 1 Running executable file directly
Find the “Client.exe” file in the specified directory, double click it and the Client is opened.

After the client is successfully opened,
1.You need to open the Raspberry Pi and Turn on the server,
2.Enter the Raspberry Pi’s IP address in the white IP edit box,
3.Click “Connect” to connect client to the Raspberry Pi.
After the connection is successful, you need to calibrate the robot in Calibration section. After the calibration is completed, the robot dog can be controlled to move.
Note
When Raspberry Pi is shut down, server will be closed. You need open server again the next time.
4.2.2.2. Option 2 Install python3 and some related python libraries to run client
If you want to modify the client, you can follow this section.
This section will be completed in your computer with windows system, not Raspberry Pi.
To run the client on a Windows system, you need to install some software and libraries, which takes some time. During this process, it does not need to run a server and a Raspberry Pi. You can turn off the Raspberry Pi first. After the installation is completed, turn on the Raspberry Pi and the server.
4.2.2.2.1. Install python3
Download the installation file via the below link:
https://www.python.org/downloads/windows/
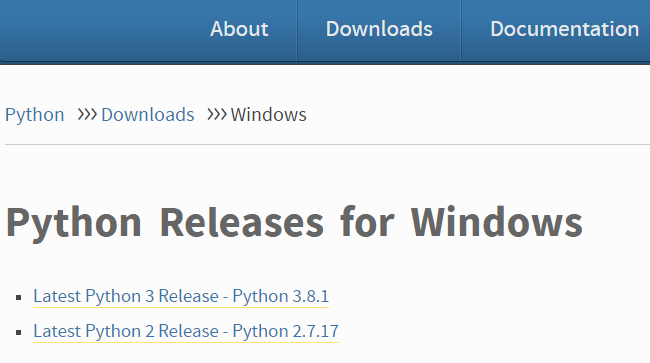
Click Latest Python 3 Release - Python 3.8.1 (as an example).
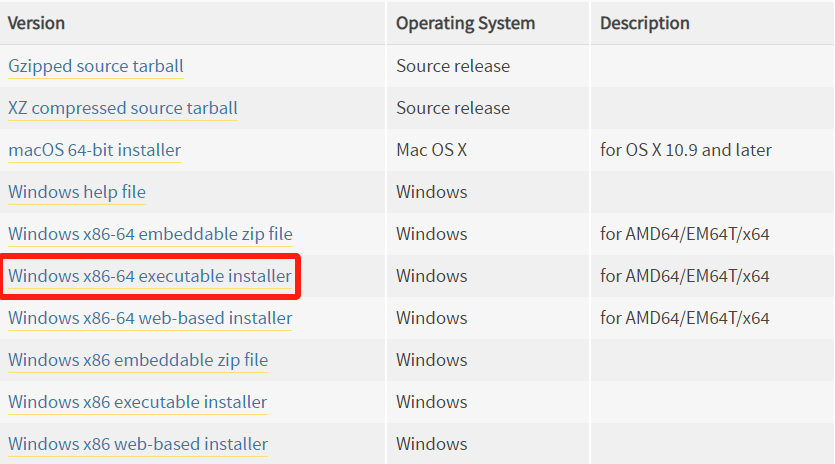
Choose “Windows x86-64 executable installer” to download and install.
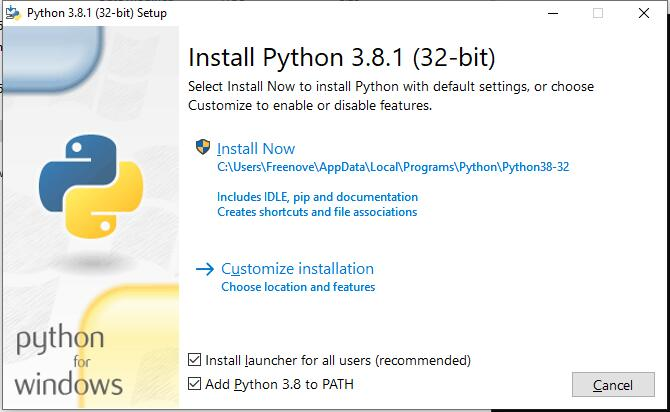
Select “Add Python 3.8 to PATH”. And choose Customize installation.
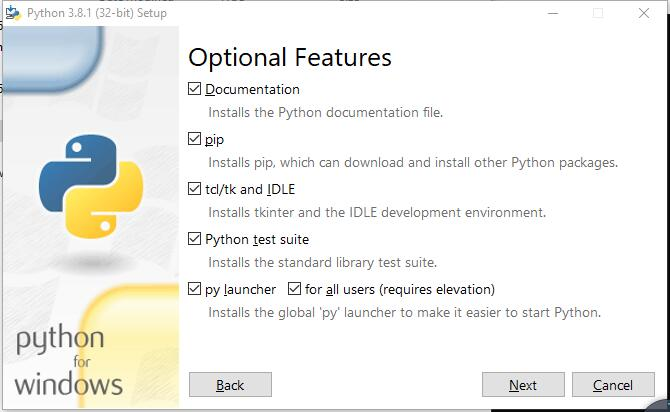
Select all options and click Next.
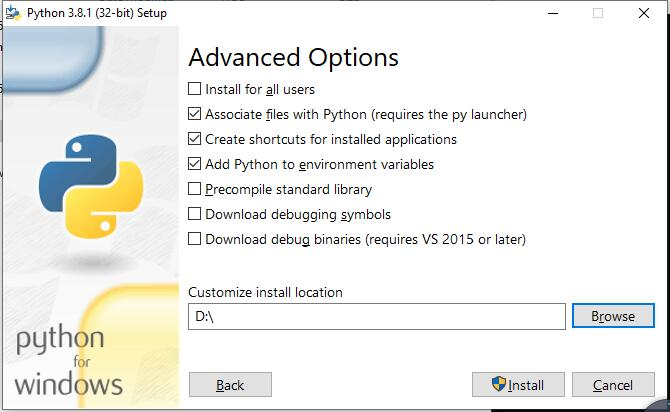
Here python is installed into D disk as an example (You can choose your own installation path). Click Install.
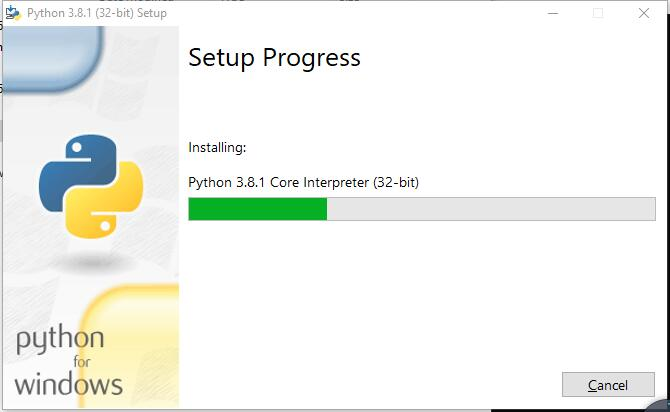
Wait for installation.
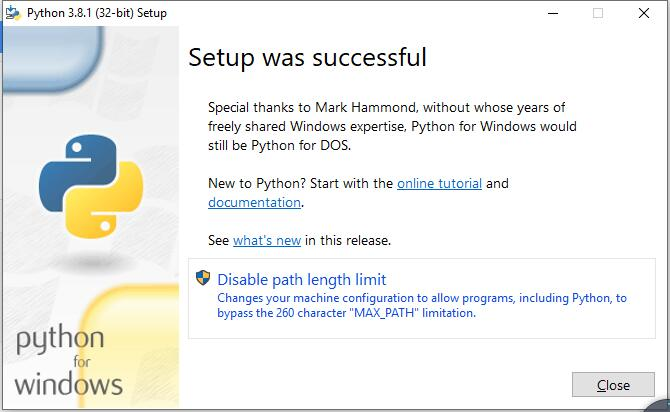
Installation is successful.
4.2.2.2.2. Install PyQt5, opencv, numpy and other libraries
If you have not download the zip file, download it via below link:
https://github.com/Freenove/Freenove_Robot_Dog_Kit_for_Raspberry_Pi/archive/master.zip
Then unzip it and delete “-master” to rename it to “Freenove_Robot_Dog_Kit_for_Raspberry_Pi”.
Then put it into D disk, for example.
You can also place it into other disks (like E), but the path in following command should be modified accordingly (replace D: by E:).
Press “win + R” and enter cmd, and click ok. Then enter following commands.
Enter D disk. If you put it into E, it should be
E:
D:
Enter directory where setup_windows.py is located:
cd D:\Freenove_Robot_Dog_Kit_for_Raspberry_Pi\Code
Run: setup_windows.py
Python setup_windows.py
Or double-click “setup_windows.py” to execute the installation program, under following path:
Freenove_Robot_Dog_Kit_for_Raspberry_Pi\Code\
Or use python3 to run “setup_windows.py”.
Note
If the default python in your windows system is not python3 but python2, then change all “python” in “setup_windows.py” to “python3” and run the command “setup_windows.py” as shown below.

Python3 setup_windows.py
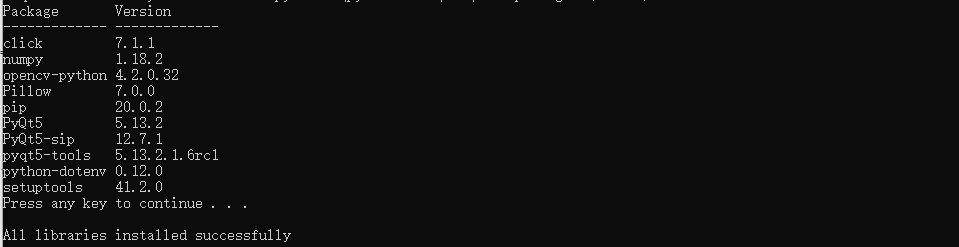
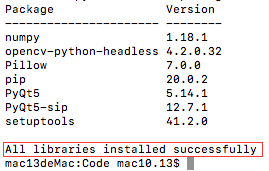
Installation takes some time, please be patient. If all installations are successful, it will prompt “Press any key to continue…” and “All libraries installed successfully”.
If some libraries are not installed successfully, it will prompt “Some libraries have not been installed yet. Please run ‘python setup_windows.py’ again”. Then you need to execute the python3 setup_windows.py command again. Most installation failures are caused by a poor network. You can check the network before installing.
4.2.2.2.3. Open client
Press “win + R” and enter cmd, and click ok. Then enter following commands.
1.Enter D disk. If you put it into E, it should be E:
D:
2.Enter directory where Main.py is located:
cd D:\Freenove_Robot_Dog_Kit_for_Raspberry_Pi\Code\Client
3.Run Main.py:
Python Main.py

Or double-click “Main.py”. under following path:
Freenove_Robot_Dog_Kit_for_Raspberry_Pi\Code\Client
Or use python3 to run “Main.py”.
Note
If the default python in your windows system is not python3, then change the command to run Main.py as shown below.
Python3 Main.py
The client interface is shown below:
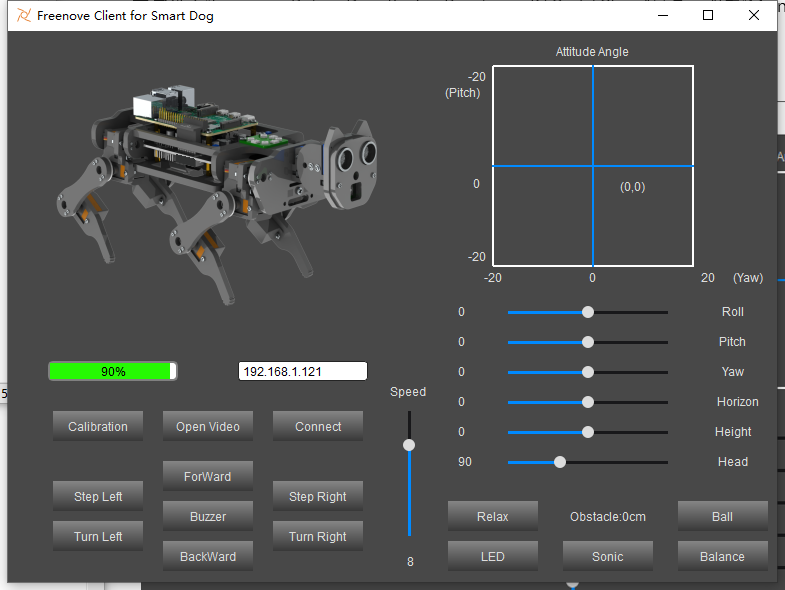
After the client is successfully opened,
1.You need to open the Raspberry Pi and Open Server,
2.Enter the Raspberry Pi’s IP address in the white IP edit box,
3.Click “Connect” to connect client to the Raspberry Pi.
After the connection is successful, you need to calibrate the robot in Calibration section. After the calibration is completed, the robot dog can be controlled to move.
Note
When Raspberry Pi is shut down, server will be closed. You need open server again the next time.
4.2.3. Run Client on macOS system
Here take MacOS 10.13 as an example. To run the client on MacOS, you need to install some software and libraries. During the installation, it does not need to run a server and use a Raspberry Pi. You can turn off the Raspberry Pi first. After the installation is completed, turn on the Raspberry Pi and run the server. MacOS 10.13 comes with python2, but no python3. The programs of this robot can only run on python3.
4.2.3.1. Install python3
Download installer, link https://www.python.org/downloads/

Click Python 3.8.2.
If your macOS is 11. Like 11.0, please install python 3.9.
If your macOS is NOT 11, like 10.15, please install python 3.8. If you have installed python 3.9. You need uninstall it first.
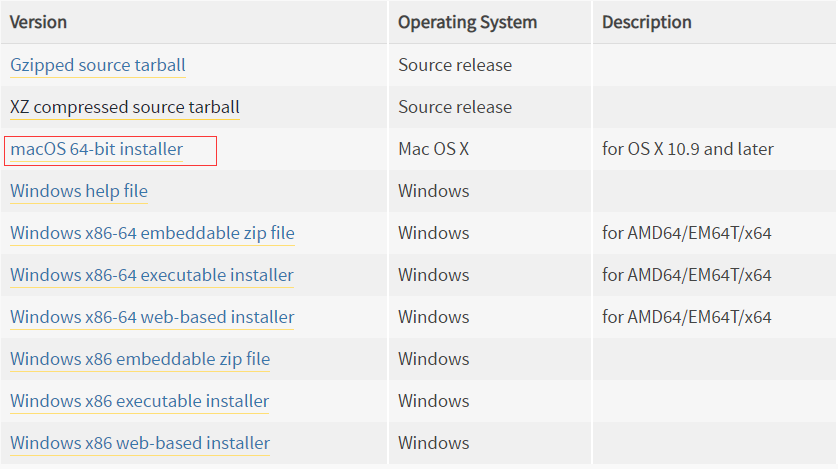
On the bottom of the page, click macOS 64-bit installer to download installer.
Then install python.
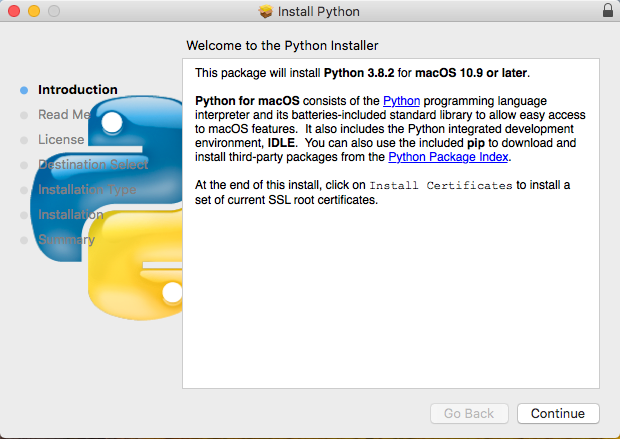
Click Continue.
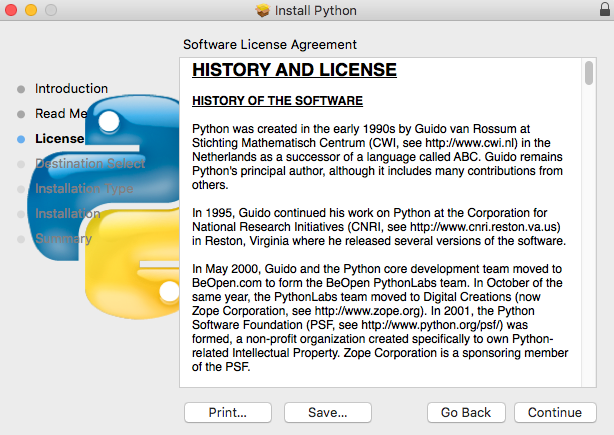
Click Continue.
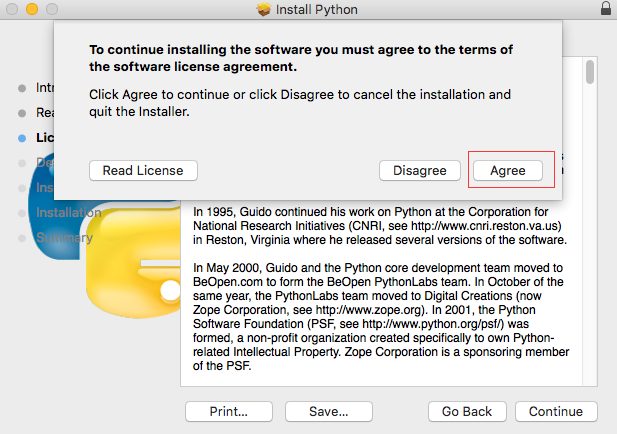
Click Agree.
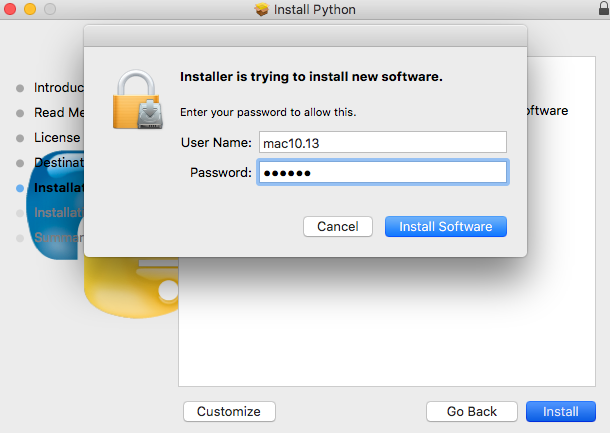
Click Install. If your computer has a password, enter the password and click Install Software.
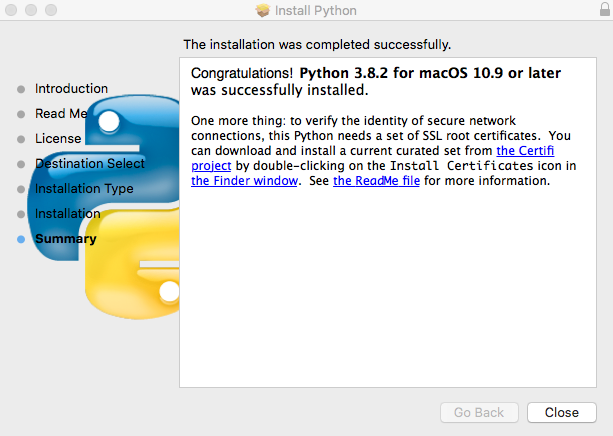
Now the installation is completed successfully.
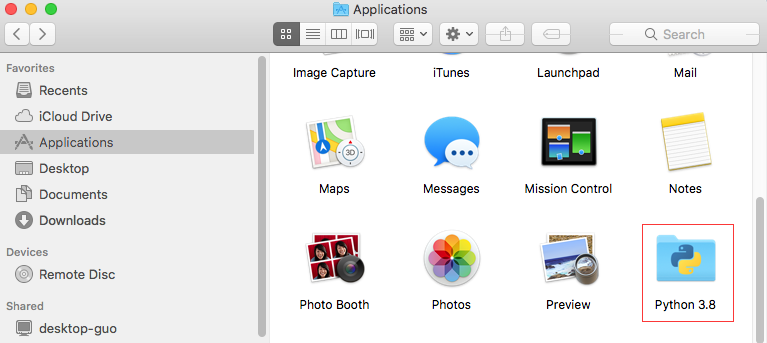
You can find in Applications.
4.2.3.2. Install PyQt5、opencv、numpy and other libraries
If there is no robot dog code in your macOS, you can download it via link below:
https://github.com/Freenove/Freenove_Robot_Dog_Kit_for_Raspberry_Pi/archive/master.zip
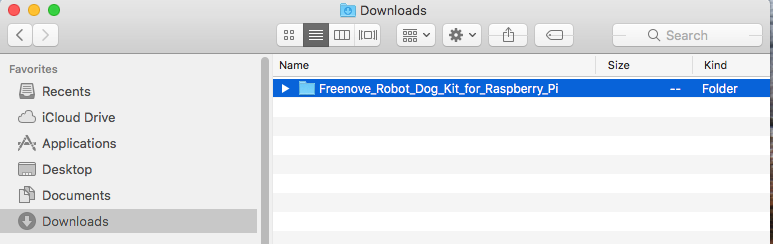
After downloading successfully, you can find it under “Downloads”.
Open “Terminal”.

Type following command in Terminal.
Enter “Downloads” where the code is located. If your path is different, please modify the command.
$ cd Downloads
Enter directory where setup_macos.py is located:
$ cd Freenove_Robot_Dog_Kit_for_Raspberry_Pi/Code/
Run setup_macos.py:
$ python3 setup_macos.py
Installation takes some time, please wait patiently.
If some libraries are not installed successfully, it will prompt “Some libraries have not been installed yet. Please run ‘python3 setup_windows.py’ again”. Then you need to execute the python3 setup_windows.py command again. Most installation failures are caused by a poor network. You can check the network before installing.
If you are using macOS under 11.0, like 10.15. Just skip to “Open client”.
If you are using macOS 11.0 or later version. Please run commands below:
$ pip3 uninstall PyQt5
$ pip3 install PyQt5
4.2.3.3. Open client
After installation is completed in previous step, now it is in the directory that setup_macos.py is located.
Type following command to enter where the program is located.
$ cd Client/
Type following command to run the program.
$ python3 Main.py

After the client is successfully opened,
1.You need to open the Raspberry Pi and Open Server,
2.Enter the Raspberry Pi’s IP address in the white IP edit box,
3.Click “Connect” to connect client to the Raspberry Pi.
Then you need calibrate the robot in the Calibration section. After the Calibration is completed, robot dog can be controlled to move.
Note
When Raspberry Pi is shut down, server will be closed. You need open server again the next time.
4.2.4. Calibration
Calibrate the robot.
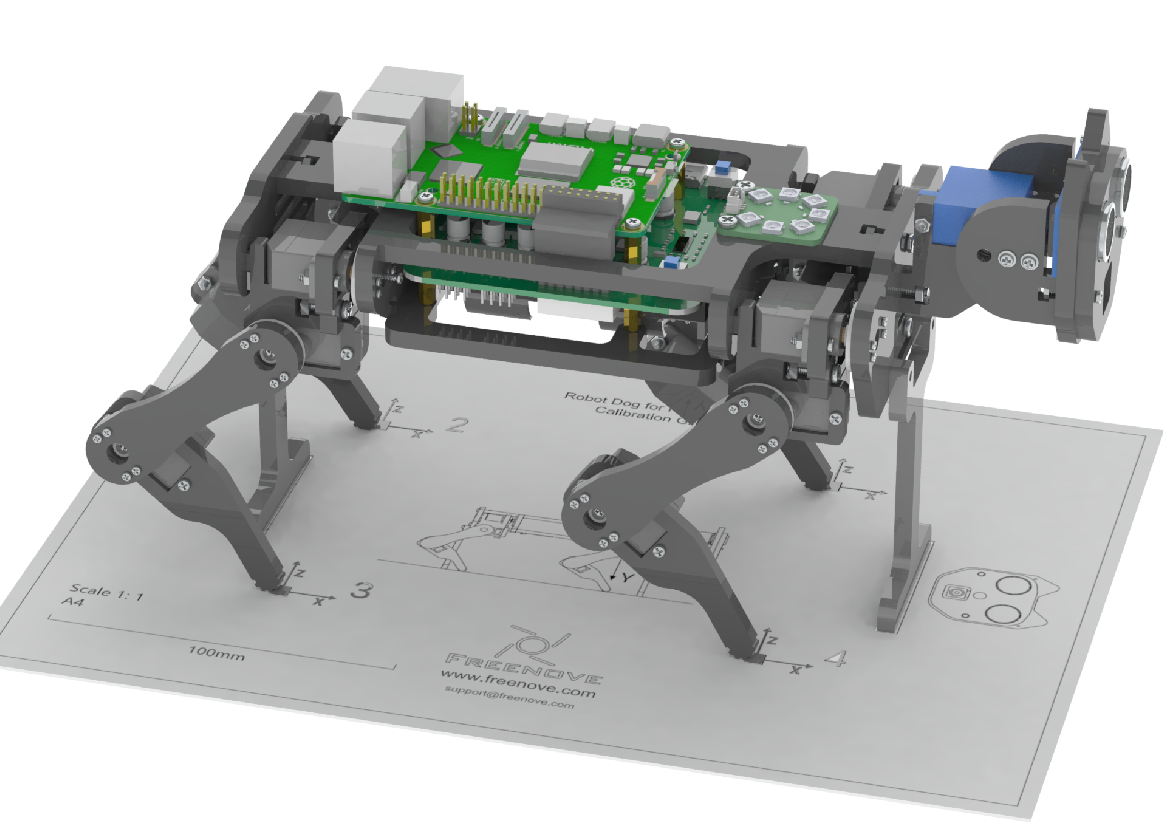
Lay the calibration paper on a horizontal hard table.
Install the calibration supports on the robot dog and place it on the corresponding position on the calibration paper.

Connect client with server successfully, click the “Calibration” button on the client, then a calibration window pops up. And the robot’s legs will automatically put to the following position.
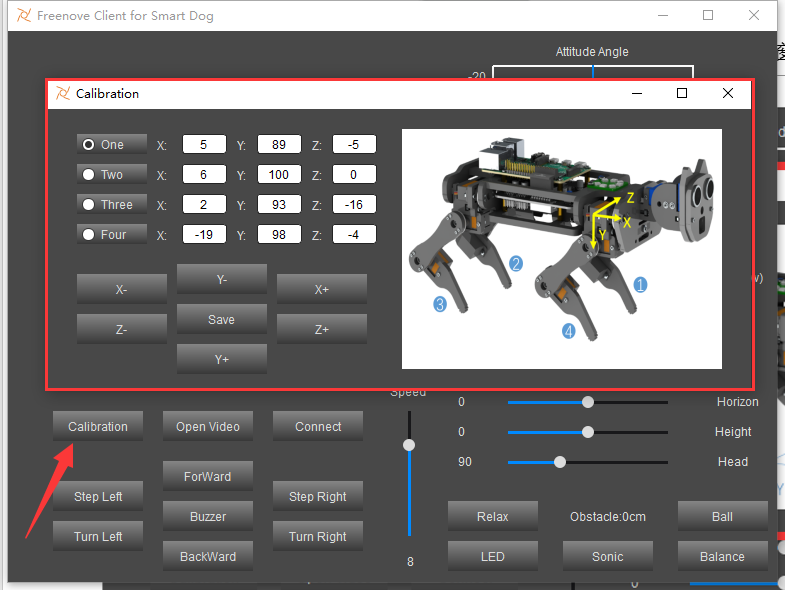
Calibrate the four legs to make 4 foot points fall to the corresponding positions. Feel the contact force between the robot dog and the ground during calibration. Future control depends on this step.
After all the 4 points have reached the designated position, click “Save” to save. Now calibration is completed.
Note
1.It is best to have the robot dog walk on a flat hard floor. The robot dog may not walk well on other grounds.
2.There is an offset when controlling the robot dog to walk straightly, which is normal. It is caused by the installation error and the error of the servo itself. As a result, the left and right legs cannot be completely symmetrical, and may differ by 1mm or 2mm. As the walking distance accumulates, this error is constantly superimposed. Then there will be a large offset from the original position.
3.If the calibration is not good enough, it will affect walking. You can recalibrate the robot with same steps.
4.2.5. Control
After calibrating successfully, you can control the robot dog to move.

Relax mode:
When the robot dog moves for 3 minutes at a time, it will feel tired (the servo will get hot). In order to protect the servo, the robot will get into relax mode for 1 minute. During this time, it won’t respond to any motion command. You can still use the functions of LED, buzzer, real-time video and so on.
When the robot dog moves for less than3 minutes and rests for 1 minute. The timer will start from 0. Then the robot can move for 3 minutes again.
If the robot isn’t tired and is standing, when the robot does not receive motion command for 10s, it will get into relax mode. In this situation, it will respond to all commands.
You can click and drag the cross cursor in the coordinate system to adjust the yaw and pitch angle of body.
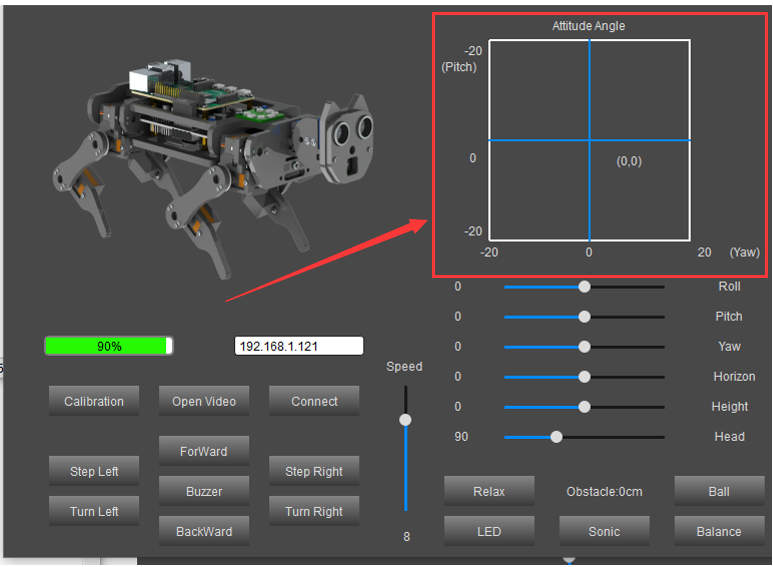
The following is the corresponding operation of the buttons and keyboards.
Button on Client |
Key |
Action |
|---|---|---|
ForWard |
W |
Move |
BackWard |
S |
Back off |
Turn Left |
A |
Turn left |
Turn Right |
D |
Turn right |
Step Left |
Q |
Step Left |
Step Right |
E |
Step Right |
Connect/ Disconnect |
C |
On/Off Connection |
Open Video/ Close Video |
V |
On/Off Video |
Calibration |
M |
Open calibration interface |
Buzzer/Noise |
Space |
On/Off Buzzer |
Relax |
R |
Relax station |
LED |
L |
Open LED control interface |
Sonic |
U |
Measure and display distance from obstacle |
Balance |
B |
Open/Close balance modeAction |
Face/Ball/Close |
F |
Face recognition and ball tracking |
Face ID |
Input images of human faces |
Input images of human faces and recognize them.
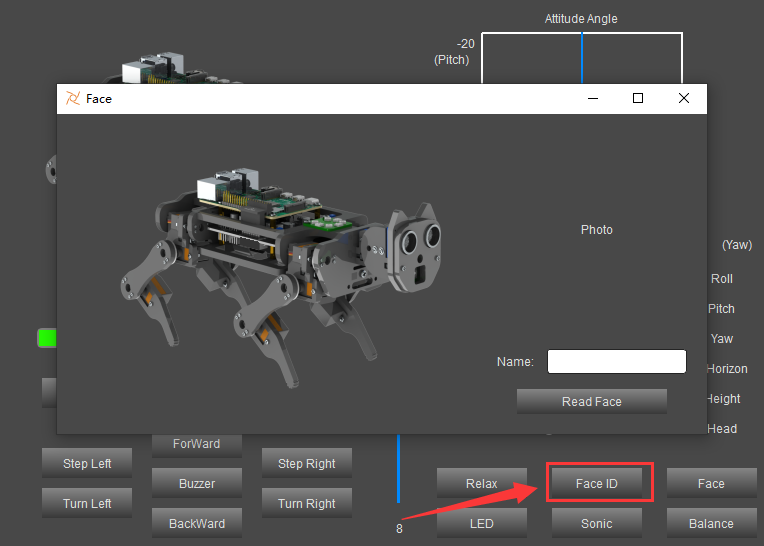
Click “Face ID”.
Enter name in the box of the pop-up window.
Click “Read Face”.
A picture is taken and recorded every two seconds, and a total of 30 images will be taken. Try to show faces at different distances and angles during the shooting process. (When the face is not recognized, the picture will not be recorded until the face is recognized again.)
After the 30 images are recorded, you can close the window and click “Face” on the Right to identify the face.
Note
Do NOT use different names when re-entering images of the same person to avoid client working abnormally.
The function of SliderBar is below:
SliderBar |
Function |
|---|---|
Head |
Adjust head angle. |
Height |
Control body height. |
Horizon |
Make body move forward or back. |
Yaw |
Adjust Yaw angle of body |
Pitch |
Adjust Pitch angle of body |
Roll |
Adjust Roll angle of body |
Note
If the robot work abnormally, please check following contents.
Check the battery level. Low battery level will make the server shut down.
Check if the wireless connection is disconnected.
Check if the Raspberry Pi is stuck.
If all three points above work well, please restart server and client. If there still is any abnormality, please contact us by email (support@freenove.com). We will help you.
4.3. Free your innovation
If you have any concerns, please feel free to contact us via support@freenove.com
If you want to write your own program to control the robot dog, you can follow this chapter.
The robot dog program is based on python3. If your python is python2 by default, please change to python3.
If you have never learned python before, you can learn some basics through the following links:
https://python.swaroopch.com/basics.html
4.3.1. Program
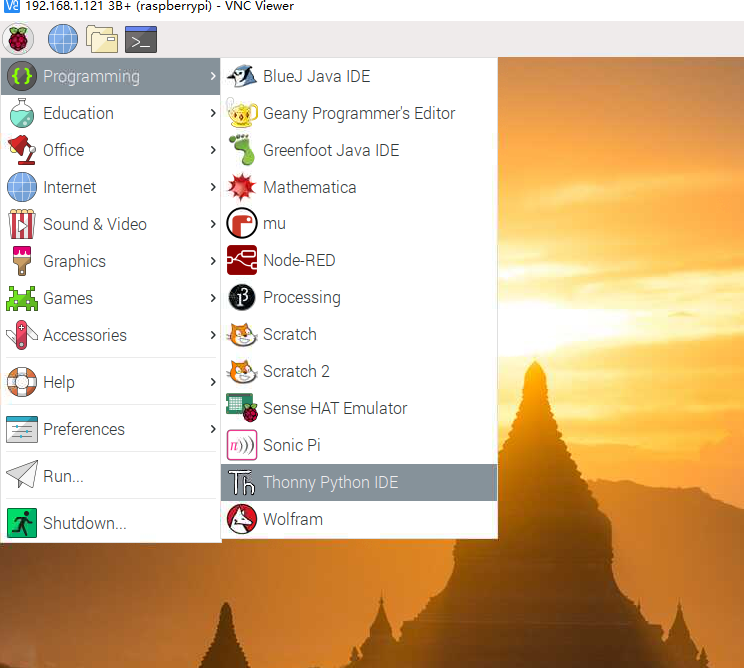
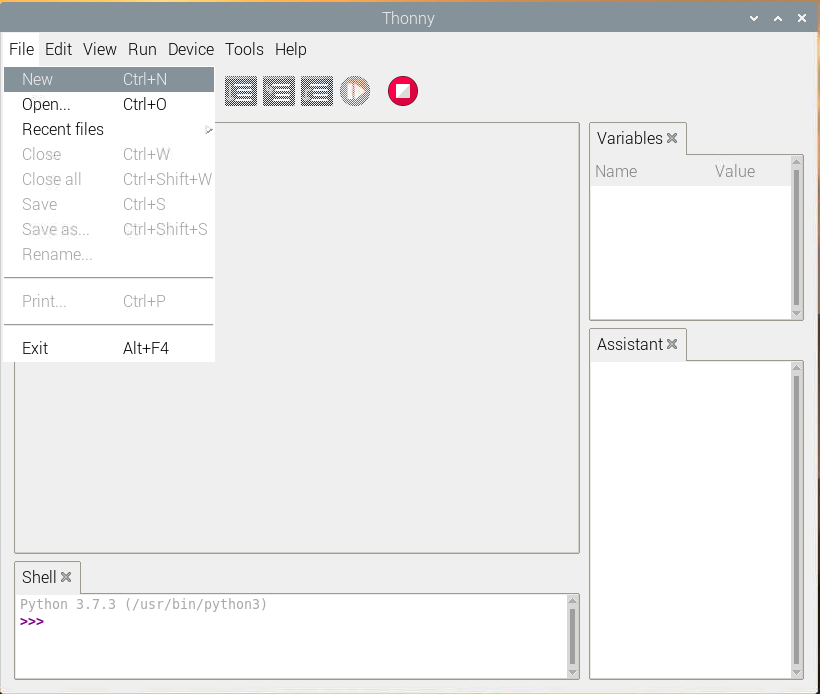
First, open Thonny Python IDE which is easy to use for beginners.
Create a new file.
Name it with myCode as an example and save it in Server folder of robot code folder.
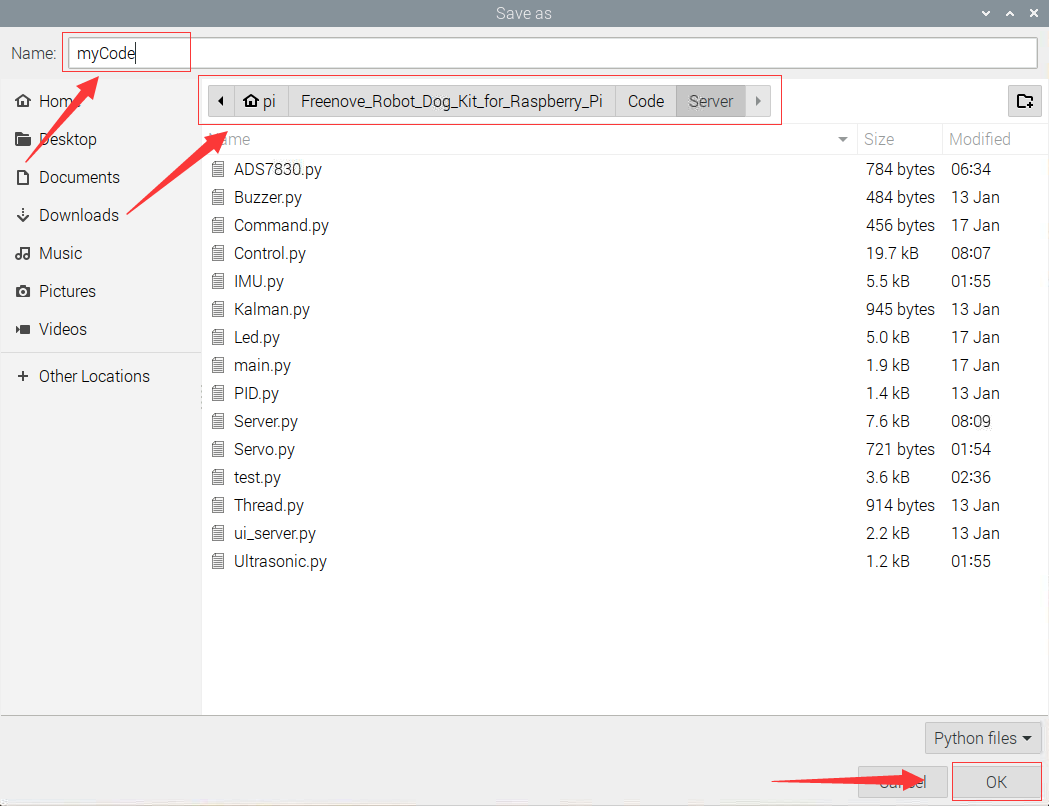
Open the Server folder of the robot dog code and you can see the file you created.

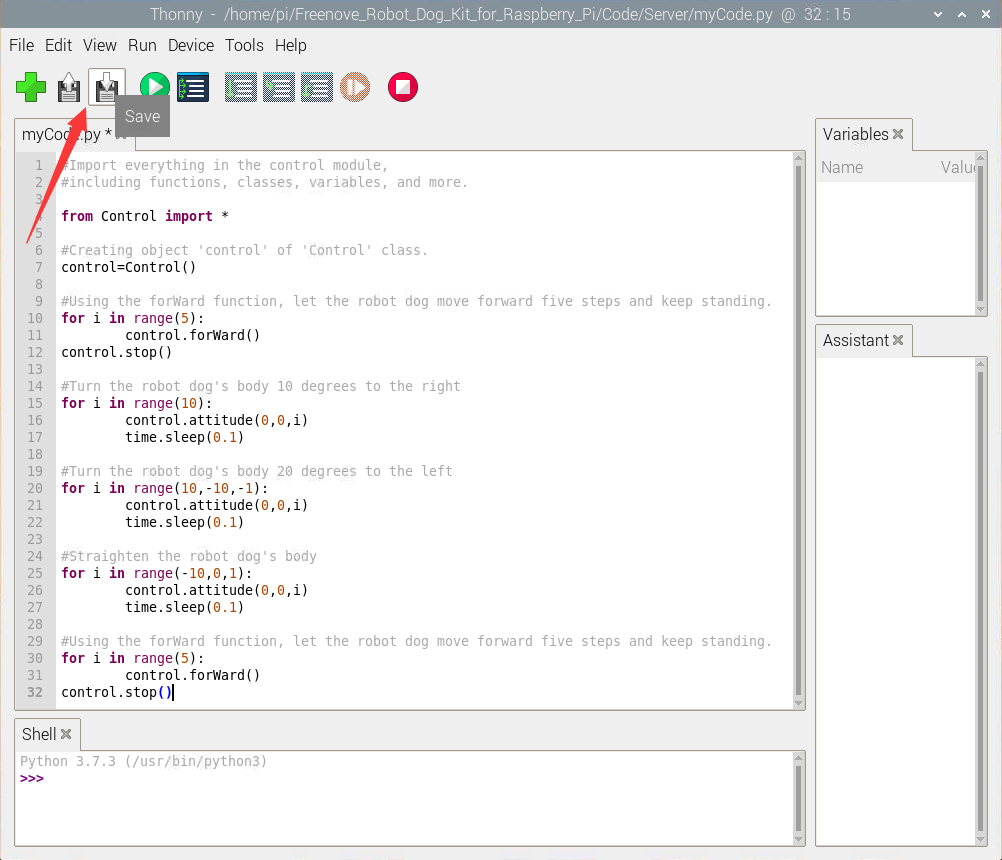
Write the code in myCode.py as below and click save after finished, as shown below.
Type the following command to enter the directory where myCode.py is located.
$ cd ~/Freenove_Robot_Dog_Kit_for_Raspberry_Pi/Code/Server
Run myCode.py
$ sudo python myCode.py

You can see that your robot dog moves forward for 5 steps, then twists its body at 10 degrees to the right, then 20 degrees to the left, then returns to the original attitude and move forward 5 steps and then stops.
4.3.3. Custom Action
We have also customized some specific actions, such as push-up, greeting, etc. You can run “Action.py” to play.

4.4. Android and iOS app
You can download and install the Freenove Android app from below links:
On Google play:
https://play.google.com/store/apps/details?id=com.freenove.suhayl.Freenove
On GitHub:
https://github.com/Freenove/Freenove_App_for_Android
In this GitHub repository, you can find the App instruction (Tutorial.pdf).
You can download and install the Freenove iOS app by searching freenove in app store.

Relax mode
When the robot dog moves for 3 minutes in total, it will feel tired (the servo will get hot). In order to protect the servo, the robot will get into relax mode for 1 minute. During this time, it won’t respond to motion command. You can still use the functions of LED, buzzer, real-time video and so on.
When the robot dog moves for < 3 minutes and then the robot rest for 1 minute. The timer will start from 0. Then the robot can move for 3 minutes again.
If the robot isn’t tired and is standing, when the robot does not receive motion command for 10s, it will get into relax mode. In this situation, it will responds to any commands.
The followings are the features of this app.
First, you need to turn on the Server. Then enter your raspberry pi IP address and click connect icon.
On the top of the interface, there is a timer slider to indicate the time for moving or resting.
