4. Chapter 4 Hexapod Robot
You can refer to these videos to open client and calibrate the robot:
Client control:
Calibration:
The robot features with live video, ultrasonic ranging and other functions. Based on Python3 and PyQt5, it has also been built with server and client, which communicate with each other through TCP/IP protocol and can be controlled remotely with the same LAN.
We will help you with any concerns via support@freenove.com

4.1. Server
The server runs on the Raspberry Pi. It sends the camera data and ultrasonic module data to the client, and receive commands from client.
The code in the Server folder is used as an example, or if you has a Raspberry Pi5, refer to the code in the server-PI5 folder.
4.1.1. Code
Part of the server code is as follows:
4.1.1.1. Reference
For more code, please check “Server.py” in the Server directory.
- get_interface_ip()
To obtain the IP address of RPi’s WLAN0
- start_server()
To turn ON TCP to wait for the connection of Client
- stop_server()
To turn OFF TCP
- send_data()
To send commands to client
- reset_server()
To restart TCP
- transmit_video()
To send video data to client
- receive_commands()
To receive commands from client
4.1.2. Open Server
4.1.2.1. Step 1 Login Raspberry Pi via VNC viewer
Because server and client use GUI. You need use VNC viewer as remote desktop way.
Download and install VNC Viewer according to your computer system by clicking following link:
https://www.realvnc.com/en/connect/download/viewer/
After installation is completed, open VNC Viewer. And click File -> New Connection. Then the interface is shown below.

Enter IP address of your Raspberry Pi and fill in a Name. And click OK.
Then on the VNC Viewer panel, double-click new connection you just created, and the following dialog box pops up. Enter username: pi and Password: raspberry. And click OK.

If the resolution ratio is not great or there is just a little window, you can set a proper resolution ratio via steps below.
Select Screen Configuration. Select the appropriate resolution in the new window. Click Apply.
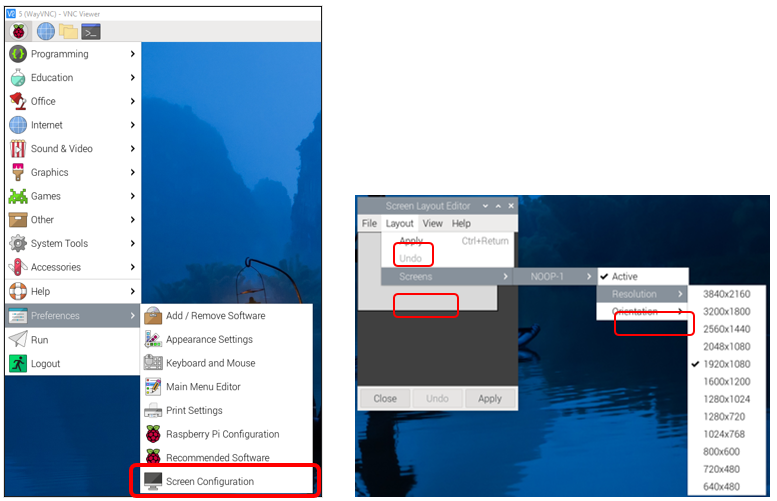
In addition, your VNC Viewer window may zoom your Raspberry Pi desktop. You can change it. On your VNC View control panel, click right key. And select Properties->Options label->Scaling. Then set proper scaling.
4.1.2.2. Step 2 Run commands
Enter following command in the terminal.
Use cd command to enter directory where main.py is located:
$ cd ~/Freenove_Big_Hexapod_Robot_Kit_for_Raspberry_Pi/Code/Server
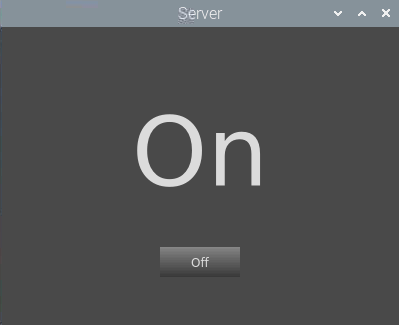
Run main.py:
$ sudo python main.py

The interface is as below:
If you don’t like the interface, you can also enter the commands to open the server. It is more convenient.
Use cd command to enter directory where main.py is located:
$ cd ~/Freenove_Big_Hexapod_Robot_Kit_for_Raspberry_Pi/Code/Server
Run main.py:
$ sudo python main.py -t -n
or Run main,py with following command:
$ sudo python main.py -tn
“-t” means open TCP communication. “-n” means don’t show interface.
4.1.2.2.1. Sever Auto Start
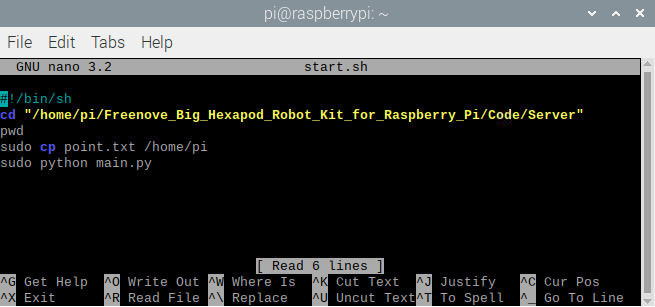
Open the terminal and execute the following two commands respectively to create a “start.sh” file.
$ cd ~
$ sudo touch start.sh
Open “start.sh”.
$ sudo nano start.sh
Add the following contents to “start.sh” file.
#!/bin/sh
cd "/home/pi/Freenove_Big_Hexapod_Robot_Kit_for_Raspberry_Pi/Code/Server"
pwd
sleep 10
sudo cp point.txt /home/pi
sudo python main.py
Press Ctrl + O and then press Enter to save it. Press Ctrl+X to exit.
Modify permissions.
$ sudo chmod 777 start.sh
Enter the following command to create a directory.
$ mkdir ~/.config/autostart/
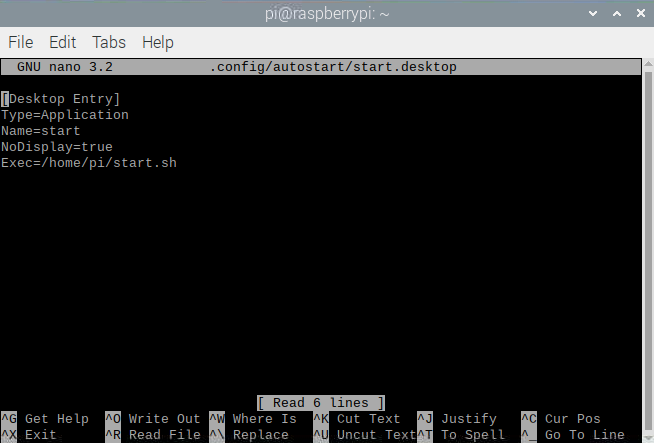
create and open “start.desktop” file
$ sudo nano .config/autostart/start.desktop
Add the following content to “start.desktop” file.
[Desktop Entry]
Type=Application
Name=start
NoDisplay=true
Exec=/home/pi/start.sh
Press Ctrl + O and then press Enter to save it. Press Ctrl+X to exit.
Modify permissions.
$ sudo chmod +x .config/autostart/start.desktop
Finally enter the following content to reboot Raspberry Pi.
$ sudo reboot
Note
To cancel auto start, please delete the files “start.sh” and “start.desktop” created above.
4.2. Client
Client can receive video data and commands from the server as well as send commands to server. It can also be run in different systems including Windows and macOS as long as you install the related software and libraries.
4.2.1. Code
Part of the client code is as follows:
 1    def turn_on_client(self,ip):
 2        self.client_socket1 = socket.socket(socket.AF_INET, socket.SOCK_STREAM)
 3        self.client_socket = socket.socket(socket.AF_INET, socket.SOCK_STREAM)
 4        print (ip)
 5    def turn_off_client(self):
 6        try:
 7            self.client_socket.shutdown(2)
 8            self.client_socket1.shutdown(2)
 9            self.client_socket.close()
10            self.client_socket1.close()
11        except Exception as e:
12            print(e)
13    def receiving_video(self,ip):
14        try:
15            self.client_socket.connect((ip, 8002))
16            self.connection = self.client_socket.makefile('rb')
17        except:
18            #print ("command port connect failed")
19            pass
20        while True:
21            try:
22                stream_bytes= self.connection.read(4)
23                leng=struct.unpack('<L', stream_bytes[:4])
24                jpg=self.connection.read(leng[0])
25                if self.is_valid_image_4_bytes(jpg):
26                    if self.video_flag:
27                        self.image = cv2.imdecode(np.frombuffer(jpg, dtype=np.uint8), cv2.IMREAD_COLOR)
28                        if self.fece_id == False and self.fece_recognition_flag:
29                            self.face.face_detect(self.image)
30                        self.video_flag=False
31            except BaseException as e:
32                print (e)
33                break
34    def send_data(self,data):
35        if self.tcp_flag:
36            try:
37                self.client_socket1.send(data.encode('utf-8'))
38            except Exception as e:
39                print(e)
40    def receive_data(self):
41        data=""
42        data=self.client_socket1.recv(1024).decode('utf-8')
43        return data
4.2.1.1. Reference
For more code, please check “Client.py” in the Client director.
- turn_on_client()
To connect to the server
- turn_off_client()
To disconnect server。
- receiving_video()
To receive video data from server
- is_valid_image_4_bytes()
To check the integrity of each frame of video data
- send_data()
To send commands to server
- receive_data()
To receive commands from server
4.2.2. Run Client on Windows system
There are two ways to run Client on Windows.
4.2.2.1. 1. Running executable file directly
Find the “Client.exe” file in the specified directory, double click it and the Client is opened.

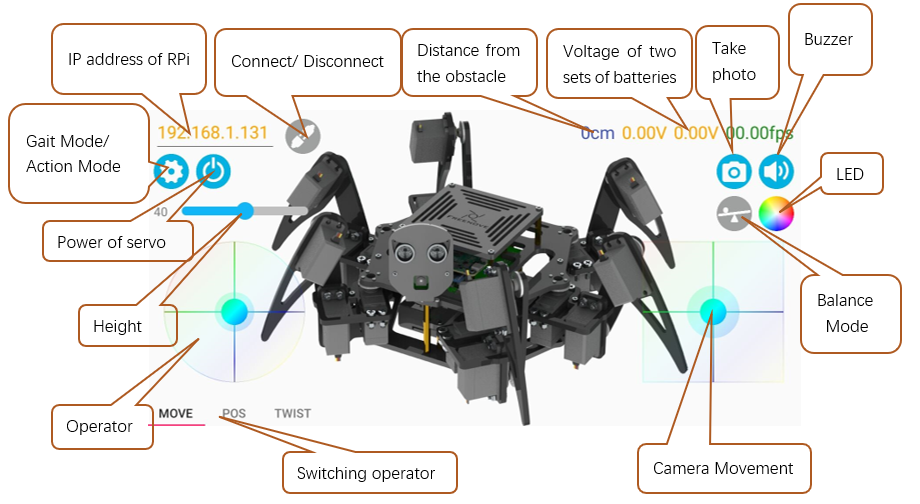
The client interface is shown as below:

When the Client is opened successfully, you need to turn on Raspberry Pi and open the server. Enter Raspberry Pi’s IP address in the white IP editor and click “Connect” to connect the robot with RPi. After connecting successfully, you need to calibrate the robot’s six legs before control it to move.
Note
When Raspberry Pi is shut down, server will be closed. You need open server again the next time.
4.2.2.3. Install python3
Download the installation file via below:
https://www.python.org/downloads/windows/

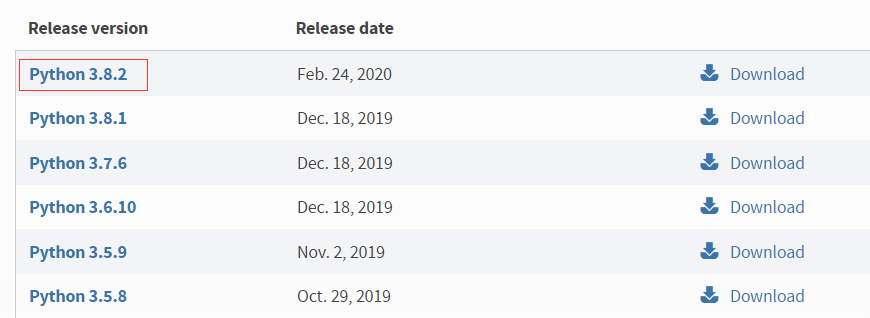
Click Latest Python Release - Python 3.8.1

Select “Windows x86 executable installer”. Execute the installer when completes downloading.

Check “Add Python 3.8 to PATH” and install according to your needs.
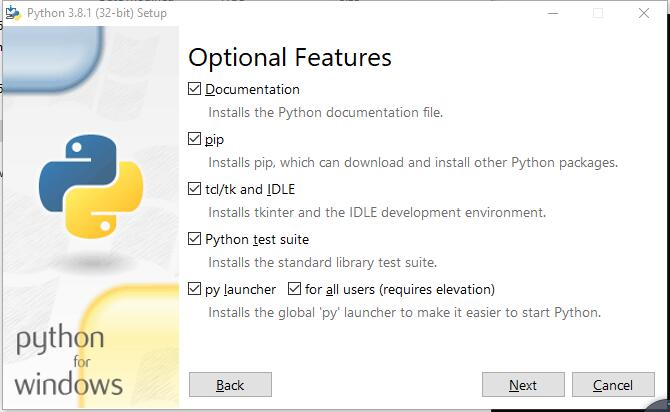
Check all the options and click “Next”.

My installation path here is Disk D (You can choose whichever you prefer). Click Install.

Wait for the installation,

Installation finishes.
4.2.2.4. Install libraries including PyQt5 library, opencv library, numpy library, etc.
If have not download the zip file, download it via below:
https://github.com/Freenove/Freenove_Big_Hexapod_Robot_Kit_for_Raspberry_Pi/archive/master.zip
Then unzip it and delete “-master” to rename it to “Freenove_Big_Hexapod_Robot_Kit_for_Raspberry_Pi”.
Then put it into D disk for example.
You can also place it into other disks (like E), but the path in following command should be modified accordingly (replace D: by E:).
Press “win + R” and enter cmd, and click ok. Then enter following commands.
Enter D disk. If you put it into E, it should be E:
D:
Enter directory where setup_windows.py is located:
cd D:\Freenove_Big_Hexapod_Robot_Kit_for_Raspberry_Pi\Code
Run: setup_windows.py
Python setup_windows.py

Or you can enter “Freenove_Big_Hexapod_Robot_Kit_for_Raspberry_Pi\Code\” directory and double click “setup_windows.py” to execute the installer.
Or open “setup_windows.py” with python3 and execute it.
Caution
If the default python of your Windows system is not python3 but python2, change the command “setup_windows.py” as follows and replace all “python” in setup_windows.py to “python3”.
Python3 setup_windows.py
The installation takes some time, please wait with patience. When all the libraries are installed successfully, you can see the prompt “All libraries installed successfully” on the screen.
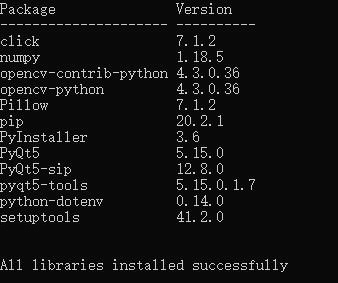
If there is any library fails to install, it will print “Some libraries have not been installed yet. Please run ‘python setup_windows.py’ again” on the screen, then you need to execute the command python setup_windows.py again. Most installation fails because of poor network, so you can check your network before installing the libraries.
4.2.2.5. Open client
Press “win + R” and enter cmd, and click ok. Then enter following commands.
Enter D disk. If you put it into E, it should be E:
D:
Enter directory where Main.py is located:
cd D:\Freenove_Big_Hexapod_Robot_Kit_for_Raspberry_Pi\Code\Client
Run Main.py:
Python Main.py

Or you can enter “Freenove_Big_Hexapod_Robot_Kit_for_Raspberry_Pi\Code\Client” directory and double-click “Main.py”.
Or use python3 to open and execute “Main.py”.
Note
If the default python of your Windows system is not Python3 but python2, change the command
Main.py as follows:
Python Python3 Main.py
The client interface is shown as below:
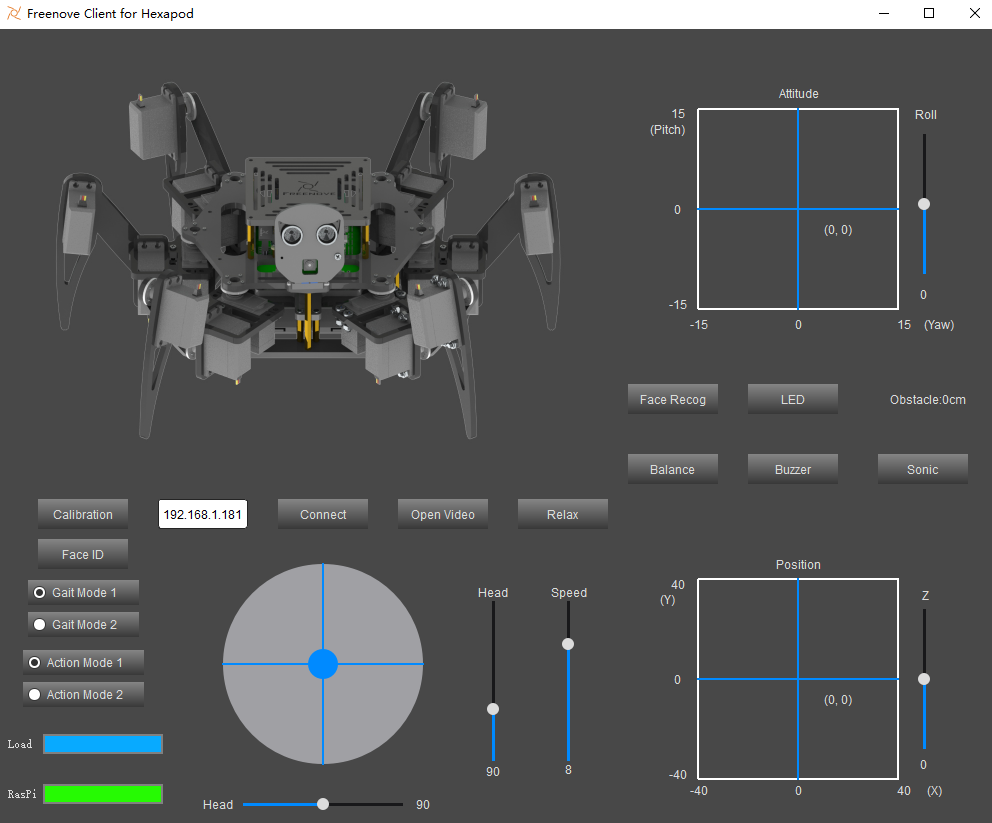
When the Client is opened successfully, you need to turn on Raspberry Pi and open the server. Enter Raspberry Pi’s IP address in the white IP editor and click “Connect” to connect the robot with RPi. After connecting successfully, you need to calibrate the robot’s six legs before control it to move.
Note
When Raspberry Pi is shut down, server will be closed. You need open server again the next time.
4.2.3. Run Client on macOS system
Running client on macOS system requires the installation of some software and libraries, which take some time. At this point, it does not require to run server and use the Raspberry Pi, so you can turn OFF RPi temporarily. After installing successfully, turn ON the RPi and run the Server. The system comes with python2 instead of python3, so you need to install python3 first, as all the program of this robot are run with python3.
4.2.3.1. Install python3
Download the installation package via: https://www.python.org/downloads/
If your macOS is 11. Like 11.0, please install python 3.9.
If your macOS is NOT 11, like 10.15, please install python 3.8. If you have installed python 3.9. You need uninstall it first.
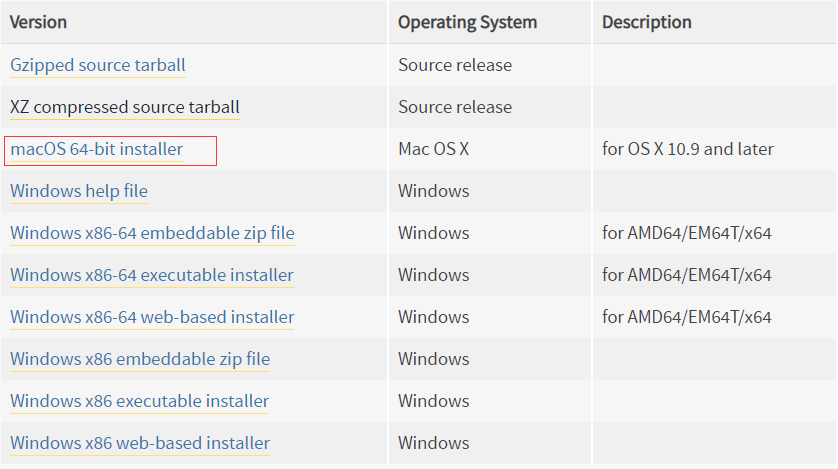
Slide to the bottom of the page and click macOS 64-bit installer.
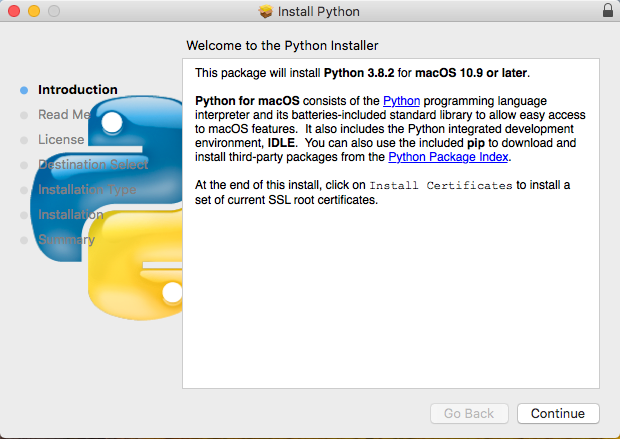
Click Continue
Click Continue
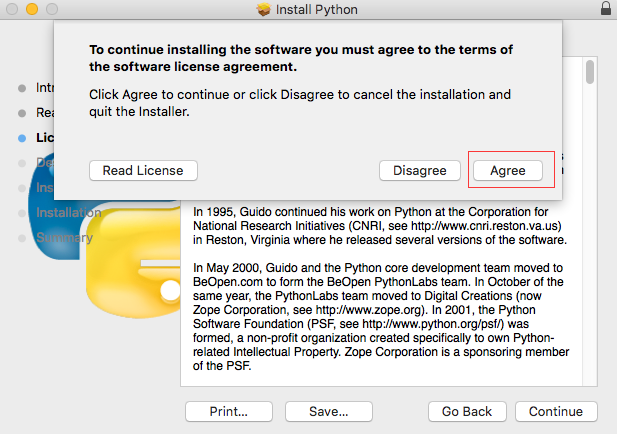
Click Agree
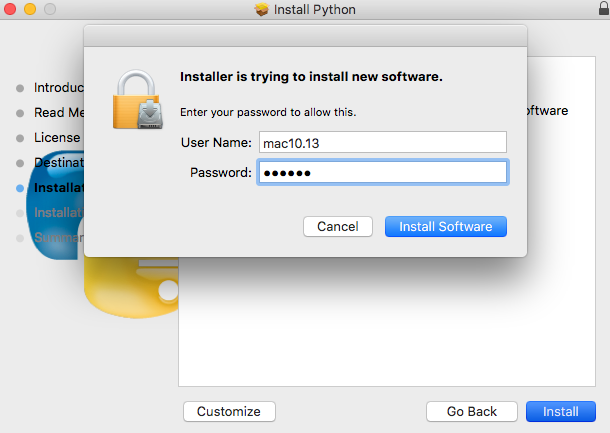
Click “Install”, enter the computer password and click “Install Software”.
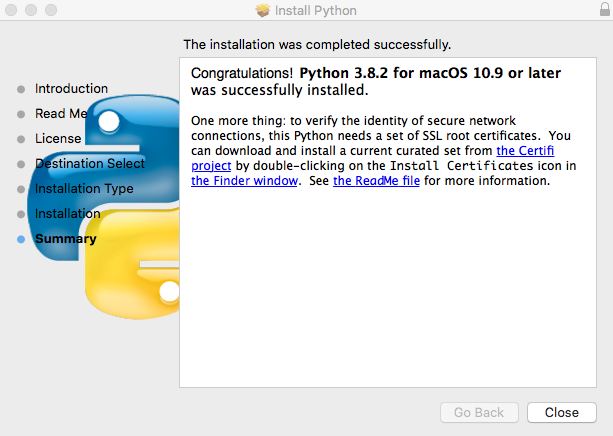
Install successfully
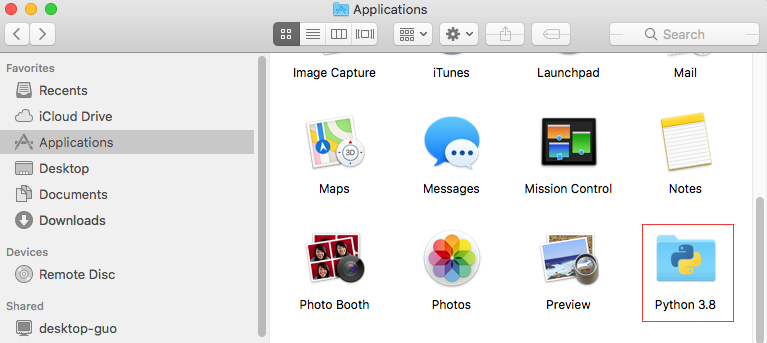
You can find it in your Applications.
4.2.3.2. Install PyQt5 library, opencv library, numpy library, etc.
If you have not yet downloaded the robot code, you can download it through the following link:
https://github.com/Freenove_Big_Hexapod_Robot_Kit_for_Raspberry_Pi/archive/master.zip
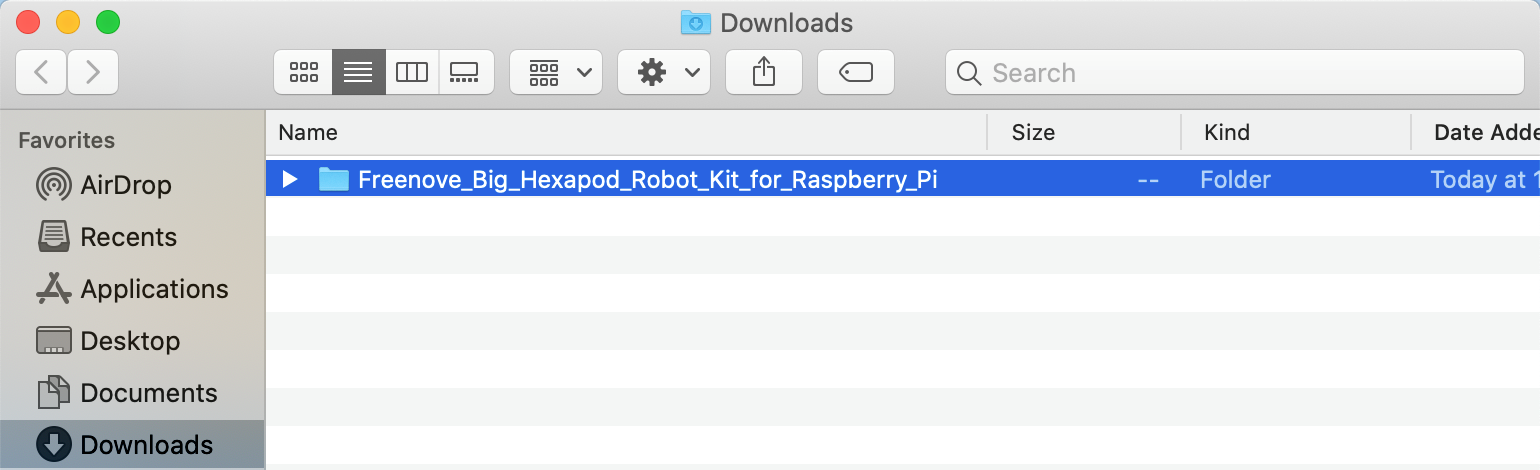
After downloading, you can find it in “Downloads”.
Open “Terminal”

Enter the following commands in “Terminal”
1.Enter “Downloads” (where you save the robot code. If your path is different, please change it.)
cd Downloads
2.Enter directory where setup_macos.py is located:
cd Freenove_Big_Hexapod_Robot_Kit_for_Raspberry_Pi/Code/
3.Run setup_macos.py:
python3 setup_macos.py

The installation takes some time, please wait with patience.
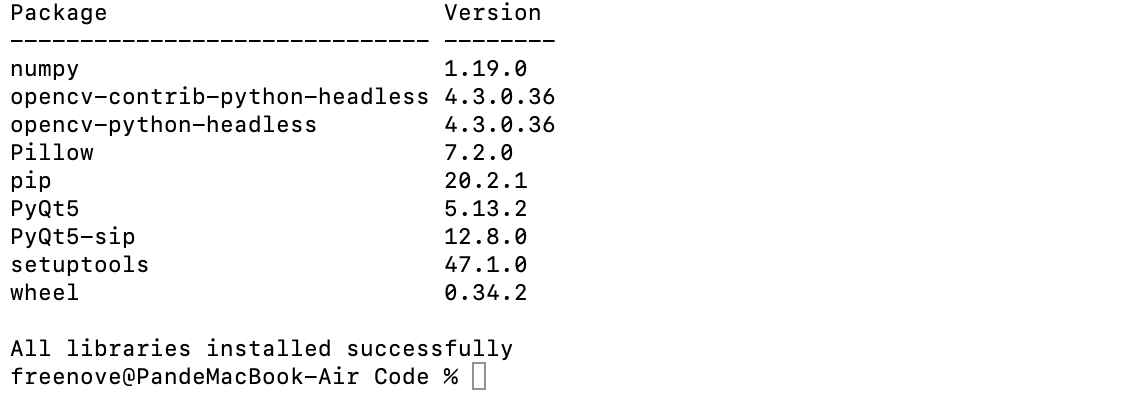
When all the libraries are installed successfully, you can see the prompt “All libraries installed successfully” on the screen. If there is any library fails to install, it will print “Some libraries have not been installed yet. Please run ‘ python3 setup_macos.py’ again” on the screen, then you need to execute the command python3 setup_macos.py again.
If you are using macOS under 11.0, like 10.15. Just skip to “Open client”.
If you are using macOS 11.0 or later version. Please run commands below:
pip3 uninstall PyQt5
pip3 install PyQt5
Most installation fails because of poor network, so you can check your network before installing the libraries.
4.2.3.3. Open client
Installing successfully, now you are in the directory where setup_macos.py locates.
Enter the following command to enter the client program folder:
cd Client/
Enter the following command to run the program
python3 Main.py
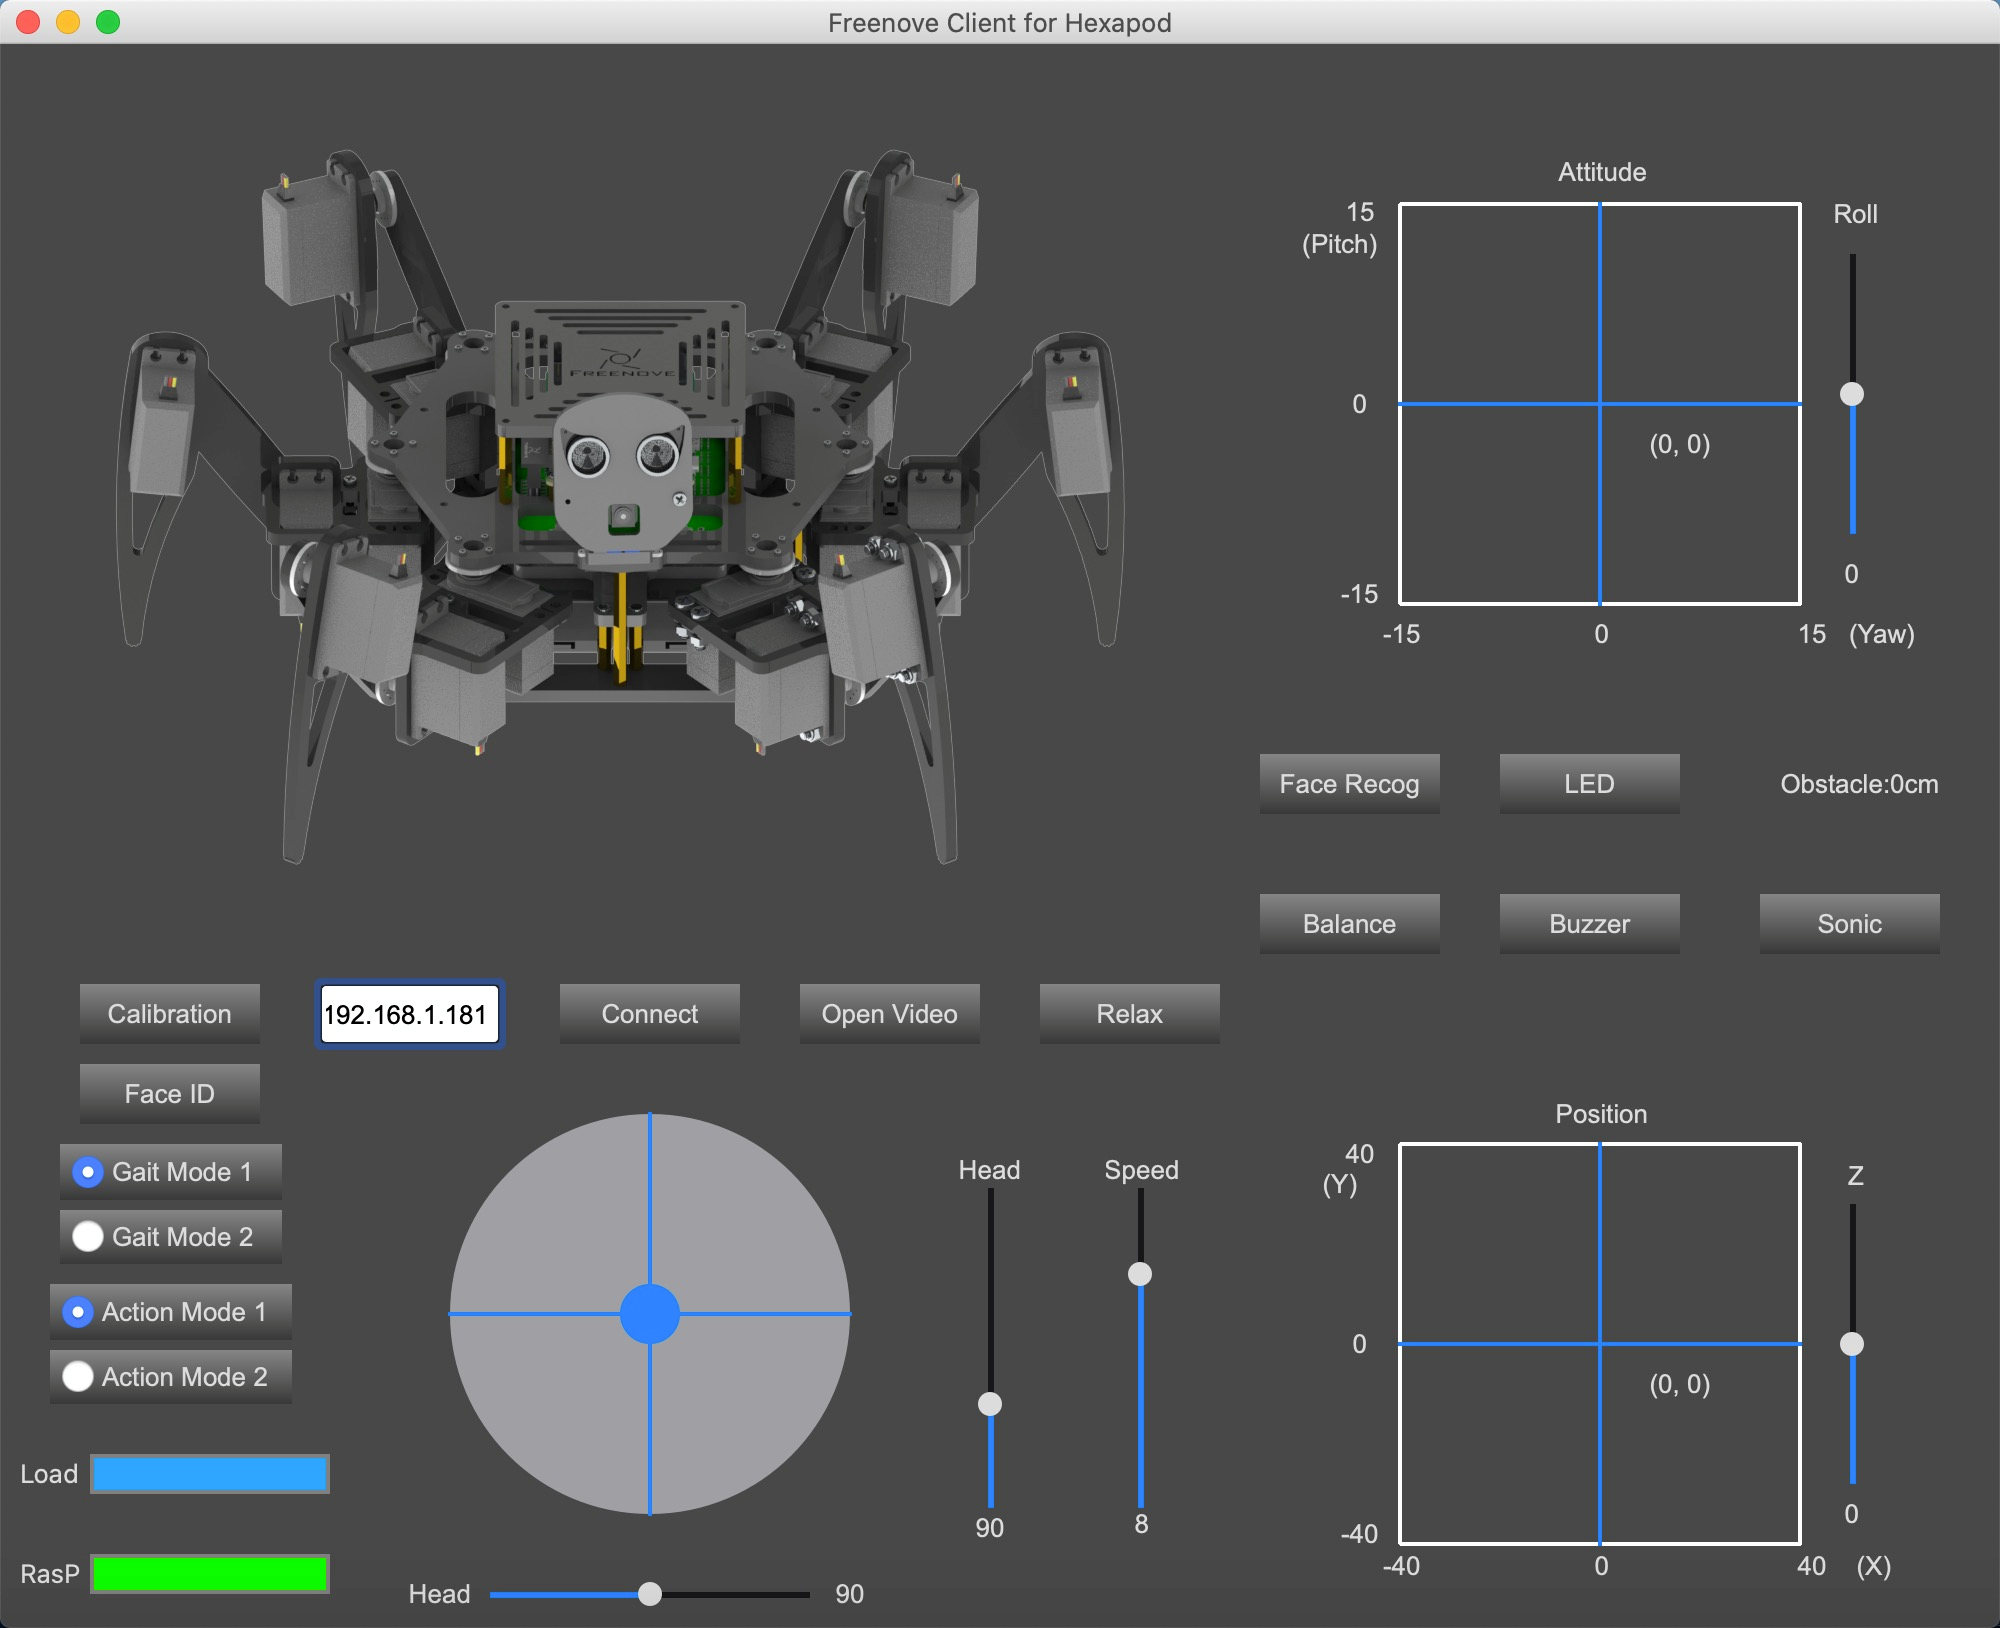
When the Client is opened successfully, you need to turn on Raspberry Pi and open the server. Enter Raspberry Pi’s IP address in the white IP editor and click “Connect” to connect the robot with RPi. After connecting successfully, you need to calibrate the robot’s six legs before control it to move.
Note
when Raspberry Pi is shut down, server will be closed. You need open server again the next time.
4.2.4. Calibration
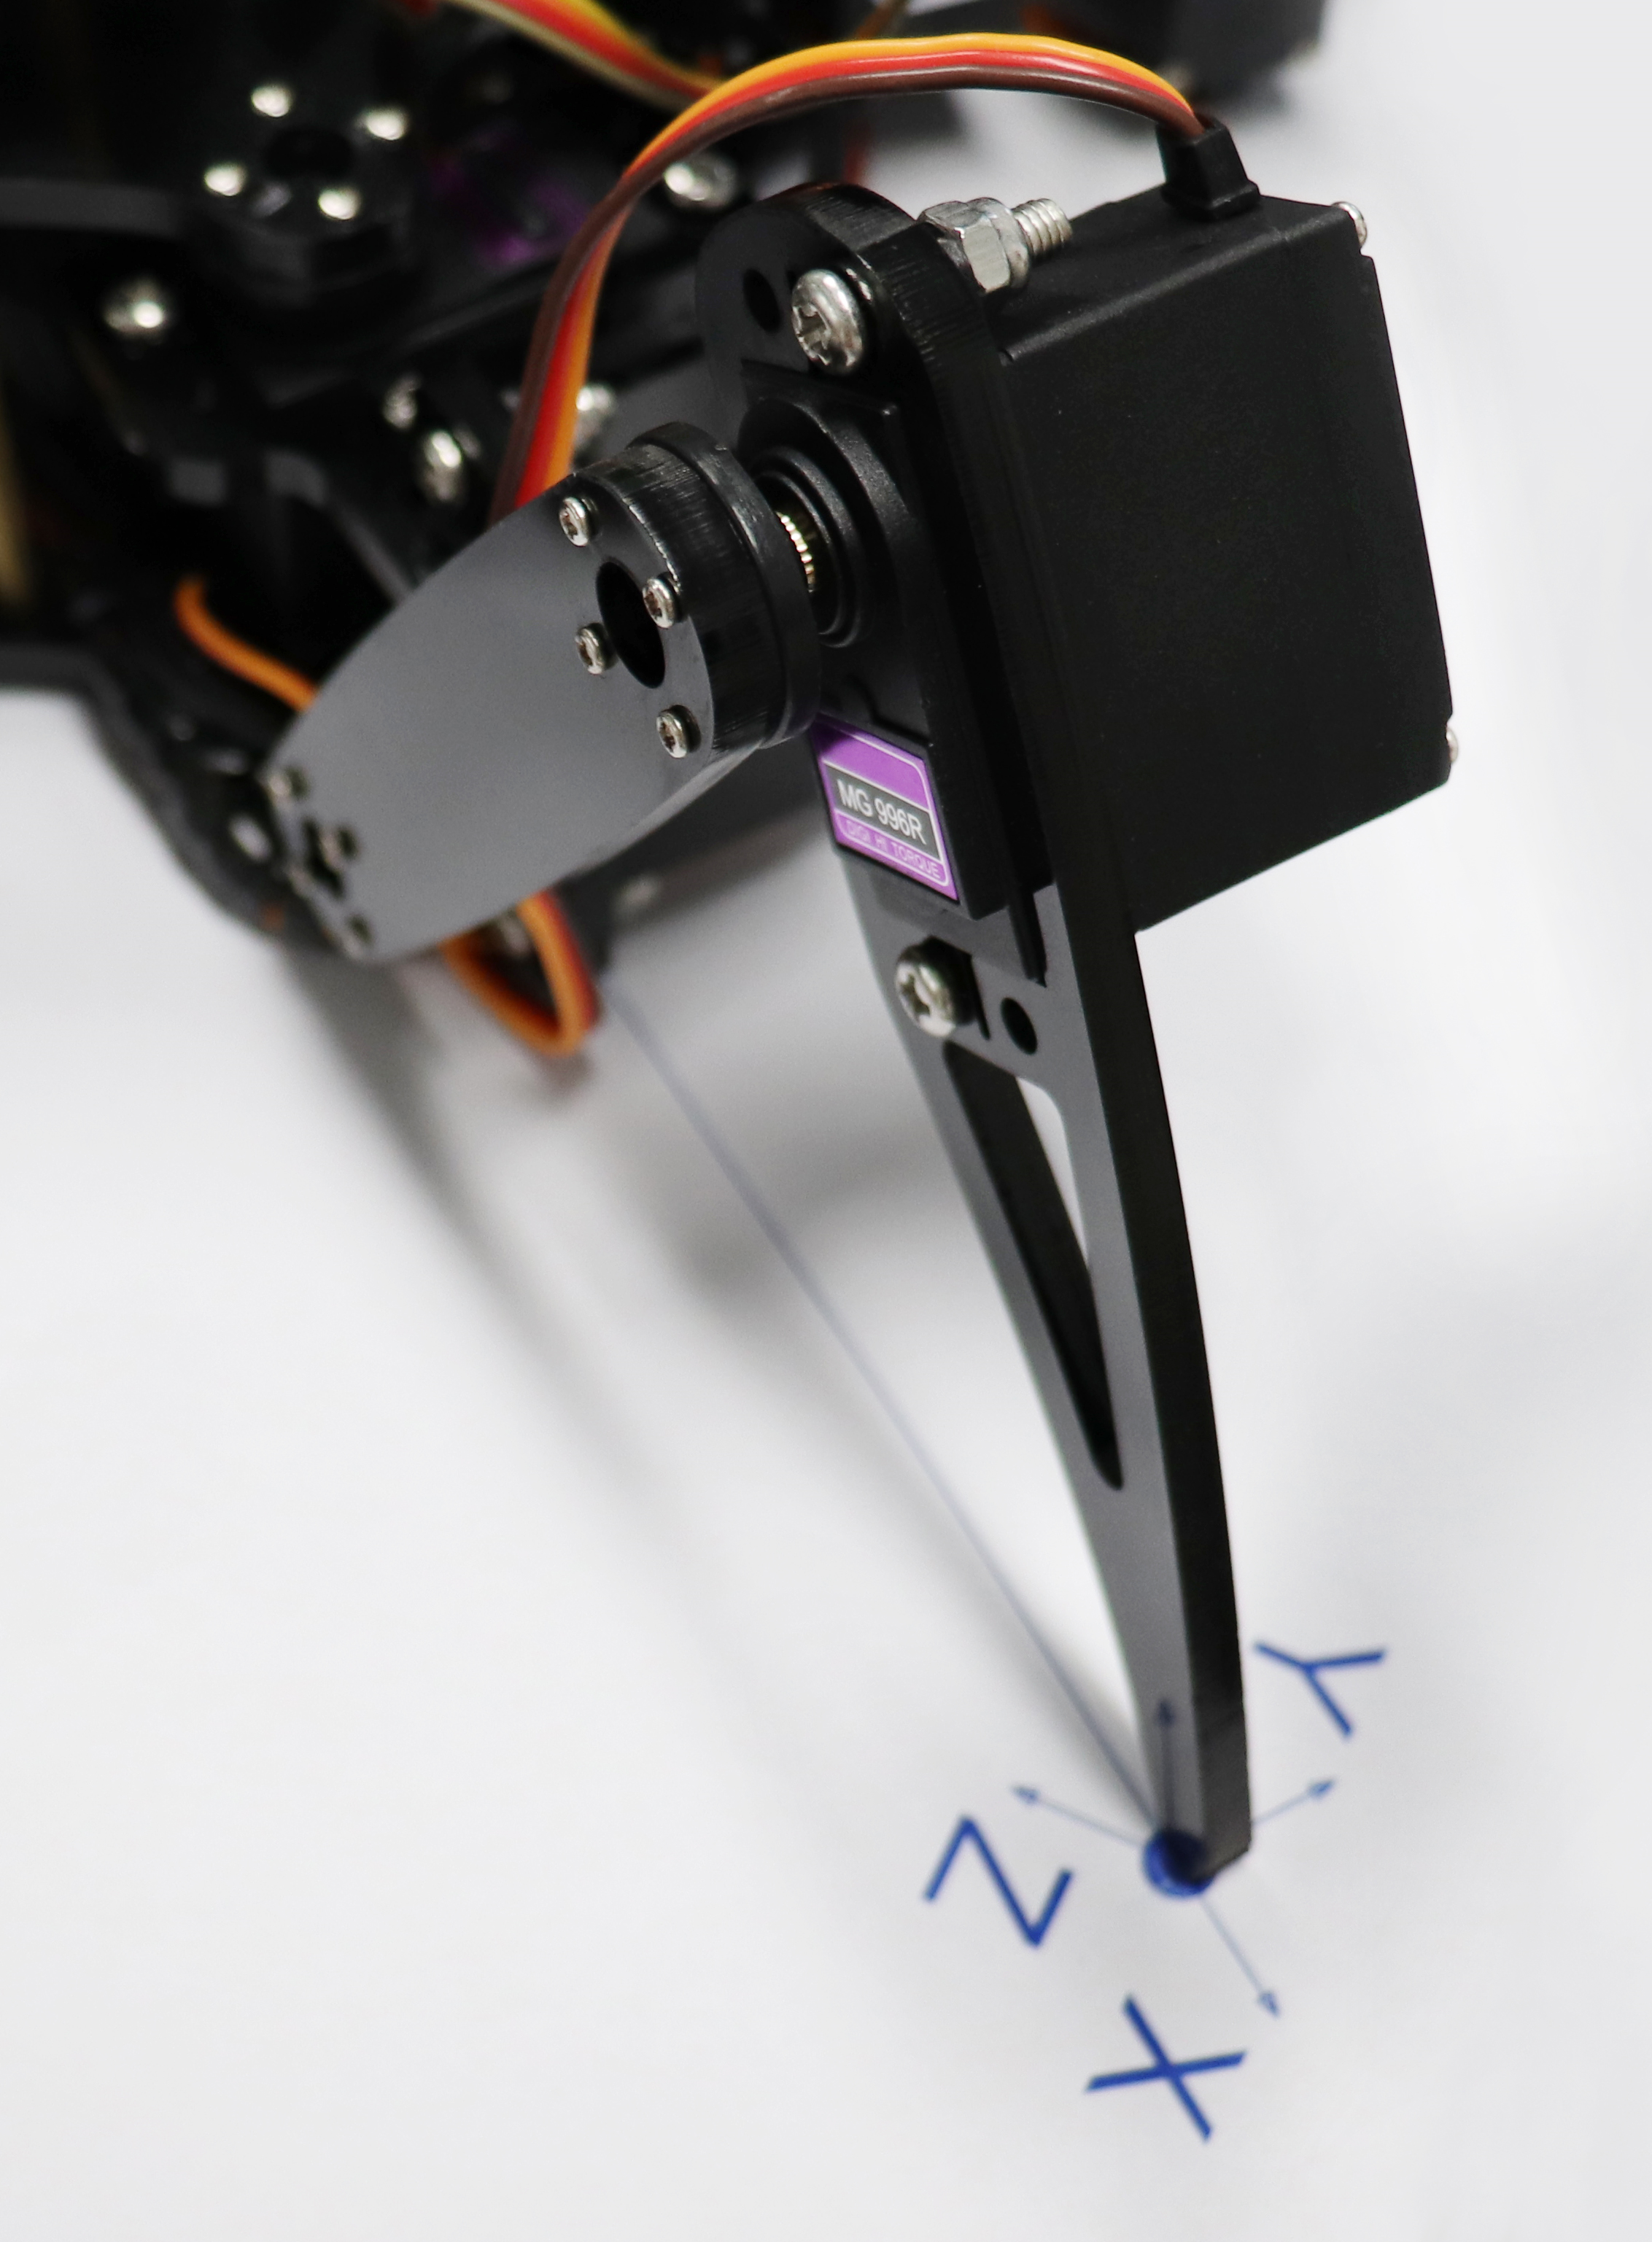
Calibrate the robot’s six legs
Lay the calibration paper on a horizontal table.
Place the robot to the corresponding position on the calibration paper as shown below:

Connect client with server successfully, click the “Calibration” button on the client, then a calibration window pops up.
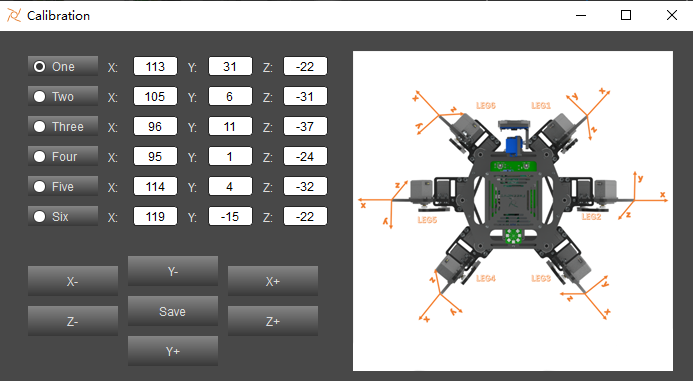
Calibrate the six legs to make the six foot points fall to the corresponding positions. (Due to the error of the installation and error of the servos themselves, the six foot points may fail to fall to the specified position perfectly, which is reasonable but we should try to make them as accurate as possible.)
When all the six foot points fall to the specified positions, click “Save” and you can control the robot to move.
Note
Poor calibration will affect the robot’s movement. You can recalibrate it when needed.
4.2.5. Control
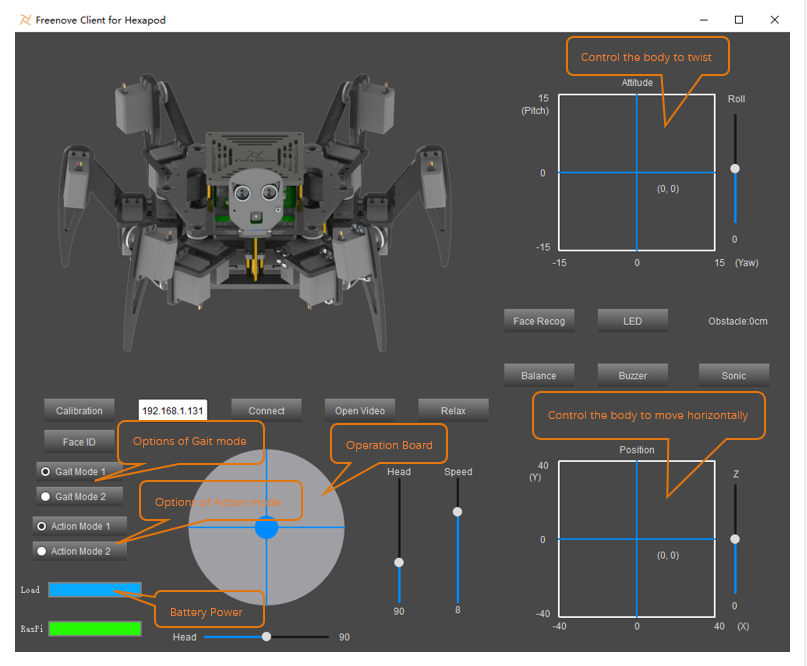
The following is the corresponding operation of the buttons and keyboards.
Button on Client |
Key |
Action |
|---|---|---|
ForWard |
W |
Move |
BackWard |
S |
Back off |
Turn Left |
A |
Turn left |
Turn Right |
D |
Turn right |
Connect/ Disconnect |
C |
Connection ON/OFF |
Open Video/ Close Video |
V |
Video ON/OFF |
Relax |
R |
Relax/Activated |
LED |
L |
Open LED control interface |
Balance |
B |
balance mode ON/OFF |
Face Recog |
F |
face recognition ON/OFF |
Sonic |
U |
Ultrasonic ranging ON/OFF |
Calibration |
T |
Open calibration interface |
Face ID |
I |
Input images of human faces |
Buzzer/Noise |
Y |
Buzzer ON/OFF |
The function of SliderBar is below:
SliderBar |
Function |
|---|---|
Head |
Rotate the robot’s head |
Speed |
Control the robot’s speed |
4.3. Free your innovation
If you have any concerns, please feel free to contact us via support@freenove.com
If you want to write your own program to control the robot dog, you can follow this chapter.
The robot program is based on python3. If your python is python2 by default, please change to python3.
If you have never learned python before, you can learn some basics through the following links:
https://python.swaroopch.com/basics.html
4.3.1. Program
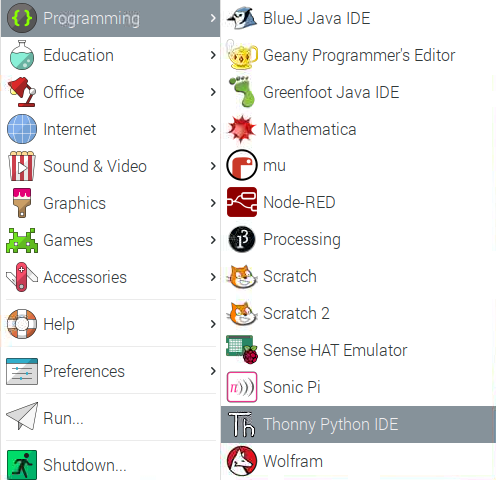
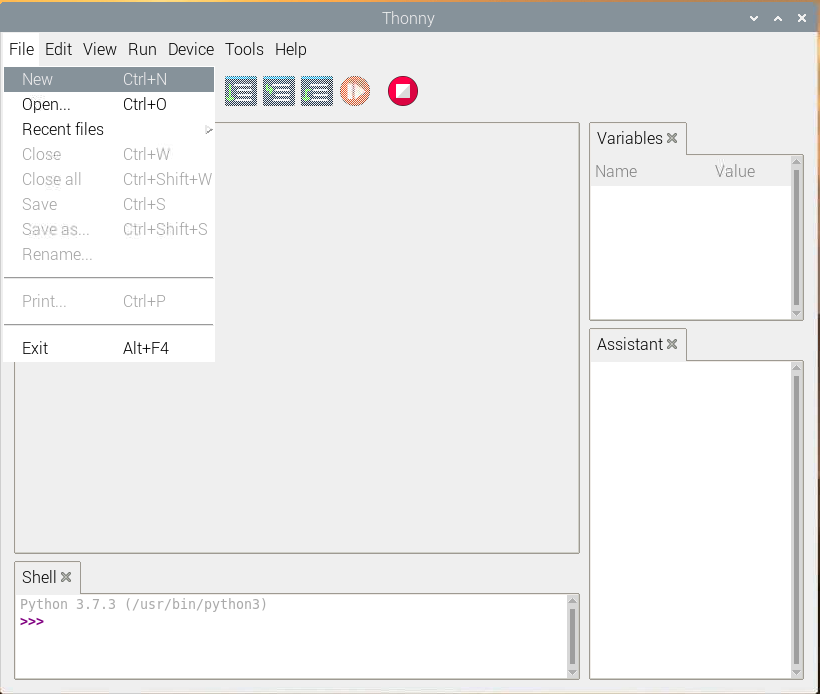
First, open Thonny Python IDE which is easy to use for beginners.
Create a new file.
Name it myCode and save it in Server folder of robot code folder that you have downloaded.
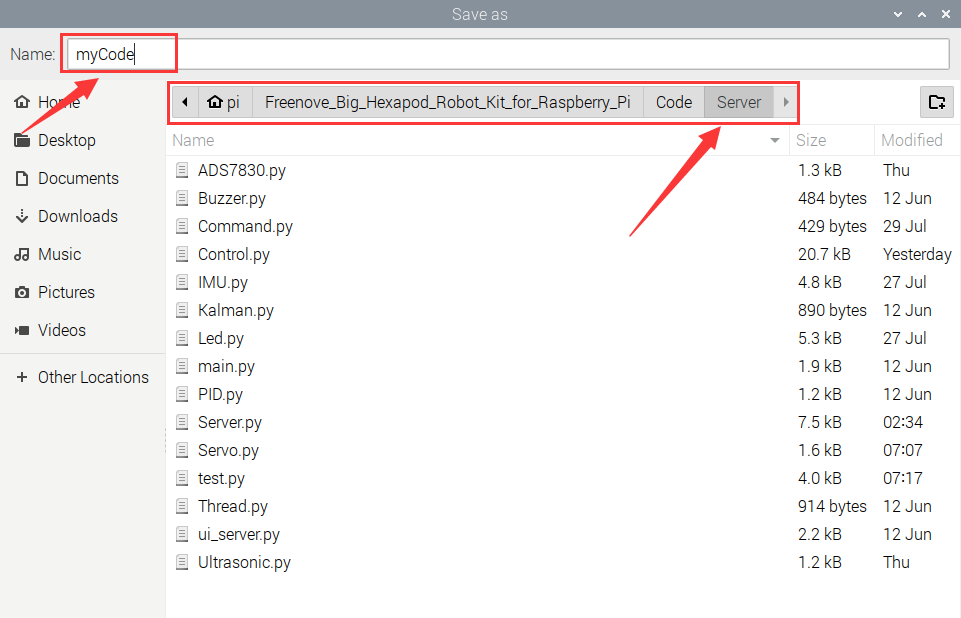
Open the Server folder of the robot code and you can see the file you created.
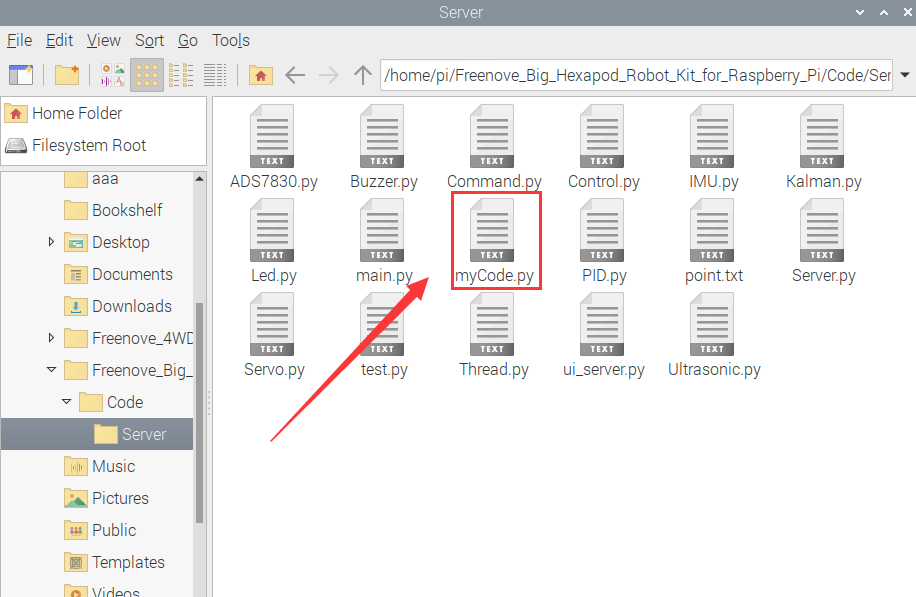
Write the code in myCode.py and click save after finishing, as shown below.
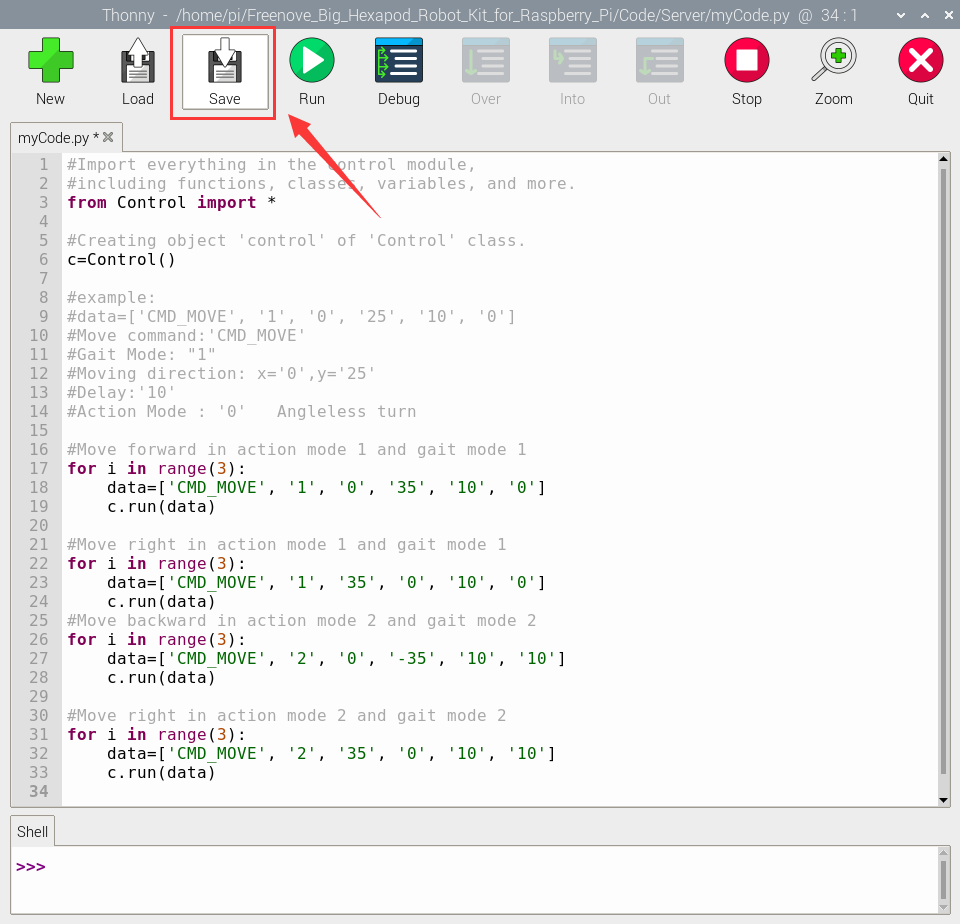
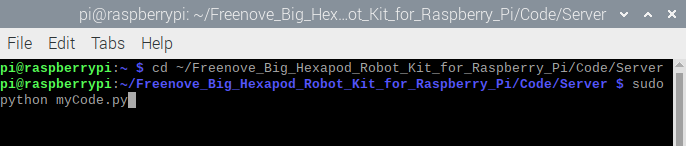
Type the following command to enter the directory where myCode.py is located.
$ cd ~/Freenove_Big_Hexapod_Robot_Kit_for_Raspberry_Pi/Code/Server
Run myCode.py
$ sudo python myCode.py
4.3.1.1. Result
The robot moves straight forward first and then walks to the right (Gait Mode1 and Action Mode1), and then it moves back and turn right.( Gait Mode2 and Action Mode2)
4.4. Android and iOS app
Android and iOS app
You can download and install the Freenove Android app from below:
On Google play:
https://play.google.com/store/apps/details?id=com.freenove.suhayl.Freenovez
On GitHub:
https://github.com/Freenove/Freenove_App_for_Android
In this github repository, you can find the App instruction (Tutorial.pdf).
You can download and install the Freenove iPhone ios app by searching freenove in app store.
The interface of the APP is shown below:
The servos and the Raspberry Pi are powered by two separate, independent power supplies. When the servos are powered OFF, the power supply of RPi remains its original state.