Prepare
Processing is an easy-to-use, free and open source software for writing graphical programs to run on a computer.
This document will show you how to use Processing to write programs to communicate with the control board.
By doing this, we can make virtual instruments, game consoles and other projects.
Processing Software
Processing software / Processing Development Environment (PDE) makes it easy to write programs.
Processing software uses Java programming language by default. Do not worry even if you don’t know Java, because we provide complete code. You can learn Java later if you are interested in it.
First, install Processing software. Visit https://processing.org/, click “Download” to enter the download page.

Select the Mac, Windows, or Linux version, depending on what machine you use.
In this tutorial, we use Version 3.5.4. You can also use 4.0 beta 1.

Installation on each machine is straightforward:
On Windows, you’ll have a .zip file. Double-click it, and drag the folder inside to a location on your hard disk. It could be Program Files or simply the desktop, but the important thing is for the processing folder to be pulled out of that .zip file. Then double-click processing.exe to start.
The Mac OS X version is also a .zip file. Double-click it and drag the Processing icon to the Applications folder. If you’re using someone else’s machine and can’t modify the Applications folder, just drag the application to the desktop. Then double-click the Processing icon to start.
The Linux version is a .tar.gz file, which should be familiar to most Linux users. Download the file to your home directory, then open a terminal window, and type:
tar xvfz processing-xxxx.tgz
(Replace xxxx with the rest of the file’s name, which is the version number.) This will create a folder named processing-2.0 or something similar. Then change to that directory:
cd processing-xxxx
and run it:
./processing
With any luck, the main Processing window will now be visible. Everyone’s setup is different, so if the program didn’t start, or you’re otherwise stuck, visit the troubleshooting page for possible solutions.
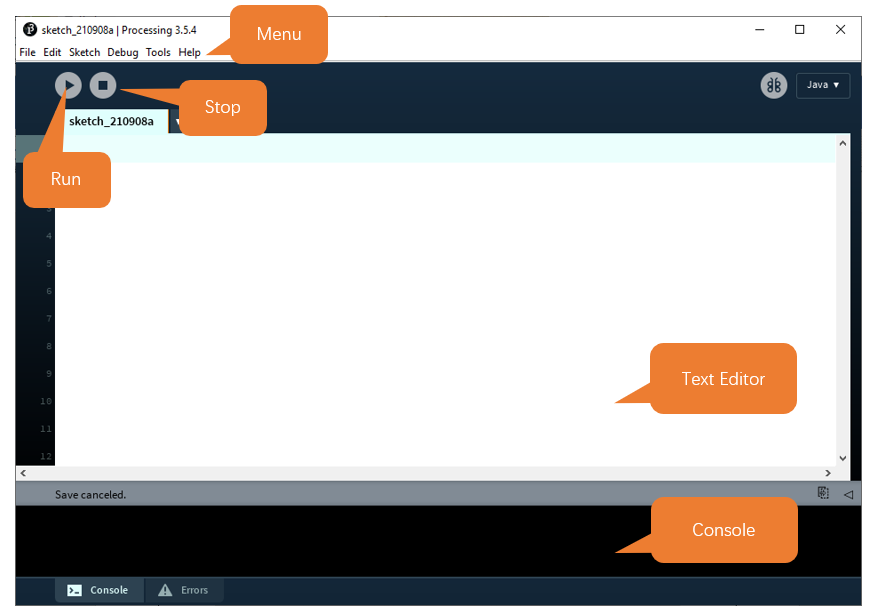
Display Window:
You’re now running the Processing Development Environment (or PDE). There’s not much to it; the large area is the Text Editor, and there’s a row of buttons across the top; this is the toolbar. Below the editor is the Message Area, and below that is the Console. The Message Area is used for one line messages, and the Console is used for more technical details.
First Use
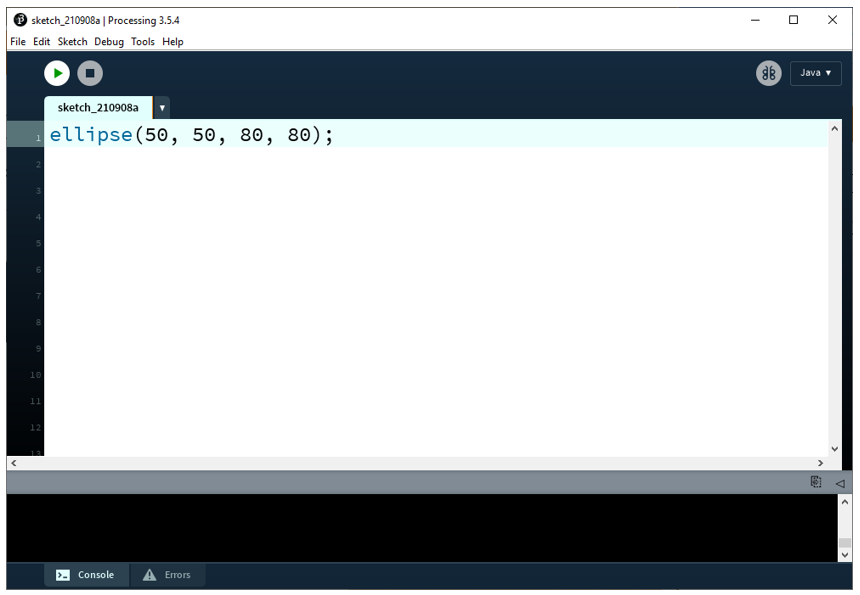
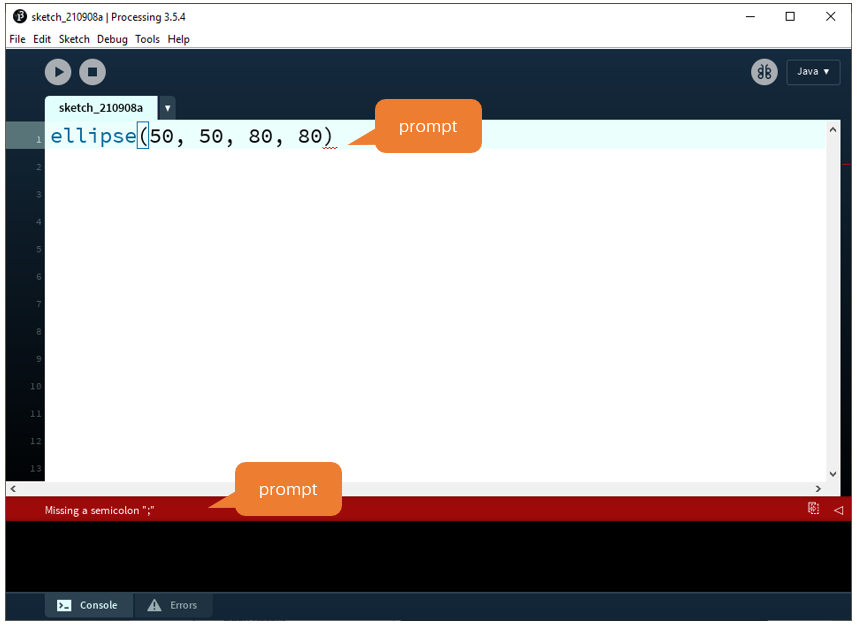
In the editor, type the following
ellipse(50, 50, 80, 80);
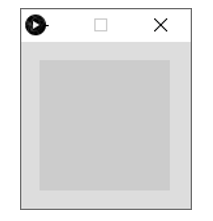
This line of code means “draw an ellipse, with the center 50 pixels over from the left and 50 pixels down from the top, with a width and height of 80 pixels.” Click the Run button (the triangle button in the Toolbar).
If you’ve typed everything correctly, you’ll see a circle on your screen.

If you didn’t type it correctly, the Message Area will turn red and complain about an error. If this happens, make sure that you’ve copied the example code correctly, the numbers should be contained within parentheses and have commas between each of them, and the line should end with a semicolon.
You can export this sketch to an application to run it directly without opening the Processing.
To export the sketch to the application, you must first save it.

So far, we have completed the first use. I believe you have felt the joy of it.
Communication protocol
We need to write code for control board and Processing to complete the interaction project of them, respectively.
To simplify the operation, we’ve compile SerialDevice class on Processing to communicate with Raspberry Pi Pico. To use this class, we need to upload the below main.py file to Pico.
Processing\SerialDevice\main.py
Open Thonny, select the main.py file of the above path, right click the mouse to and select “Upload to /” to upload the file to Pico. Run the main.py file offline, which means you need to disconnect the USB cable from Pico and then reconnect them.
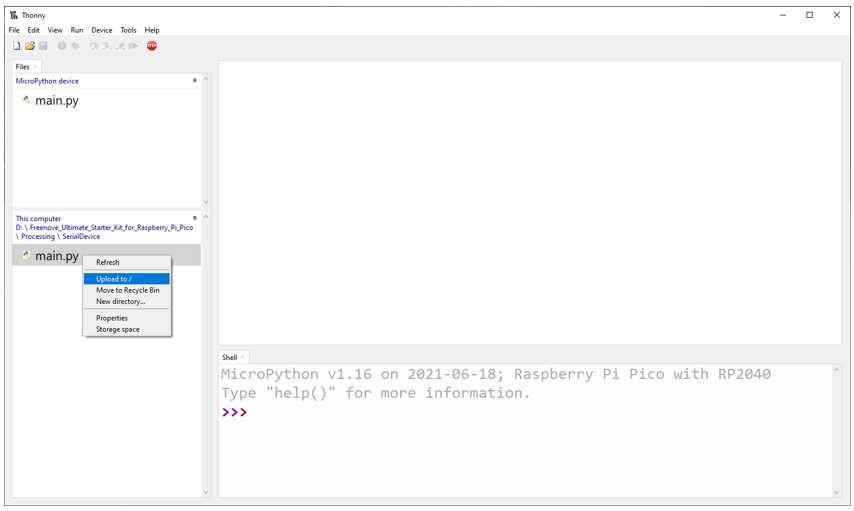
Main.py file only need to be uploaded once. So we won’t upload it again for the further projects.
SerialDevice class and main.py defined the communication protocol between them. The features include:
Recognize the control board that uploads SerialDevice.ino and establish connection with it, automatically. No need to view and set the serial number of the control board connected to the computer, even if there are a number of control boards, it can be connected automatically.
If the control board that uploads main.py is not connected to computer, the Processing code will not be executed until the connection is done. The Processing sketch does not need to be run again after the connection is done.
Send data to control board and receive data from it.
Here, Processing sketch code will not be introduced in detail. Interested readers can learn it by themselves.
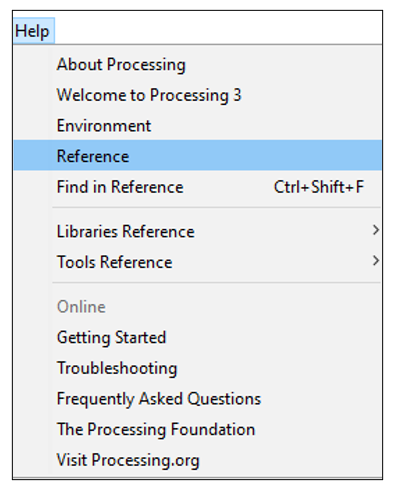
And as for syntax and standard functions of Processing, you can visit https://processing.org/ and click
Reference to view.
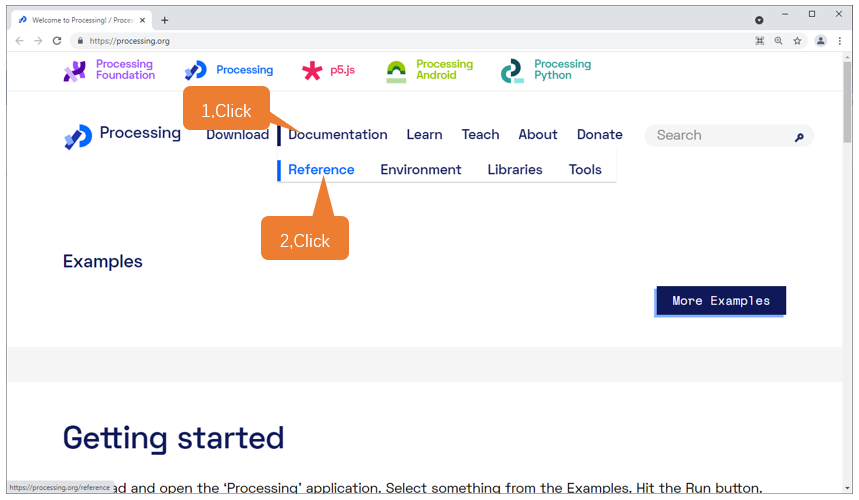
Or in the Processing software menu bar, click Help-Reference to view offline documents.