13. Chapter Onboard LED Matrix (WiFi Board)
In this chapter, we utilize the LED matrix on the control board to display interesting patterns. The control board features a built-in 12x8 LED matrix that can be programmed to display graphics, animations, serve as an interface, and even play games.
13.1. Project LED Matrix
In this section, we will use the LED matrix to display static graghics.
13.1.1. Component List
Schematic diagram |
|
Hardware connection If you need any support, please feel free to contact us via: support@freenove.com |
|
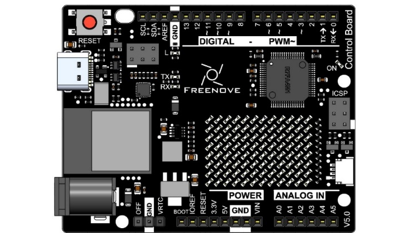
13.1.2. Component Knowledge
13.1.2.1. LED matrix
The LED matrix on the control board is a rectangular display module composed of a uniform grid of LEDs. Below is an 8x12 monochrome LED matrix, which includes 96 LEDs (8 rows by 12 columns).
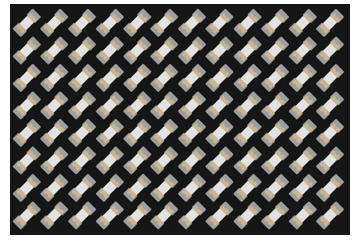
You can call the LED matrix library to display any content you wish. With the LED matrix library, you can quickly display any graphics. For example, to display a smiling face, simply assign a value of 1 to the positions of the LEDs that need to be lit. Conversely, assigning a value of 0 will turn off the corresponding LEDs, allowing you to set up a variety of interesting patterns.
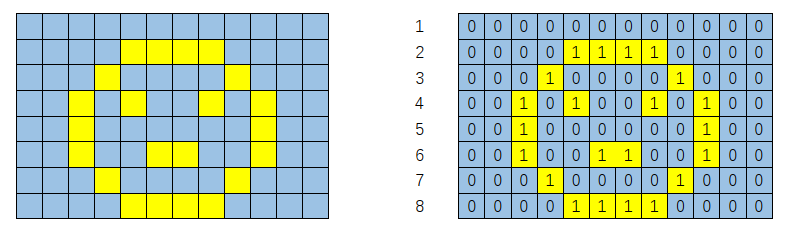
To control the onboard 12x8 LED matrix, you will need a memory space of at least 96 bits in size, as shown below:
 1byte frame[8][12] = {
 2  { 0, 0, 0, 0, 0, 0, 0, 0, 0, 0, 0, 0 },
 3  { 0, 0, 0, 0, 1, 1, 1, 1, 0, 0, 0, 0 },
 4  { 0, 0, 0, 1, 0, 0, 0, 0, 1, 0, 0, 0 },
 5  { 0, 0, 1, 0, 1, 0, 0, 1, 0, 1, 0, 0 },
 6  { 0, 0, 1, 0, 0, 0, 0, 0, 0, 1, 0, 0 },
 7  { 0, 0, 1, 0, 0, 1, 1, 0, 0, 1, 0, 0 },
 8  { 0, 0, 0, 1, 0, 0, 0, 0, 1, 0, 0, 0 },
 9  { 0, 0, 0, 0, 1, 1, 1, 1, 0, 0, 0, 0 }
10};
The setup method mentioned above is easy to understand because you can visualize the image in the array pattern, and it is straightforward to edit while running. The elements in the array above form a smiley face, which is the image you see on the screen.
If you need to locate a single pixel, select its address and change the value. Remember to start counting from 0. Thus, the following lines will address the third pixel from the left and the second pixel from the top, and then activate it:
frame[2][1] = 1;

matrix.renderBitmap(frame, 8, 12);
Howevere, this method consumes more memory than required. Even though each LED only needs one bit to store its state, 8 bits (one byte) are used. There is a more memory-efficient approach for storing frames that employs an array of 32-bit integers.
Unsigned long variables store 32 bits, and dividing 96 by 32 gives us 3, indicating that 96 LEDs can be split into three segments. Thus, an array of unsigned long integers is an efficient way to store all the bits necessary for the LED matrix.
The following is the data of converting the binary values of each row of the LED matrix to hexadecimal from left to right:
Column |
Binary |
Hexadecimal |
|---|---|---|
1 |
0000 0000 0000 |
0x000 |
2 |
0000 1111 0000 |
0x0F0 |
3 |
0001 0000 1000 |
0x108 |
4 |
0010 1001 0100 |
0x294 |
5 |
0010 0000 0100 |
0x204 |
6 |
0010 0110 0100 |
0x264 |
7 |
0001 0000 1000 |
0x108 |
8 |
0000 1111 0000 |
0x0F0 |
The above 8 sets of data are converted into 3 groups as follows:
0000 0000 0000 0000 1111 0000 0001 0000

1000 0010 1001 0100 0010 1001 0100 0010

0110 0100 0001 0000 1000 0000 1111 0000
0x0000F010

0x82942042

0x641080F0
From this we can conclude that the 32-bit integer array of a smiley face is as follows.
1unsigned long frame[] = {
2    0x0000F010,
3    0x82942042,
4    0x641080F0
5};
Uploading the above data to the control board will display the corresponding pattern. Additionally, if you have multiple different frames, you can load and display them as below:
 1const uint32_t happy[] = {
 20x19819,
 30x80000001,
 40x81f8000
 5};
 6const uint32_t heart[] = {
 7    0x3184a444,
 8    0x44042081,
 9    0x100a0040
10};
11matrix.loadFrame(happy);
12delay(500);
13
14matrix.loadFrame(heart);
15delay(500);
Call the display function and you can see the LED display the above contents.
13.1.3. Sketch
13.1.3.1. Sketch LED_Matrix
Upload the sketch to the control board and you should see the entire matrix lights up, turn off after a second, and then display the static expression resembling a smiley face.
The following is the program code:
 1/**********************************************************************
 2  Filename    : Sketch_19.1.1_LED_Matrix
 3  Description : LED Matrix is onboard
 4  Auther      : www.freenove.com
 5  Modification: 2024/08/05
 6**********************************************************************/
 7
 8#include "Arduino_LED_Matrix.h"  // Include the LED_Matrix library
 9
10ArduinoLEDMatrix matrix;  // Create an instance of the ArduinoLEDMatrix class
11
12byte frame[8][12] = {
13  { 0, 0, 0, 0, 0, 0, 0, 0, 0, 0, 0, 0 },
14  { 0, 0, 0, 0, 1, 1, 1, 1, 0, 0, 0, 0 },
15  { 0, 0, 0, 1, 0, 0, 0, 0, 1, 0, 0, 0 },
16  { 0, 0, 1, 0, 1, 0, 0, 1, 0, 1, 0, 0 },
17  { 0, 0, 1, 0, 0, 0, 0, 0, 0, 1, 0, 0 },
18  { 0, 0, 1, 0, 0, 1, 1, 0, 0, 1, 0, 0 },
19  { 0, 0, 0, 1, 0, 0, 0, 0, 1, 0, 0, 0 },
20  { 0, 0, 0, 0, 1, 1, 1, 1, 0, 0, 0, 0 }
21};
22
23unsigned long frame2[] = {
24  0x0000F010,
25  0x82942042,
26  0x641080F0
27};
28
29const uint32_t fullOn[] = {
30  0xffffffff,
31  0xffffffff,
32  0xffffffff
33};
34const uint32_t fullOff[] = {
35  0x00000000,
36  0x00000000,
37  0x00000000
38};
39
40void setup() {
41  matrix.begin();  // Initialize the LED matrix
42  matrix.loadFrame(fullOn);
43  delay(250);
44  matrix.loadFrame(fullOff);
45  delay(250);
46}
47
48void loop() {
49  //matrix.loadFrame(frame2);
50  matrix.renderBitmap(frame, 8, 12);
51  delay(250);
52}
First, include the library “Arduino_LED_Matrix.h” at the beginning of the sketch, as shown below.
1#include "Arduino_LED_Matrix.h" // Include the LED_Matrix library
Create an object for the LED matric in the sketch.
1ArduinoLEDMatrix matrix; // Create an instance of the ArduinoLEDMatrix class
Activate the LED matrix by adding the line “matrix.begin();” under void setup() as shown below.
1matrix.begin(); // Initialize the LED matrix
After the program initializes, it first lights up the entire LED matrix and then turns off the LED matrix, and subsequently continuously displays the smiling face graphic.
1matrix.begin();  // Initialize the LED matrix
2matrix.loadFrame(fullOn);
3delay(250);
4matrix.loadFrame(fullOff);
5delay(250);
6......
7matrix.renderBitmap(frame, 8, 12);
8delay(250);
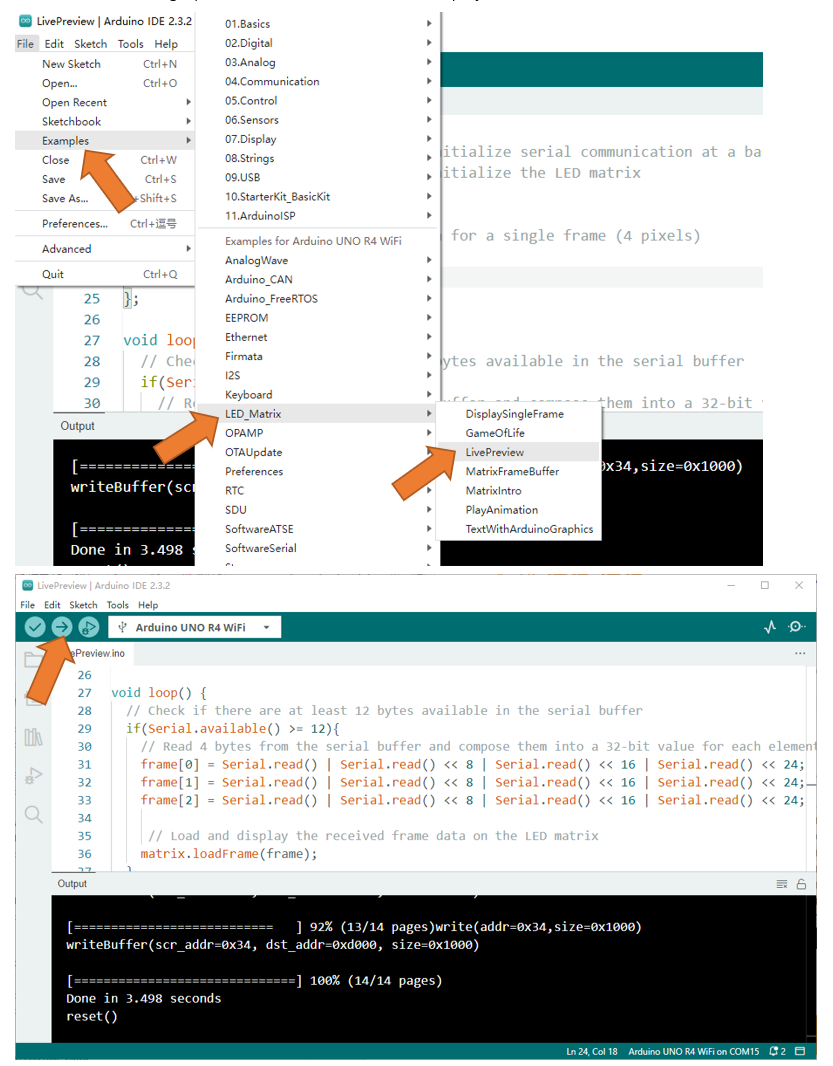
Arduino has also created an online tool called LED Matrix Editor to simplify frame creation. Each frame can be edited graphically and the duration specified. Once this process is complete, simply name the file and download it for use in your project.
To customize more graphics, you can design via this link: LED matrix editor (Arduino cc)
When using the above tools to customize the graphics, the following examples should be uploaded to the control board first. After uploading, the corresponding device can be connected to the real-time transmission of the graphics to the control board for display.
13.2. Project LED Matrix
In this segment, we’ll harness the onboard LED matrix to showcase dynamic visuals by scrolling the message “Hello World!” across the matrix.
13.2.1. Component List
Schematic diagram |
|
Hardware connection If you need any support, please feel free to contact us via: support@freenove.com |
|
13.2.2. Sketch
13.2.2.1. Sketch LED_Matrix_Scrolling_Text
When you upload the sketch to the control board, you will observe the onboard LED matrix displaying dynamic scenes. The text “Hello World!” will be presented in a scrolling manner.
The following is the program code:
 1/**********************************************************************
 2  Filename    : Sketch_19.2.1_LED_Matrix_Scrolling_Text
 3  Description : LED Matrix Scrolling Text
 4  Auther      : www.freenove.com
 5  Modification: 2024/08/05
 6**********************************************************************/
 7
 8// To use ArduinoGraphics APIs, please include BEFORE Arduino_LED_Matrix
 9#include "ArduinoGraphics.h"
10#include "Arduino_LED_Matrix.h"
11
12ArduinoLEDMatrix matrix;
13
14void setup() {
15  Serial.begin(115200);
16  matrix.begin();
17}
18
19void loop() {
20
21  // Make it scroll!
22  matrix.beginDraw();
23
24  matrix.stroke(0xFFFFFFFF);
25  matrix.textScrollSpeed(50);
26
27  // add the text
28  const char text[] = " Hello World! ";
29  matrix.textFont(Font_5x7);
30  matrix.beginText(0, 1, 0xFFFFFF);
31  matrix.println(text);
32  matrix.endText(SCROLL_LEFT);
33
34  matrix.endDraw();
35}
First, include the library “Arduino_LED_Matrix.h” at the beginning of the sketch, as shown below.
1#include "ArduinoGraphics.h"
2#include "Arduino_LED_Matrix.h"
Create an object for the LED matric in the sketch.
1ArduinoLEDMatrix matrix;
Activate the LED matrix by adding the line “matrix.begin();” under void setup() as shown below.
1matrix.begin();
In the main function, print “ Hello World! “ on the LED matrix.
1matrix.begin();
For more examples please refer to:
Using the Arduino UNO R4 WiFi LED Matrix | Arduino Documentation
13.3. Project Play the game with LED matrix
In this section, we play the game using the LED matrix.
13.4. Project LED Matrix Bounce Game
Play a bounce game with an LED matrix.
13.4.1. Component List
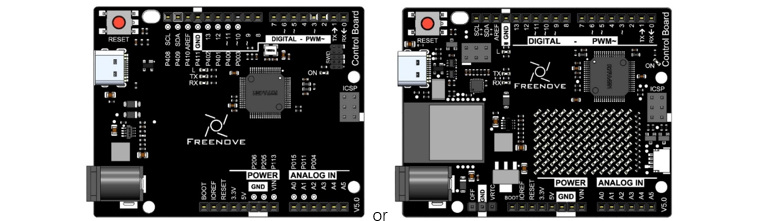
Control board x1
|
||
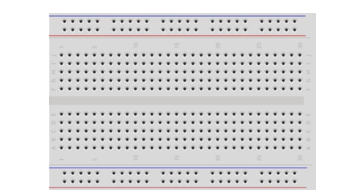
Breadboard x1
|
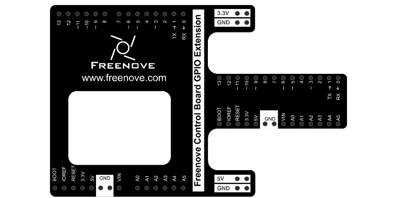
GPIO Extension Board x1
|
|
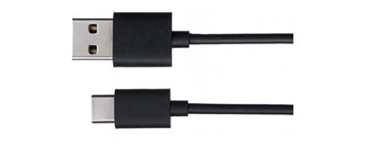
USB cable x1
|
Jumper M/M x4
|
|
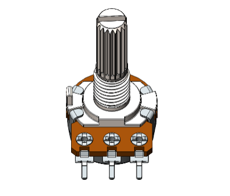
Rotary potentiometer x1
|
||

13.4.2. Circuit
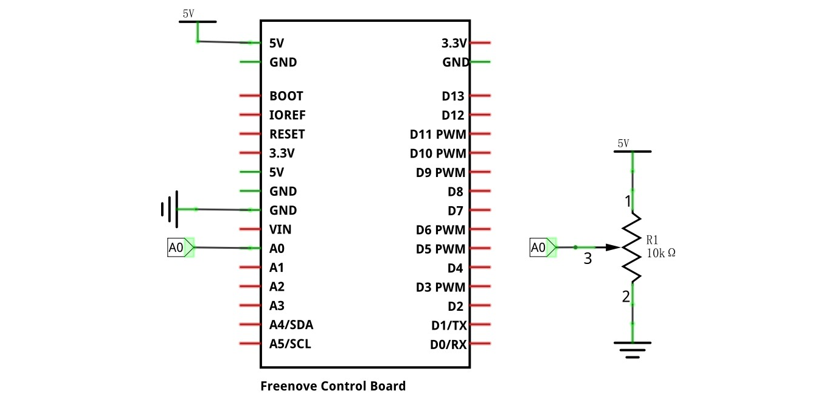
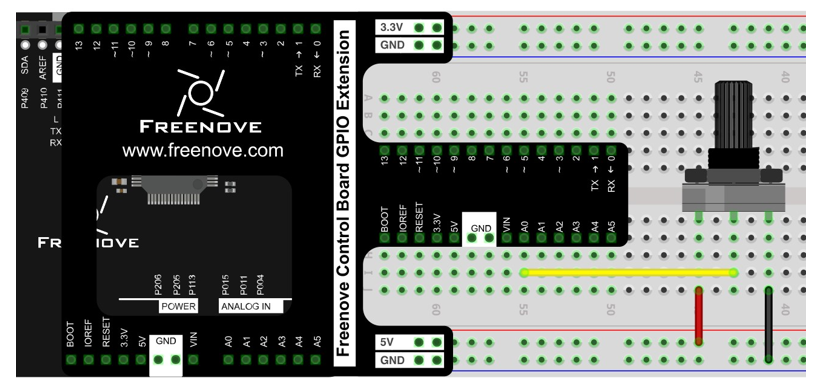
The voltage of the rotary potentiometer is detected with the A0 pin on the control board to control the movement of the bat.
Schematic diagram |
|
Hardware connection If you need any support, please feel free to contact us via: support@freenove.com |
|
13.4.3. Sketch
13.4.3.1. Sketch LED_Matrix_Bounce_Game
This is a simple ball bounce game, using a potentiometer to control the movement of the bat, when your bat fails to catch the ball, the game will end and the led matrix will show “OUT”, and then start the game again.
The following is the program code:
 1/**********************************************************************
 2  Filename    : Sketch_19.3.1_LED_Matrix_Bounce_Game
 3  Description : LED Matrix Bounce Game
 4  Auther      : www.freenove.com
 5  Modification: 2024/08/05
 6**********************************************************************/
 7
 8// To use ArduinoGraphics APIs, please include BEFORE Arduino_LED_Matrix
 9#include "Arduino_LED_Matrix.h"
10
11ArduinoLEDMatrix matrix;
12
13void setup() {
14  Serial.begin(115200);
15  matrix.begin();
16}
17
18uint8_t frame[8][12] = {
19  { 0, 0, 0, 0, 0, 0, 0, 0, 0, 0, 0, 0 },
20  { 0, 0, 0, 0, 0, 0, 0, 0, 0, 0, 0, 0 },
21  { 0, 0, 0, 0, 0, 0, 0, 0, 0, 0, 0, 0 },
22  { 0, 0, 0, 0, 0, 0, 0, 0, 0, 0, 0, 0 },
23  { 0, 0, 0, 0, 0, 0, 0, 0, 0, 0, 0, 0 },
24  { 0, 0, 0, 0, 0, 0, 0, 0, 0, 0, 0, 0 },
25  { 0, 0, 0, 0, 0, 0, 0, 0, 0, 0, 0, 0 },
26  { 0, 0, 0, 0, 0, 0, 0, 0, 0, 0, 0, 0 }
27};
28
29uint8_t game_over[8][12] = {
30  { 0, 0, 0, 0, 0, 0, 0, 0, 0, 0, 0, 0 },
31  { 0, 0, 0, 0, 0, 0, 0, 0, 0, 0, 0, 0 },
32  { 0, 1, 0, 0, 1, 0, 0, 1, 0, 1, 1, 1 },
33  { 1, 0, 1, 0, 1, 0, 0, 1, 0, 0, 1, 0 },
34  { 1, 0, 1, 0, 1, 0, 0, 1, 0, 0, 1, 0 },
35  { 0, 1, 0, 0, 0, 1, 1, 0, 0, 0, 1, 0 },
36  { 0, 0, 0, 0, 0, 0, 0, 0, 0, 0, 0, 0 },
37  { 0, 0, 0, 0, 0, 0, 0, 0, 0, 0, 0, 0 }
38};
39
40int y = 4;           // starting y position
41int x = 4;           // starting x position
42int b = 1;           // starting y direction
43int a = 1;           // starting x direction
44int anticipate = 5;  // variable used to anticipate whether ball hits bat
45int speed = 300;     // initial delay which decreases each time ball hit
46
47
48void loop() {
49  int batcenter = (analogRead(A0) / 204);
50  frame[batcenter][11] = 1;
51  frame[batcenter + 1][11] = 1;
52  frame[batcenter + 2][11] = 1;
53  frame[y][x] = 1;
54  matrix.renderBitmap(frame, 8, 12);
55  delay(speed);
56  frame[batcenter][11] = 0;
57  frame[batcenter + 1][11] = 0;
58  frame[batcenter + 2][11] = 0;
59  frame[y][x] = 0;
60  matrix.renderBitmap(frame, 8, 12);
61  delay(1);
62
63  if (y == 7) {
64    b = -b;
65  }
66  if (y == 0) {
67    b = -b;
68  }
69  if (x == 10) {  // when ball reaches line in front of batcenter, checks if batcenter hit
70    anticipate = (y + b);
71    speed = (speed - 20);  // reduces delay each time batcenter hit
72    if ((anticipate == batcenter) or (anticipate == (batcenter + 1)) or (anticipate == (batcenter + 2))) {
73      a = -a;
74    } else {  // game over grid
75      matrix.renderBitmap(game_over, 8, 12);
76      delay(2000);
77      x = 4;
78      y = 4;
79      a = -1;
80      b = -1;
81      speed = 300;
82    }
83  }
84  if (x == 0) {
85    a = -a;
86  }
87  y = (y + b);  // adjusts ball position
88  x = (x + a);
89}
13.5. Project LED Matrix Snake Game
Play a snake game with an LED matrix.
13.5.1. Component List
Control board x1
|
||
Breadboard x1
|
GPIO Extension Board x1
|
|
USB cable x1
|
Jumper M/M x3
|
|
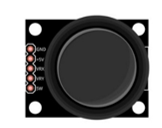
Joystick x1
|
||

13.5.2. Circuit
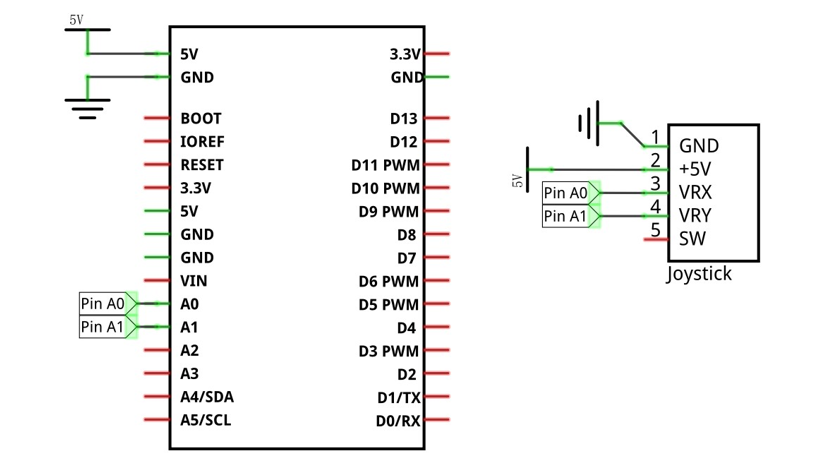
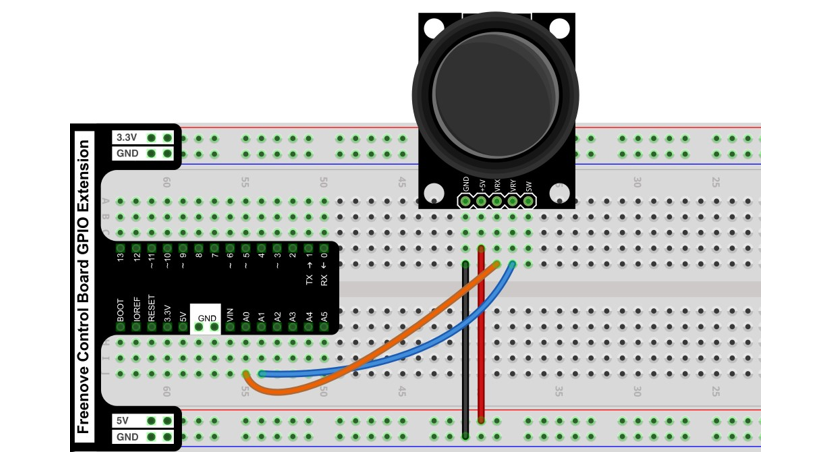
Use pin A0 and pin A1 on control board to detect the voltage value of two rotary potentiometers inside Joystick.
Schematic diagram |
|
Hardware connection If you need any support, please feel free to contact us via: support@freenove.com |
|
13.5.3. Sketch
13.5.3.1. Sketch LED_Matrix_Snake_Game
This is a simple snake game, using a Joystick to control the direction of movement of the snake head, when the snake head contacts the body of the snake, the game will end, the led matrix will show “OUT”, and then start the game again.
The following is the program code:
  1/**********************************************************************
  2  Filename    : Sketch_18.3.1_LED_Matrix_Bounce_Game
  3  Description : LED Matrix Bounce Game,Simple Snake Game for Arduino Uno R4 Wifi
  4  Auther      : www.freenove.com
  5  Modification: 2024/08/05
  6
  7  This experiment comes from the Internet. If you want to know more about the experiment,
  8  you can visit the following link:
  9  https://www.eeplayground.com/posts/snake-game-arduino/
 10
 11**********************************************************************/
 12
 13#include "Arduino_LED_Matrix.h"
 14
 15ArduinoLEDMatrix matrix;
 16
 17void setup() {
 18  matrix.begin();
 19}
 20
 21#define LEFT 0
 22#define RIGHT 1
 23#define UP 2
 24#define DOWN 3
 25
 26// Global variables
 27byte frame[8][12];
 28byte dir = RIGHT;
 29byte snake_len = 2;
 30byte col_idx[96];
 31byte row_idx[96];
 32byte food_col = random(2,12);
 33byte food_row = random(1,8);
 34byte speed = 500;
 35byte food_hit = 1;
 36byte blank_frame[8][12];
 37
 38uint8_t gameover[8][12] = {
 39  { 0, 0, 0, 0, 0, 0, 0, 0, 0, 0, 0, 0 },
 40  { 0, 0, 0, 0, 0, 0, 0, 0, 0, 0, 0, 0 },
 41  { 0, 1, 0, 0, 1, 0, 0, 1, 0, 1, 1, 1 },
 42  { 1, 0, 1, 0, 1, 0, 0, 1, 0, 0, 1, 0 },
 43  { 1, 0, 1, 0, 1, 0, 0, 1, 0, 0, 1, 0 },
 44  { 0, 1, 0, 0, 0, 1, 1, 0, 0, 0, 1, 0 },
 45  { 0, 0, 0, 0, 0, 0, 0, 0, 0, 0, 0, 0 },
 46  { 0, 0, 0, 0, 0, 0, 0, 0, 0, 0, 0, 0 }
 47};
 48
 49int get_dir(){
 50  // Get values from ADC (joy stick)
 51  int x = analogRead(A0);
 52  int y = analogRead(A1);
 53
 54  if((x >= 0) && (x<= 300) && dir != RIGHT){
 55    return LEFT;
 56  }
 57  else if( (x >=723) && (x <= 1023) && dir != LEFT){
 58    return RIGHT;
 59  }
 60  else if((y >= 0) && (y <= 300) && dir != DOWN){
 61    return UP;
 62  }
 63  else if((y >= 723) && (y <= 1023) && dir != UP){
 64    return DOWN;
 65  }
 66  else return dir;
 67}
 68
 69void display_frame(){
 70  // Clear the frame first - Turn off all LEDs
 71  for(int i=0; i<8; i++){
 72    for(int j=0; j<12; j++){
 73      frame[i][j] = 0;
 74    }
 75  }
 76
 77  // Turn on LEDs for snake
 78  for(int i=0; i<snake_len; i++){
 79    // Turn on LED for Body
 80    frame[row_idx[i]][col_idx[i]] = 1;
 81  }
 82
 83  // Turn on LEDs for food
 84  frame[food_row][food_col] = 1;
 85
 86  // Display frame value in the LED matrix
 87  matrix.renderBitmap(frame, 8, 12);
 88}
 89
 90void game_over(){
 91  // Pause Snake movement and blink for 5 times
 92  for(int i=0; i<5; i++){
 93    // Display current frame (paused movement)
 94    matrix.renderBitmap(frame, 8, 12);
 95    delay(100);
 96    // Display blank frame (to make LEDs blink)
 97    matrix.renderBitmap(blank_frame, 8, 12);
 98    delay(100);
 99    matrix.renderBitmap(gameover, 8, 12);
100    delay(2000);
101  }
102  // Reset the length of snake
103  snake_len = 2;
104}
105
106void chk_snake_body_hit(){
107  for(int i=1; i<snake_len; i++){
108    // Check if head hit the body
109    if((row_idx[i] == row_idx[0]) && (col_idx[i] == col_idx[0])){
110      game_over();
111    }
112  }
113}
114
115void chk_food_hit(){
116  // Logic to detect food is hit
117  if(col_idx[0] == food_col && row_idx[0] == food_row){
118    // Increment snake length if food is hit
119    snake_len = snake_len + 1;
120    // Set food_hit to 1 to enable generation of new food coordinates
121    food_hit = 1;
122  }
123}
124
125void get_snake_position(){
126  // Logic to Calculate the next frame
127  // body
128  for(int i=snake_len-1; i>0; i--){
129    col_idx[i] = col_idx[i-1];
130    row_idx[i] = row_idx[i-1];
131  }
132  // head
133  if (dir == RIGHT) {
134    // Wrap around to left
135    if(col_idx[0] == 11){
136      col_idx[0] = 0;
137    }
138    else {
139      col_idx[0] = col_idx[0] + 1;
140    }
141  }
142  if(dir == LEFT) {
143    // Wrap around to right
144    if(col_idx[0] == 0){
145      col_idx[0] = 11;
146    }
147    else{
148      col_idx[0] = col_idx[0] - 1;
149    }
150  }
151  if (dir == DOWN) {
152    // Wrap around to top
153    if(row_idx[0] == 7){
154      row_idx[0] = 0;
155    }
156    else{
157      row_idx[0] = row_idx[0] + 1;
158    }
159  }
160  if(dir == UP) {
161    // Wrap around to bottom
162    if(row_idx[0] == 0){
163      row_idx[0] = 7;
164    }
165    else{
166      row_idx[0] = row_idx[0] - 1;
167    }
168  }
169}
170
171void gen_food(){
172 // Generate coordinates for food
173  if(food_hit == 1){
174    food_col = random(0,12);
175    food_row = random(0,8);
176    // Set food_hit to 0 so it will not randomize food coordinates unless hit
177    food_hit = 0;
178  }
179}
180
181void loop() {
182  // Get the snake direction
183  dir = get_dir();
184  // Display food and snake in the LED Matrix
185  display_frame();
186  // Check if snake body is hit by its head
187  chk_snake_body_hit();
188  // Check if the food is hit
189  chk_food_hit();
190  // Get the snake positions for the next frame
191  get_snake_position();
192  // Generate random coordinates for food
193  gen_food();
194  // Speed of the animation/snake movement
195  delay(speed);
196}
This experiment comes from the Internet. If you want to know more about the experiment, you can visit the following link:
https://www.eeplayground.com/posts/snake-game-arduino/
In addition, you can also refer to the following link. This experiment is a more multifunctional snake game experiment, adding scoring and other functions.