9. Chapter Motor & Driver
In this chapter, we will learn how to use a DC motor, including how to control the speed and direction of the motor.
9.1. Project Motor
In this project, we use L293D to drive the DC motor. We can click on the button in the Processing Display Window to control motor direction, and drag the progress bar to control the motor speed.
|
Jumper Wires x22 |
Breadboard Power Module x1 |
9V Battery (you provide) & 9V Battery Cable |
L293D IC Chip
|
DC Motor x1 |


9.1.1. Circuit
Use caution: when connecting this circuit, because the DC Motor is a high-power component, do not use the power provided by the RPi to power the motor directly, as this may cause permanent damage to your RPi!
The logic circuit can be powered by the RPi’s power or an external power supply, which should share a common ground with RPi.
Schematic diagram
|
Hardware connection.
|


9.1.2. Sketch
9.1.2.1. Sketch Motor
First, observe the result after running the sketch, and then learn about the code in detail.
Use Processing to open the file Sketch_09_1_1_Motor.
$ processing ~/Freenove_Kit/Processing/Sketches/Sketch_09_1_1_Motor/Sketch_09_1_1_Motor.pde
Click on “RUN” to run the code.
After the program is executed, a virtual fan, a button and a progress bar are shown on Display Window. Dragging the progress bar can change the motor speed, and the virtual fan will rotate with different speed accordingly. Clicking Button with mouse can change the motor rotation direction.

This project contains a lot of code files, and the core code is contained in the file Sketch_09_1_1_Motor. The other files only contain some custom classes.
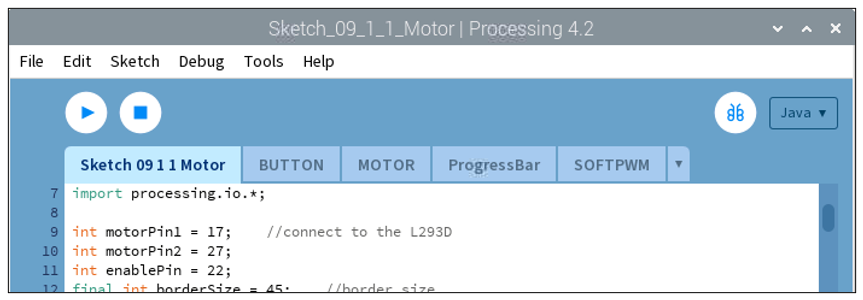
The following is program code:
 1/*****************************************************
 2 * Filename    : Sketch_09_1_1_Motor
 3 * Description : Control speed and direction of the motor
 4 * auther      : www.freenove.com
 5 * modification: 2024/09/04
 6 *****************************************************/
 7import freenove.processing.io.*;
 8
 9int motorPin1 = 17;    //connect to the L293D
10int motorPin2 = 27;
11int enablePin = 22;
12final int borderSize = 45;    //border size
13//MOTOR Object
14MOTOR motor = new MOTOR(motorPin1, motorPin2, enablePin);
15ProgressBar mBar;    //ProgressBar Object
16boolean mMouse = false;    //determined whether a mouse click the ProgressBar
17BUTTON btn;    //BUTTON Object, For controlling the direction of motor
18int motorDir = motor.CW;    //motor direction
19float rotaSpeed = 0, rotaPosition = 0;  //motor speed
20void setup() {
21  size(640, 360);
22  mBar = new ProgressBar(borderSize, height-borderSize, width-borderSize*2);
23  mBar.setTitle("Duty Cycle");    //set the ProgressBar's title
24  btn = new BUTTON(45, height - 90, 50, 30);   //define the button
25  btn.setBgColor(0, 255, 0);  //set button color
26  btn.setText("CW");        //set button text
27}
28
29void draw() {
30  background(255);
31  titleAndSiteInfo();  //title and site information
32  strokeWeight(4);    //border weight
33  mBar.create();      //create the ProgressBar
34  motor.start(motorDir, (int)(mBar.progress*100));  //control the motor starts to rotate
35  btn.create();      //create the button
36  rotaSpeed = mBar.progress * 0.02 * PI;  //virtual fan's rotating speed
37  if (motorDir == motor.CW) {
38    rotaPosition += rotaSpeed;
39    if (rotaPosition >= 2*PI) {
40      rotaPosition = 0;
41    }
42  } else {
43    rotaPosition -= rotaSpeed;
44    if (rotaPosition <= -2*PI) {
45      rotaPosition = 0;
46    }
47  }
48  drawFan(rotaPosition);    //show the virtual fan in Display window
49}
50//Draw a clover fan according to the stating angle
51void drawFan(float angle) {
52  constrain(angle, 0, 2*PI);
53  fill(0);
54  for (int i=0; i<3; i++) {
55    arc(width/2, height/2, 200, 200, 2*i*PI/3+angle, (2*i+0.3)*PI/3+angle, PIE);
56  }
57  fill(0);
58  ellipse(width/2, height/2, 30, 30);
59  fill(128);
60  ellipse(width/2, height/2, 15, 15);
61}
62
63void mousePressed() {
64  if ( (mouseY< mBar.y+5) && (mouseY>mBar.y-5) ) {
65    mMouse = true;    //the mouse click the progressBar
66  } else if ((mouseY< btn.y+btn.h) && (mouseY>btn.y)
67    && (mouseX< btn.x+btn.w) && (mouseX>btn.x)) { // the mouse click the button
68    if (motorDir == motor.CW) {    //change the direction of rotation of motor
69      motorDir = motor.CCW;
70      btn.setBgColor(255, 0, 0);
71      btn.setText("CCW");
72    } else if (motorDir == motor.CCW) {
73      motorDir = motor.CW;
74      btn.setBgColor(0, 255, 0);
75      btn.setText("CW");
76    }
77  }
78}
79void mouseReleased() {
80  mMouse  = false;
81}
82void mouseDragged() {
83  int a = constrain(mouseX, borderSize, width - borderSize);
84  float t = map(a, borderSize, width - borderSize, 0.0, 1.0);
85  if (mMouse) {
86    mBar.setProgress(t);
87  }
88}
89void titleAndSiteInfo() {
90  fill(0);
91  textAlign(CENTER);    //set the text centered
92  textSize(40);        //set text size
93  text("Motor", width / 2, 40);    //title
94  textSize(16);
95  text("www.freenove.com", width / 2, height - 20);    //site
96}
First define the GPIO pin connected to the Motor, motor class object, the L293D class object, the ProgressBar class object, the Button class object, and some variables.
 1int motorPin1 = 17;    //connect to the L293D
 2int motorPin2 = 27;
 3int enablePin = 22;
 4final int borderSize = 45;    //border size
 5//MOTOR Object
 6MOTOR motor = new MOTOR(motorPin1, motorPin2, enablePin);
 7ProgressBar mBar;    //ProgressBar Object
 8boolean mMouse = false;    //determined whether a mouse click the ProgressBar
 9BUTTON btn;    //BUTTON Object, For controlling the direction of motor
10int motorDir = motor.CW;    //motor direction
11float rotaSpeed = 0, rotaPosition = 0;  //motor speed
Initialize the ProgressBar and Button in setup().
1mBar = new ProgressBar(borderSize, height-borderSize, width-borderSize*2);
2mBar.setTitle("Duty Cycle");    //set the ProgressBar's title
3btn = new BUTTON(45, height - 90, 50, 30);   //define the button
4btn.setBgColor(0, 255, 0);  //set button color
5btn.setText("CW");        //set button text
In function draw(), draw all the contents to be displayed. Then set the motor speed, as well as the speed of virtual fan according to the progress of progress bar. And set the motor direction according to the button flag.
 1void draw() {
 2  background(255);
 3  titleAndSiteInfo();  //title and site information
 4  strokeWeight(4);    //border weight
 5  mBar.create();      //create the ProgressBar
 6  motor.start(motorDir, (int)(mBar.progress*100));  //control the motor starts to rotate
 7  btn.create();      //create the button
 8  rotaSpeed = mBar.progress * 0.02 * PI;  //virtual fan's rotating speed
 9  if (motorDir == motor.CW) {
10    rotaPosition += rotaSpeed;
11    if (rotaPosition >= 2*PI) {
12      rotaPosition = 0;
13    }
14  } else {
15    rotaPosition -= rotaSpeed;
16    if (rotaPosition <= -2*PI) {
17      rotaPosition = 0;
18    }
19  }
20  drawFan(rotaPosition);    //show the virtual fan in Display window
21}
In the mousePressed(), determine whether the Button is clicked on. If the mouse clicked on the Button, then change the motor direction and the text and color of Button. We have learned how to drag ProgressBar before, so here is no introduction.
 1} else if ((mouseY< btn.y+btn.h) && (mouseY>btn.y)
 2  && (mouseX< btn.x+btn.w) && (mouseX>btn.x)) { // the mouse click the button
 3  if (motorDir == motor.CW) {    //change the direction of rotation of motor
 4    motorDir = motor.CCW;
 5    btn.setBgColor(255, 0, 0);
 6    btn.setText("CCW");
 7  } else if (motorDir == motor.CCW) {
 8    motorDir = motor.CW;
 9    btn.setBgColor(0, 255, 0);
10    btn.setText("CW");
11  }
Subfunction drawFan(float angle) is used to draw a three-blade fan, based on an initial angle. And the angle between each two blades is 120°. Changing the value of “angle” can make the fan rotate to different angles.
 1void drawFan(float angle) {
 2  constrain(angle, 0, 2*PI);
 3  fill(0);
 4  for (int i=0; i<3; i++) {
 5    arc(width/2, height/2, 200, 200, 2*i*PI/3+angle, (2*i+0.3)*PI/3+angle, PIE);
 6  }
 7  fill(0);
 8  ellipse(width/2, height/2, 30, 30);
 9  fill(128);
10  ellipse(width/2, height/2, 15, 15);
11}
9.1.2.2. Reference
- class MOTOR
This is a custom class that is used to operate the motor controlled by L293D.
public MOTOR (int pin1, int pin2, int enablePin)
Constructor, the first two parameters are GPIO pins connected to the L293D pin, and the enablePin is used to create a PWM pin within the range of 0-100 and with frequency of 100Hz.
public void start (int dir, int speed)
Used to drive motor. Parameter dir represents the rotation direction, whose value is CW, CCW, STOP. Parameter speed is used to decide the duty cycle of PWM. Its value is within the range of 0-100.
About class BUTTON:
- class BUTTON
This is a custom class that is used to create a Button.
public BUTTON (int ix, int iy, int iw, int ih)
Constructor, used to create a BUTTON class object. The parameters are for the location and size of the button to be created.
public void create ()
Used to draw Button.
public void setBgColor (int ir, int ig, int ib)
Used to set Button color.
public void setText (String str)
Used to set Button text.
public void setTextColor (int ir, int ig, int ib)
Used to set text color.