Chapter 6 Play MP3 Test
In the previous study, we have learned how to use the SD card. Now we are going to learn to play the music in the SD card.
Project 6.1 Play MP3
In this project, we will read files in mp3 format from SD card, decode them through ESP32-S3, and use Audio Converter & Amplifier module to transcode into stereo output.
Component List
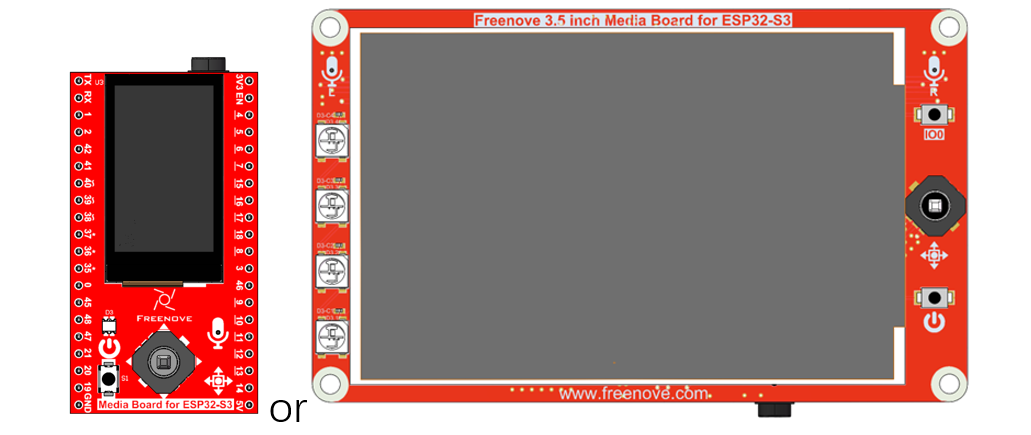
As of the time of writing, the Freenove Media Kit for ESP32-S3 comes in two different models with varying screen sizes. However, this tutorial applies to both versions.
Freenove Media Kit for ESP32-S3 x1
|
USB cable x1
|
|
Extension Board x1(1.14 inch/3.5 inch)
|
||
SD card x1
|
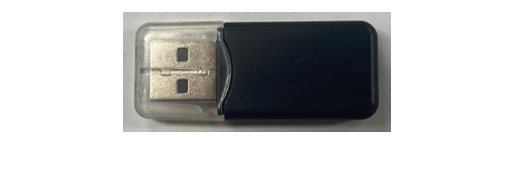
Card reader x1 (random color)
|
|


Circuit
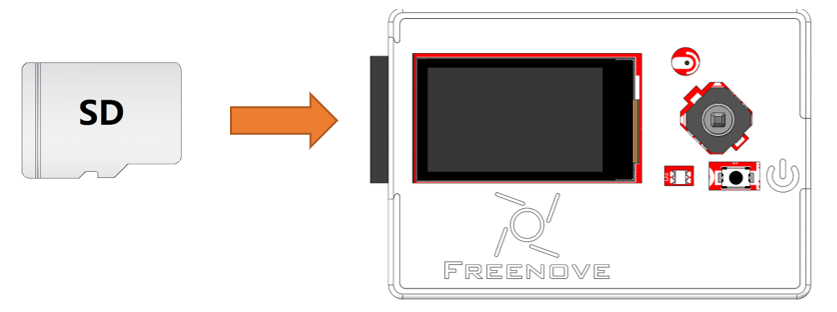
Before compling code, we should copy music to SD card first, as illustrated below.
We have placed a folder called “music” in:
Freenove_Media_Kit_for_ESP32-S3SketchSketch_06_Play_MP3
Before connecting the USB cable, insert the SD card into the SD card slot on the back of the ESP32-S3.
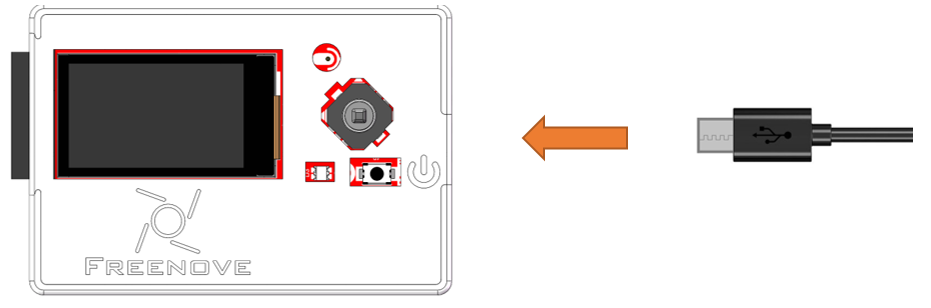
Connect Freenove ESP32-S3 to the computer using the USB cable.
Sketch
How to install the library
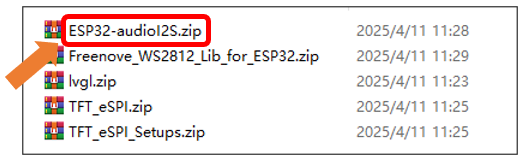
In this project, we will use the ESP32-audioI2S.zip library to decode the audio files in the SD card, and then output the audio signal through IIS. If you have not installed this library, please follow the steps below to install it.
Open Arduino IDE -> Sketch -> Include library -> Add .ZIP Library.
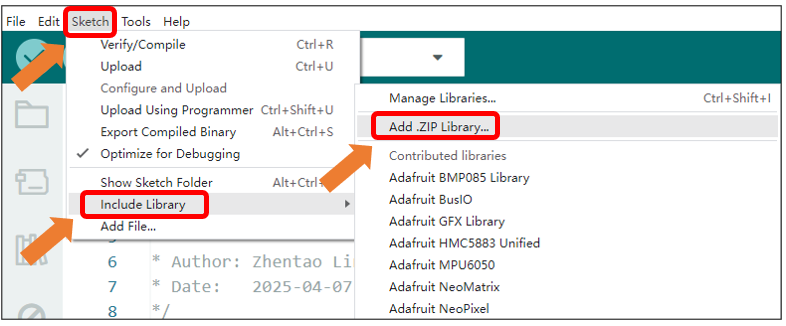
In the newly opened window, select “Freenove_Media_Kit_for_ESP32-S3\Libraries\ESP32-audioI2S.zip” and click “Open”.
If you have any concerns, please feel free to contact us via support@freenove.com
Sketch_06_Play_MP3
The following is the program code:
  1/*
  2* Sketch_05_Play_MP3.ino
  3* This sketch plays an MP3 file from an SD card using the Audio library.
  4* It initializes the SD card and I2S interface, and plays a specified MP3 file.
  5*
  6* Author: Zhentao Lin
  7* Date:   2025-04-07
  8*/
  9
 10#include "Arduino.h"
 11#include "Audio.h"
 12#include "FS.h"
 13#include "SD_MMC.h"
 14
 15#define SD_MMC_CMD 38  // Command pin for SDMMC
 16#define SD_MMC_CLK 39  // Clock pin for SDMMC
 17#define SD_MMC_D0  40  // Data pin for SDMMC
 18
 19#define I2S_BCLK   42  // Bit clock pin for I2S
 20#define I2S_DOUT   1   // Data out pin for I2S
 21#define I2S_LRC    41  // Left/Right clock pin for I2S
 22
 23Audio audio;
 24
 25void setup() {
 26 Serial.begin(115200);
 27
 28 SD_MMC.setPins(SD_MMC_CLK, SD_MMC_CMD, SD_MMC_D0);
 29 if (!SD_MMC.begin("/sdcard", true, true, SDMMC_FREQ_DEFAULT, 5)) {
 30   Serial.println("Card Mount Failed");
 31   return;
 32 }
 33 uint8_t cardType = SD_MMC.cardType();
 34 if (cardType == CARD_NONE) {
 35   Serial.println("No SD_MMC card attached");
 36   return;
 37 }
 38 if (cardType == CARD_MMC) {
 39   Serial.println("MMC");
 40 } else if (cardType == CARD_SD) {
 41   Serial.println("SDSC");
 42 } else if (cardType == CARD_SDHC) {
 43   Serial.println("SDHC");
 44 } else {
 45   Serial.println("UNKNOWN");
 46 }
 47 uint64_t cardSize = SD_MMC.cardSize() / (1024 * 1024);
 48 Serial.printf("SD_MMC Card Size: %lluMB\n", cardSize);
 49
 50 audio.setPinout(I2S_BCLK, I2S_LRC, I2S_DOUT);
 51 audio.setVolume(2);  // 0...21
 52
 53 audio.connecttoFS(SD_MMC, "/music/Jingle Bells.mp3");
 54}
 55
 56void loop() {
 57 audio.loop();
 58 if (Serial.available()) {  // put streamURL in serial monitor
 59   audio.stopSong();
 60   String r = Serial.readString();
 61   r.trim();
 62   if (r.length() > 5) audio.connecttoFS(SD_MMC, r.c_str());
 63   log_i("free heap=%i", ESP.getFreeHeap());
 64 }
 65}
 66
 67// optional
 68void audio_info(const char *info) {
 69 Serial.print("info        ");
 70 Serial.println(info);
 71}
 72void audio_id3data(const char *info) {  //id3 metadata
 73 Serial.print("id3data     ");
 74 Serial.println(info);
 75}
 76void audio_eof_mp3(const char *info) {  //end of file
 77 Serial.print("eof_mp3     ");
 78 Serial.println(info);
 79}
 80void audio_showstation(const char *info) {
 81 Serial.print("station     ");
 82 Serial.println(info);
 83}
 84void audio_showstreamtitle(const char *info) {
 85 Serial.print("streamtitle ");
 86 Serial.println(info);
 87}
 88void audio_bitrate(const char *info) {
 89 Serial.print("bitrate     ");
 90 Serial.println(info);
 91}
 92void audio_commercial(const char *info) {  //duration in sec
 93 Serial.print("commercial  ");
 94 Serial.println(info);
 95}
 96void audio_icyurl(const char *info) {  //homepage
 97 Serial.print("icyurl      ");
 98 Serial.println(info);
 99}
100void audio_lasthost(const char *info) {  //stream URL played
101 Serial.print("lasthost    ");
102 Serial.println(info);
103}
Include the required header files.
1#include "Arduino.h"
2#include "Audio.h"
3#include "FS.h"
4#include "SD_MMC.h"
Macro definitions for SD Card pin configuration
1#define SD_MMC_CMD 38  // Command pin for SDMMC
2#define SD_MMC_CLK 39  // Clock pin for SDMMC
3#define SD_MMC_D0  40  // Data pin for SDMMC
Macro definitions for I2S pin configuration
1#define I2S_BCLK   42  // Bit clock pin for I2S
2#define I2S_DOUT   1   // Data out pin for I2S
3#define I2S_LRC    41  // Left/Right clock pin for I2S
SD card initialization
1SD_MMC.setPins(SD_MMC_CLK, SD_MMC_CMD, SD_MMC_D0);
2if (!SD_MMC.begin("/sdcard", true, true, SDMMC_FREQ_DEFAULT, 5)) {
3  Serial.println("Card Mount Failed");
4  return;
5}
Declare an audio decoding object, associate it with the pin, set the volume, and set the decoding object.
1Audio audio;
2...
3audio.setPinout(I2S_BCLK, I2S_LRC, I2S_DOUT);
4audio.setVolume(2);  // 0...21
5
6audio.connecttoFS(SD_MMC, "/music/Jingle Bells.mp3");
Continuously play music until the current track finishes. Upon receiving data through the serial port, remove any leading or trailing spaces and use the audio object to decode the data.
1audio.loop();
2if (Serial.available()) {  // put streamURL in serial monitor
3  audio.stopSong();
4  String r = Serial.readString();
5  r.trim();
6  if (r.length() > 5) audio.connecttoFS(SD_MMC, r.c_str());
7  log_i("free heap=%i", ESP.getFreeHeap());
8}
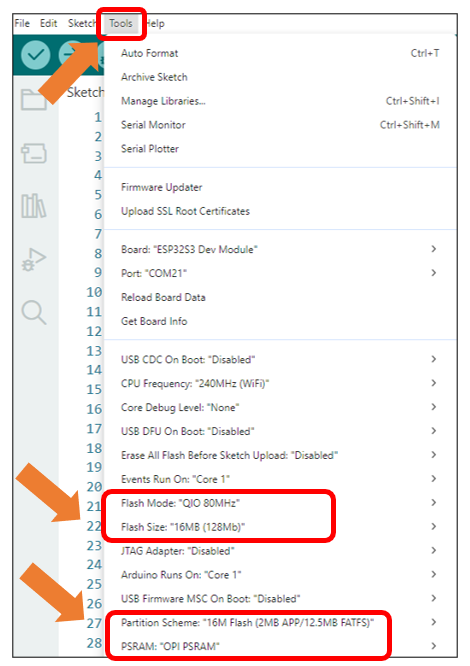
It is necessary to change the settings in Arduino IDE before clicking the Uploading button, as shown below.
Caution
Incorrect settings will result in compilation error or uploading failure. To achieve desired result, please configure exactly the same as below.
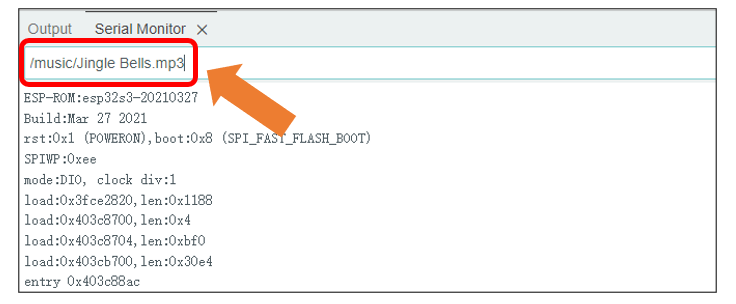
If you want to switch the music in the SD card, you can directly input the song through the serial port.
To adjust the volume, you can modify the parameter in the code, as shown below.
The range of the volume is between 0 to 21.

These functions are used to print information about audio decoding. If you don’t want to see this information in the serial port, you can simply comment out these functions.”
1void audio_info(const char *info);
2void audio_id3data(const char *info);
3void audio_eof_mp3(const char *info);
4void audio_showstation(const char *info);
5void audio_showstreamtitle(const char *info);
6void audio_bitrate(const char *info);
7void audio_commercial(const char *info);
8void audio_icyurl(const char *info);
9void audio_lasthost(const char *info);