Chapter 23 Infrared Remote
In this chapter, we’ll learn how to use an infrared remote control, and control a LED.
Project 23.1 Infrared Remote Control
First, we need to understand how infrared remote control works, then get the command sent from infrared remote control.
Component List
ESP32-WROVER x1
|
GPIO Extension Board x1
|
|
Breadboard x1
|
||
Jumper M/M x4
|
Infrared Remote x1 |
Resistor 10kΩ x1 |
Infrared Remote x1 (May need CR2025 battery x1, please check the holder)
|
||


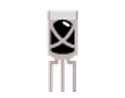
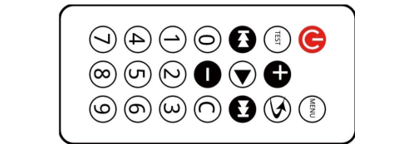
Component knowledge
Infrared Remote
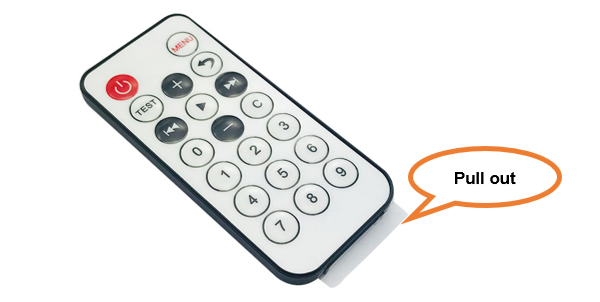
An infrared(IR) remote control is a device with a certain number of buttons. Pressing down different buttons will make the infrared emission tube, which is located in the front of the remote control, send infrared ray with different command. Infrared remote control technology is widely used in electronic products such as TV, air conditioning, etc. Thus making it possible for you to switch TV programs and adjust the temperature of the air conditioning when away from them. The remote control we use is shown below:
Infrared receiver
An infrared(IR) receiver is a component which can receive the infrared light, so we can use it to detect the signal emitted by the infrared remote control. DATA pin here outputs the received infrared signal.
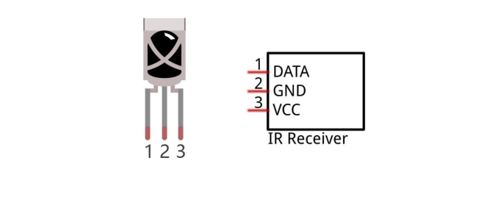
When you use the infrared remote control, the infrared remote control sends a key value to the receiving circuit according to the pressed keys. We can program the ESP32-WROVER to do things like lighting, when a key value is received.
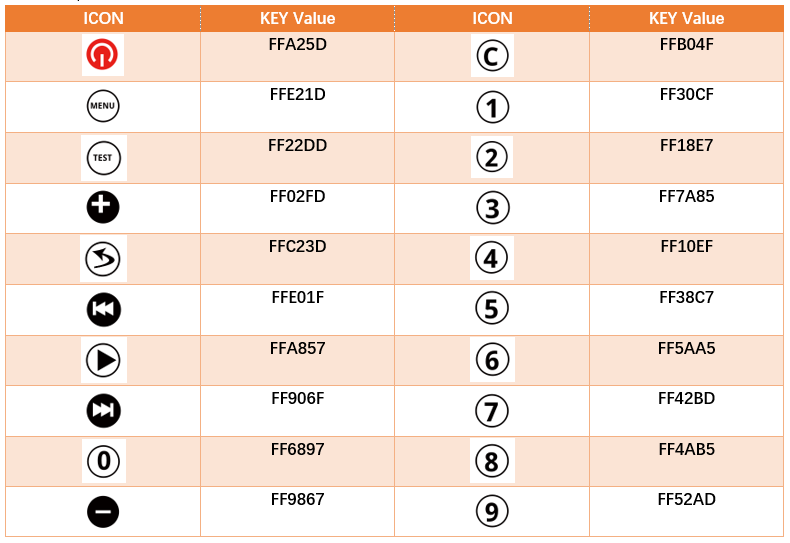
The following is the key value that the receiving circuit will receive when each key of the infrared remote control is pressed.
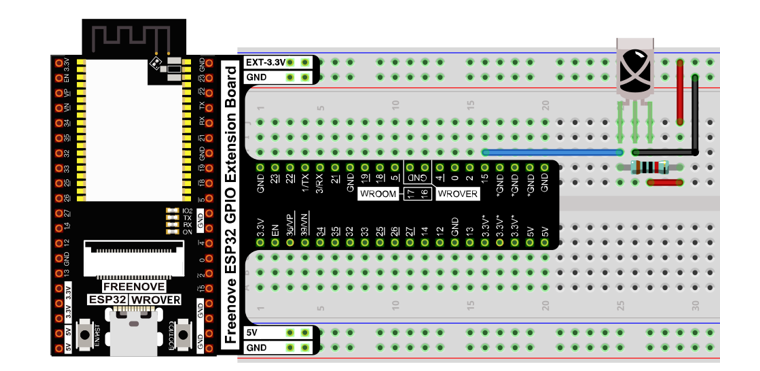
Circuit
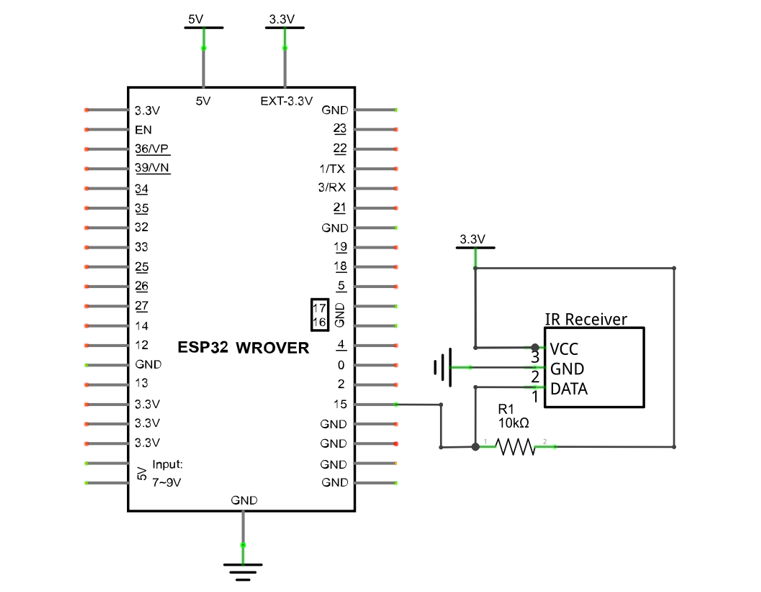
Schematic diagram |
|
Hardware connection If you need any support, please feel free to contact us via: support@freenove.com
|
Sketch
This sketch uses the infrared receiving tube to receive the value sent form the infrared remote control, and print it out via the serial port.
How to install the library
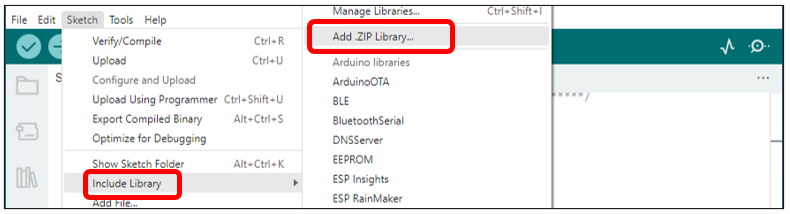
We use the third party library Freenove_IR_Lib_for_ESP32. If you haven’t installed it yet, please do so before learning. The steps to add third-party Libraries are as follows: open arduino->Sketch->Include library-> Add .ZIP Library….
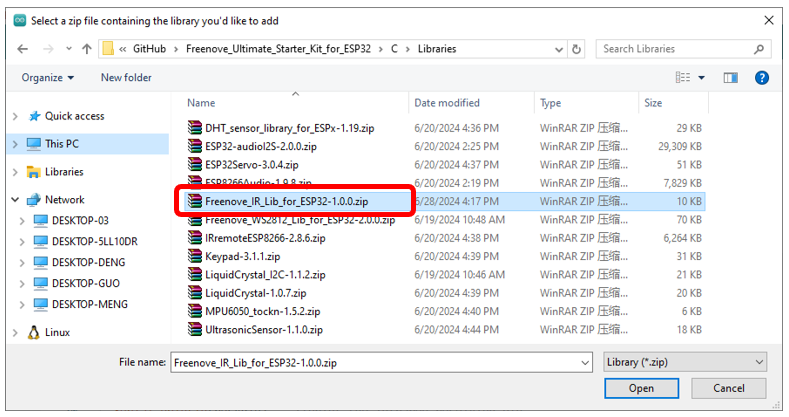
In the Freenove_Ultimate_Starter_Kit_for_ESP32/C/Libraries folder, select Freenove_IR_Lib_for_ESP32.zip and click open.
Sketch_23.1_Infrared_Remote_Control
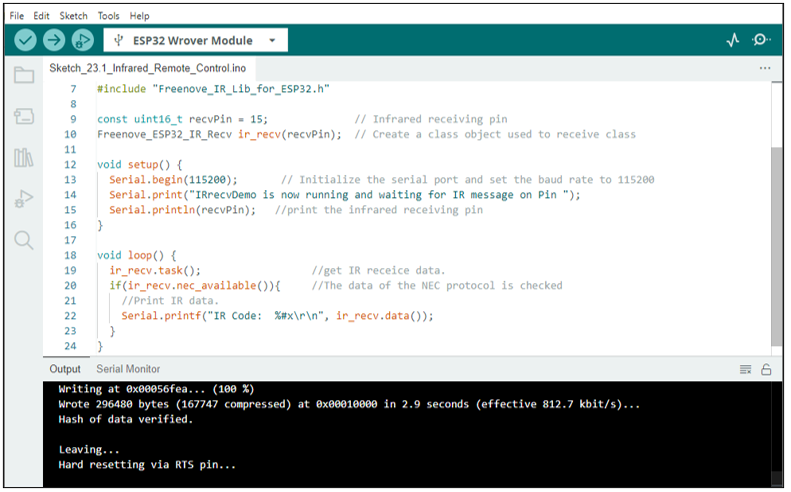
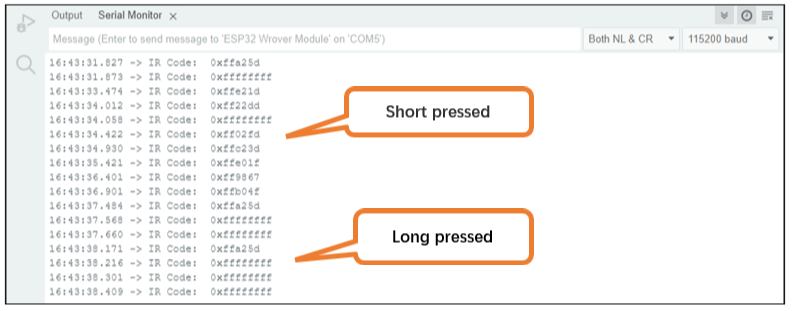
Download the code to ESP32-WROVER, open the serial port monitor, set the baud rate to 115200, press the IR remote control, the pressed keys value will be printed out through the serial port. As shown in the following figure: (Note that when the remote control button is pressed for a long time, the infrared receiving circuit receives a continuous high level, that is, it receives a hexadecimal “F”)
The following is the program code:
 1/**********************************************************************
 2  Filename    : Infrared Remote Control
 3  Description : Decode the infrared remote control and print it out through the serial port.
 4  Auther      : www.freenove.com
 5  Modification: 2024/06/28
 6**********************************************************************/
 7#include "Freenove_IR_Lib_for_ESP32.h"
 8
 9const uint16_t recvPin = 15;              // Infrared receiving pin
10Freenove_ESP32_IR_Recv ir_recv(recvPin);  // Create a class object used to receive class
11
12void setup() {
13  Serial.begin(115200);       // Initialize the serial port and set the baud rate to 115200
14  Serial.print("IRrecvDemo is now running and waiting for IR message on Pin ");
15  Serial.println(recvPin);   //print the infrared receiving pin
16}
17
18void loop() {
19  ir_recv.task();                  //Get IR receice data.
20  if(ir_recv.nec_available()){     //The data of the NEC protocol is checked
21    //Print IR data.
22    Serial.printf("IR Code:  %#x\r\n", ir_recv.data());
23  }
24}
First, include header file. Each time you use the infrared library, you need to include the header file at the beginning of the program.
1#include "Freenove_IR_Lib_for_ESP32.h"
Second, define an infrared receive pin and associates it with the receive class.
1const uint16_t recvPin = 15;              // Infrared receiving pin
2Freenove_ESP32_IR_Recv ir_recv(recvPin);  // Create a class object used to receive class
Third, call the infrared reception function, if you do not use this function, you won’t receive the value from the infrared remote control.
1ir_recv.task(); //Get IR receice data.
Finally, determine whether the detection IR data has been obtained, and if so, print the data.
1void loop() {
2  ir_recv.task();                  //Get IR receice data.
3  if(ir_recv.nec_available()){     //The data of the NEC protocol is checked
4    //Print IR data.
5    Serial.printf("IR Code:  %#x\r\n", ir_recv.data());
6  }
7}
Reference
You need to add the library each time you use the Infrared Reception.
- class Freenove_ESP32_IR_Recv
Freenove_ESP32_IR_Recv irrecv(Pin) :Create a class object used to receive class, and associated with Pin.
task You need to keep calling this function, so that IR can accurately get the data.
nec_available() : Check whether IR data is obtained from the buffer.
data() :Get IR data.
Project 23.2 Control LED through Infrared Remote
In this project, we will control the brightness of LED lights through an infrared remote control.
Component List
ESP32-WROVER x1
|
GPIO Extension Board x1
|
|
Breadboard x1
|
||
Jumper M/M
|
Infrared Remote x1 |
Resistor 10kΩ x1 |
Infrared Remote x1 (May need CR2025 battery x1, please check the holder)
|
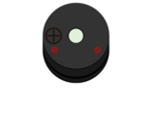
Active buzzer x1
|
|
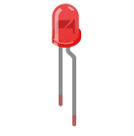
LED x1
|
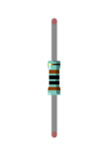
Resistor 1kΩ x2 |
NPN transistorx1 (S8050) |
Circuit
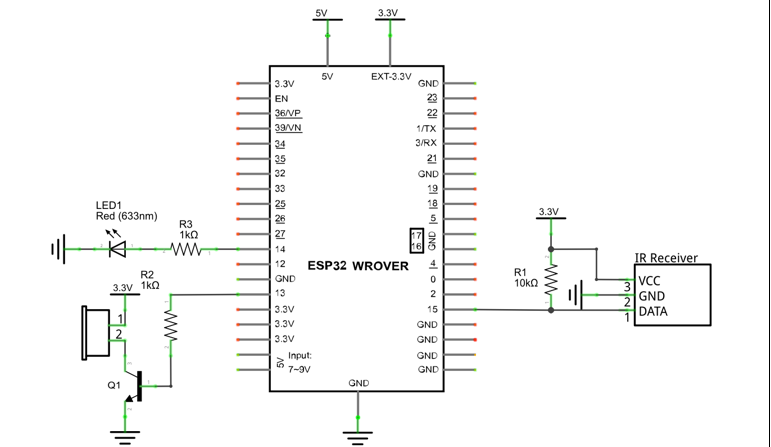
Schematic diagram |
|
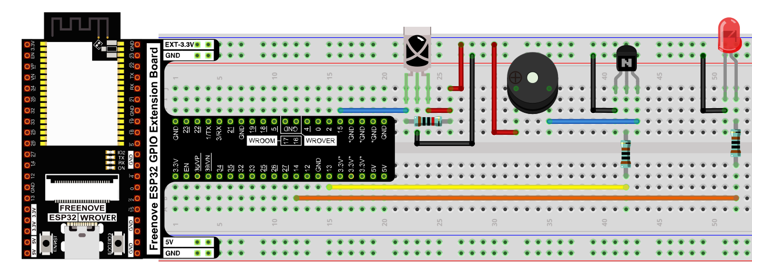
Hardware connection |
If you need any support, please feel free to contact us via: support@freenove.com
|
Sketch
The sketch controls the brightness of the LED by determining the key value of the infrared received.
Sketch_23.2_Control_LED_through_Infrared_Remote
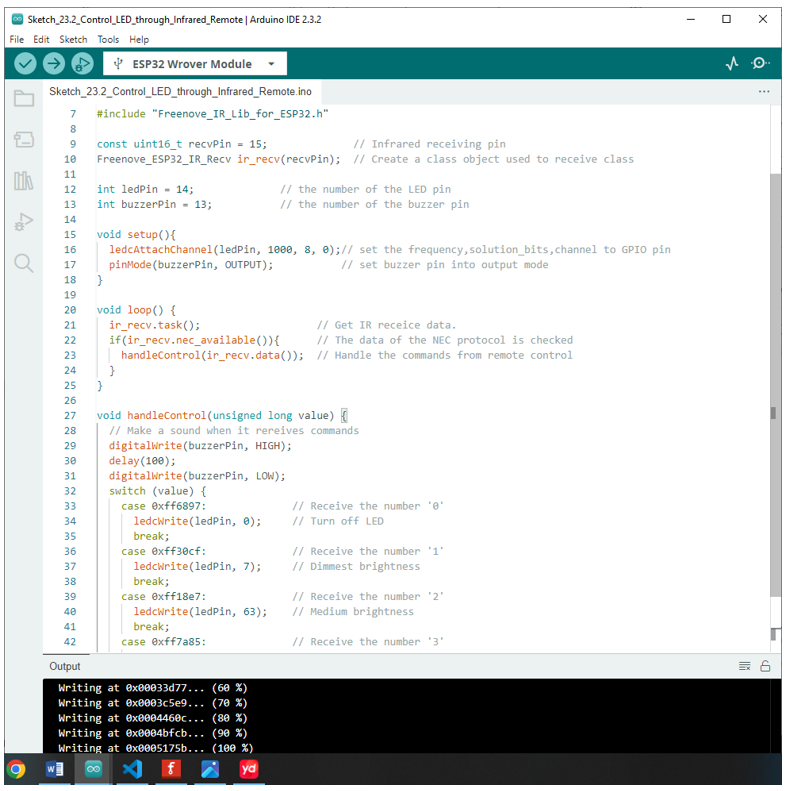
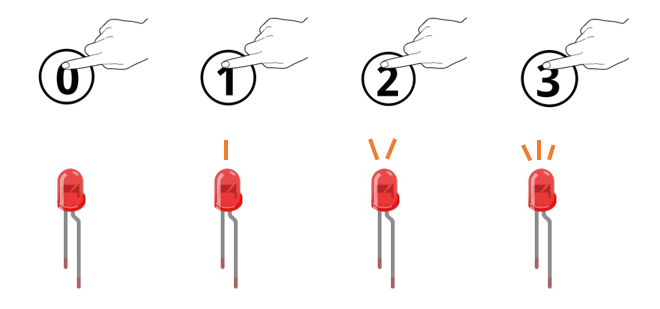
Compile and upload the code to the ESP32-WROVER. When pressing “0”, “1”, “2”, “3” of the infrared remote control, the buzzer will sound once, and the brightness of the LED light will change correspondingly.
rendering
The following is the program code:
 1/**********************************************************************
 2  Filename    : Control LED through Infrared Remote
 3  Description : Remote control the LED with the infrared remote control.
 4  Auther      : www.freenove.com
 5  Modification: 2024/06/28
 6**********************************************************************/
 7#include "Freenove_IR_Lib_for_ESP32.h"
 8
 9const uint16_t recvPin = 15;              // Infrared receiving pin
10Freenove_ESP32_IR_Recv ir_recv(recvPin);  // Create a class object used to receive class
11
12int ledPin = 14;              // the number of the LED pin
13int buzzerPin = 13;           // the number of the buzzer pin
14
15void setup(){
16  ledcAttachChannel(ledPin, 1000, 8, 0);// set the frequency,solution_bits,channel to GPIO pin
17  pinMode(buzzerPin, OUTPUT);           // set buzzer pin into output mode
18}
19
20void loop() {
21  ir_recv.task();                   // Get IR receice data.
22  if(ir_recv.nec_available()){      // The data of the NEC protocol is checked
23    handleControl(ir_recv.data());  // Handle the commands from remote control
24  }
25}
26
27void handleControl(unsigned long value) {
28  // Make a sound when it rereives commands
29  digitalWrite(buzzerPin, HIGH);
30  delay(100);
31  digitalWrite(buzzerPin, LOW);
32  switch (value) {
33    case 0xff6897:              // Receive the number '0'
34      ledcWrite(ledPin, 0);     // Turn off LED
35      break;
36    case 0xff30cf:              // Receive the number '1'
37      ledcWrite(ledPin, 7);     // Dimmest brightness
38      break;
39    case 0xff18e7:              // Receive the number '2'
40      ledcWrite(ledPin, 63);    // Medium brightness
41      break;
42    case 0xff7a85:              // Receive the number '3'
43      ledcWrite(ledPin, 255);   // Strongest brightnss
44      break;
45  }
46}
The handleControl() function is used to execute events corresponding to infrared code values. Every time when the function is called, the buzzer sounds once and determine the brightness of the LED based on the infrared key value. If the key value is not “0”, “1”, “2”, “3”, the buzzer sounds once, but the brightness of LED will not change.
 1void handleControl(unsigned long value) {
 2  // Make a sound when it rereives commands
 3  digitalWrite(buzzerPin, HIGH);
 4  delay(100);
 5  digitalWrite(buzzerPin, LOW);
 6  switch (value) {
 7    case 0xff6897:              // Receive the number '0'
 8      ledcWrite(ledPin, 0);     // Turn off LED
 9      break;
10    case 0xff30cf:              // Receive the number '1'
11      ledcWrite(ledPin, 7);     // Dimmest brightness
12      break;
13    case 0xff18e7:              // Receive the number '2'
14      ledcWrite(ledPin, 63);    // Medium brightness
15      break;
16    case 0xff7a85:              // Receive the number '3'
17      ledcWrite(ledPin, 255);   // Strongest brightnss
18      break;
19  }
20}
Each time when the command is received, the function above will be called in the loop() function.
1void loop() {
2  ir_recv.task();                   // Get IR receice data.
3  if(ir_recv.nec_available()){      // The data of the NEC protocol is checked
4    handleControl(ir_recv.data());  // Handle the commands from remote control
5  }
6}