Chapter 8 Serial Communication
Serial Communication is a means of communication between different devices/devices. This section describes ESP32’s Serial Communication.
Project 8.1 Serial Print
This project uses ESP32’s serial communicator to send data to the computer and print it on the serial monitor.
Component List
ESP32-WROVER x1
|
GPIO Extension Board x1
|
Micro USB Wire x1
|
|


Related knowledge
Serial communication
Serial communication generally refers to the Universal Asynchronous Receiver/Transmitter (UART), which is commonly used in electronic circuit communication. It has two communication lines, one is responsible for sending data (TX line) and the other for receiving data (RX line). The serial communication connections of two devices is as follows:
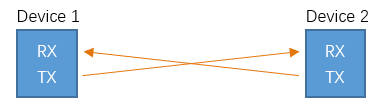
Before serial communication starts, the baud rate of both sides must be the same. Communication between devices can work only if the same baud rate is used. The baud rates commonly used is 9600 and 115200.
Serial port on ESP32
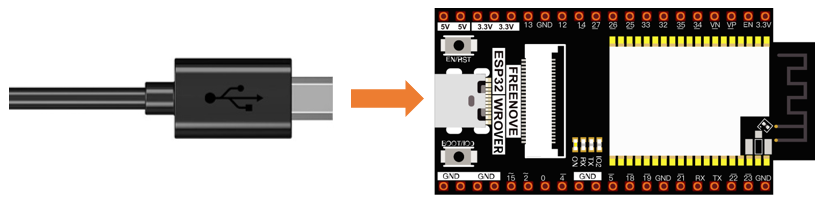
Freenove ESP32 has integrated USB to serial transfer, so it could communicate with computer connecting to USB cable.

Arduino Software also uploads code to Freenove ESP32 through the serial connection.
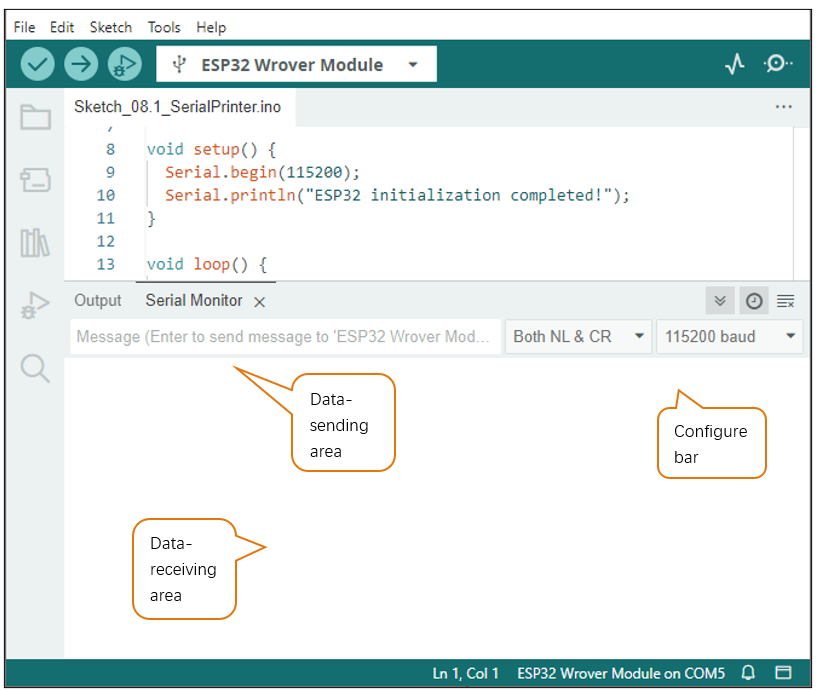
Your computer identifies serial devices connecting to it as COMx. We can use the Serial Monitor window of Arduino Software to communicate with Freenove ESP32, connect Freenove ESP32 to computer through the USB cable, choose the correct device, and then click the Serial Monitor icon to open the Serial Monitor window.

Interface of serial monitor window is as follows. If you can’t open it, make sure Freenove ESP32 has been connected to the computer, and choose the right serial port in the menu bar “Tools”.
Circuit
Connect Freenove ESP32 to the computer with USB cable
Code
Move the program folder “Freenove_Ultimate_Starter_Kit_for_ESP32/Python/Python_Codes” to disk(D) in advance with the path of “D:/Micropython_Codes”.
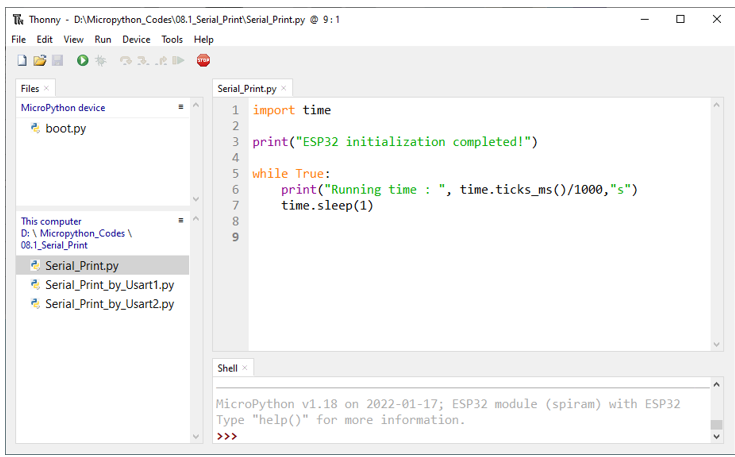
Open “Thonny”, click “This computer” -> “D:” -> “Micropython_Codes” -> “08.1_Serial_Print” and double “Serial_Print.py”.
08.1_Serial_Print
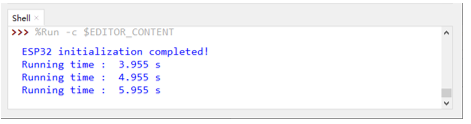
Click “Run current script” and observe the changes of “Shell”, which will display the time when ESP32 is powered on once per second.
The following is the program code:
1import time
2
3print("ESP32 initialization completed!")
4
5while True:
6    print("Running time : ", time.ticks_ms()/1000,"s")
7    time.sleep(1)
8
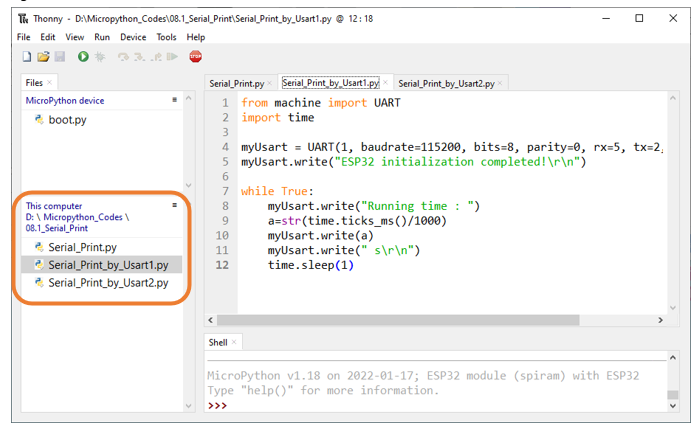
ESP32-WROVER has 3 serial ports, one of which is used as REPL, that is, Pin(1) and Pin(3) are occupied, and generally it is not recommended to be used as tx, rx. The other two serial ports can be configured simply by calling the UART module.
Reference
- Class UART
Before each use of UART module, please add the statement “ from machine import UART “ to the top of python file.
UART(id, baudrate, bits, parity, rx, tx, stop, timeout): Define serial ports and configure parameters for them.
id: Serial Number. The available serial port number is 1 or 2
baudrate: Baud rate
bits: The number of each character.
parity: Check even or odd, with 0 for even checking and 1 for odd checking.
rx, tx: UAPT’s reading and writing pins
Pin(0)、Pin(2)、Pin(4)、Pin(5)、Pin(9)、Pin(10)、Pin(12~19)、Pin(21~23)、Pin(25)、Pin(26)、Pin(34~36)、Pin(39)
Note: Pin(1) and Pin(3) are occupied and not recommend to be used as tx,rx.
stop: The number of stop bits, and the stop bit is 1 or 2.
timeout: timeout period (Unit: millisecond)
0 < timeout ≤ 0x7FFF FFFF (decimal: 0 < timeout ≤ 2147483647)
UART.init(baudrate, bits, parity, stop, tx, rx, rts, cts)): Initialize serial ports
tx: writing pins of uart
rx: reading pins of uart
rts: rts pins of uart
cts: cts pins of uart
UART.read(nbytes): Read nbytes bytes
UART.read(): Read data
UART.write(buf): Write byte buffer to UART bus
UART.readline(): Read a line of data, ending with a newline character.
UART.readinto(buf): Read and write data into buffer.
UART.readinto(buf, nbytes): Read and write data into buffer.
UART.any(): Determine whether there is data in serial ports. If yes, return the number of bytes; Otherwise, return 0.
Project 8.2 Serial Read and Write
From last section, we use Serial port on Freenove ESP32 to send data to a computer, now we will use that to receive data from computer.
Component and Circuit are the same as in the previous project.
Code
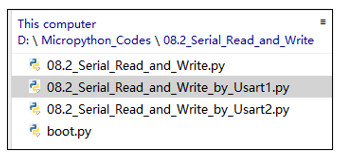
Open “Thonny”, click “This computer” -> “D:” -> “Micropython_Codes” -> “08.2_Serial_Read_and_Write” and double click “Serial_Read_and_Write.py”.
08.2_Serial_Read_and_Write
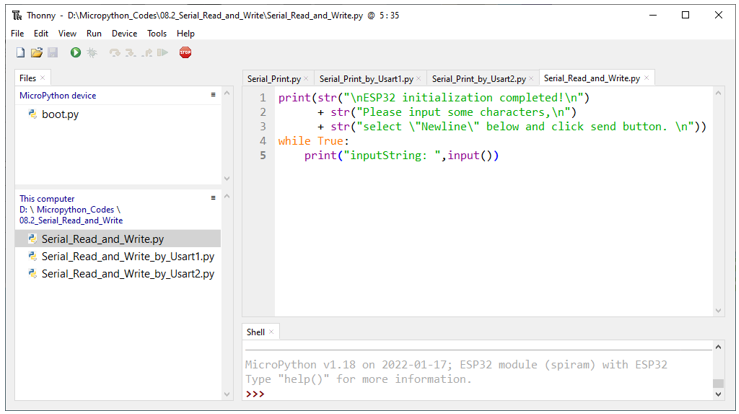
Click “Run current script” and ESP32 will print out data at “Shell” and wait for users to enter any messages. Press Enter to end the input, and “Shell” will print out data that the user entered. If you want to use other serial ports, you can use other python files in the same directory.