6. Chapter LEDPixel
This chapter will help you learn to use a more convenient RGB LED lamp, which requires only one GPIO control and can be connected in infinite series in theory. Each LED can be controlled independently.
6.1. Project LEDPixel
Learn the basic usage of LEDPixel and use it to flash red, green, blue and white.
6.1.1. Component List
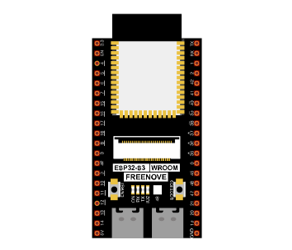
ESP32-S3 WROOM x1
|
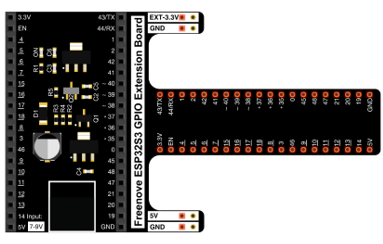
GPIO Extension Board x1
|
Breadboard x1
|
|
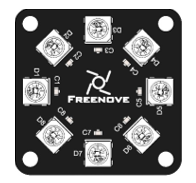
Freenove 8 RGB LED Module x1
|
Jumper F/M x3 |

6.1.2. Related knowledge
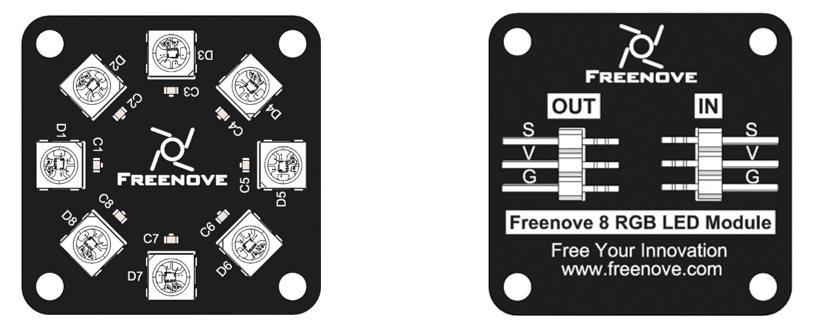
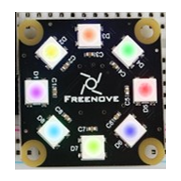
6.1.2.1. Freenove 8 RGB LED Module
The Freenove 8 RGB LED Module is as below.
It consists of 8 WS2812, each of which requires only one pin to control and supports cascade. Each WS212 has integrated 3 LEDs, red, green and blue respectively, and each of them supports 256-level brightness adjustment, which means that each WS2812 can emit 2^24=16,777,216 different colors.
You can use only one data pin to control eight LEDs on the module. As shown below:
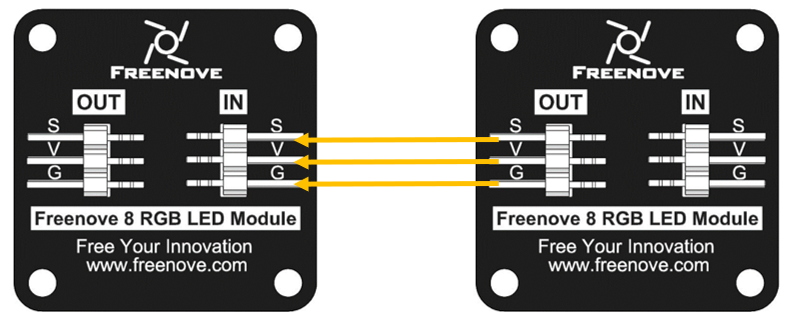
And you can also control many modules at the same time. Just connect OUT pin of one module to IN pin of another module. In this way, you can use one data pin to control 8, 16, 32 … LEDs.
6.1.2.2. Pin description:
(IN) |
(OUT) |
||
|---|---|---|---|
symbol |
Function |
symbol |
Function |
S |
Input control signal |
S |
Output control signal |
V |
Power supply pin, +3.5V~5.5V |
V |
Power supply pin, +3.5V~5.5V |
G |
GND |
G |
GND |
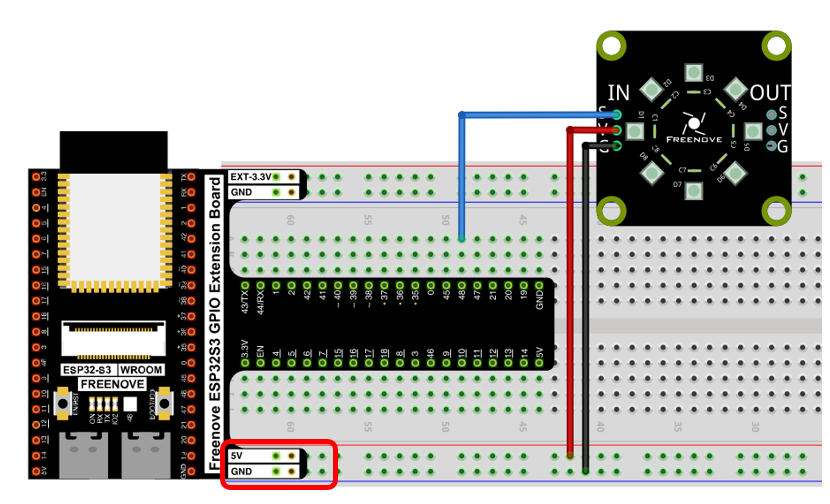
6.1.3. Circuit
Schematic diagram |
|---|
|
Hardware connection. If you need any support, please contact us via: support@freenove.com |
Don’t rotate ESP32-S3 WROOM 180° for connection. |

6.1.4. Sketch
This code uses a library named “Freenove_WS2812_Lib_for_ESP32”, if you have not installed it, please do so first.
Library is an important feature of the open source world, and we know that Arduino is an open source platform that everyone can contribute to. Libraries are generally licensed under the LGPL, which means you can use them for free to apply to your creations.
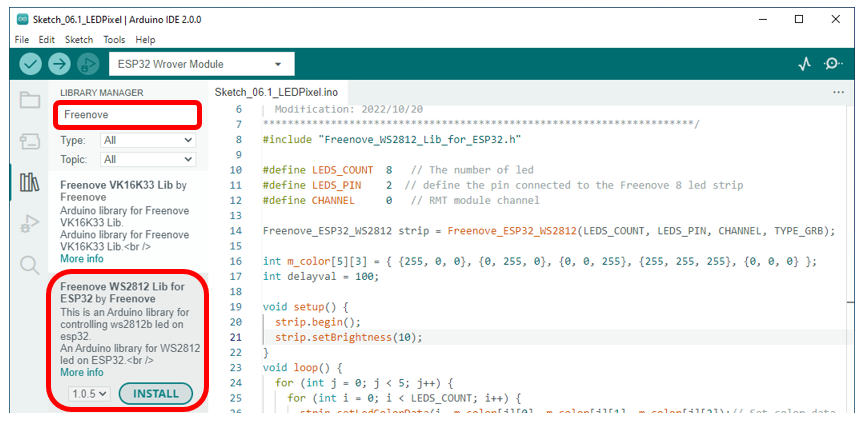
6.1.4.1. How to install the library
There are two ways to add libraries.
The first way, open the Arduino IDE, click Sketch -> Include Library -> Manager Libraries.
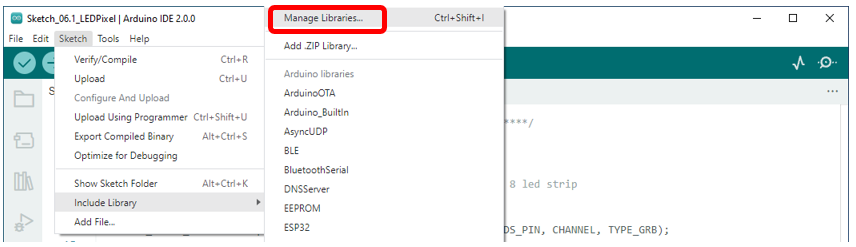
In the pop-up window, Library Manager, search for the name of the Library, “Freenove WS2812 Lib for ESP32”. Then click Install.
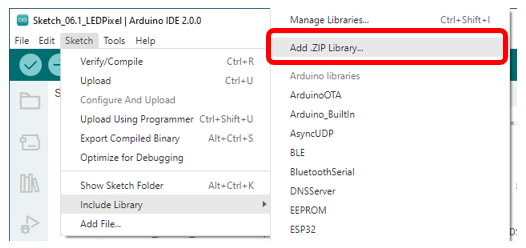
The second way, open Arduino IDE, click Sketch->Include Library->Add .ZIP Library, In the pop-up window, find the file named “./Libraries/Freenove_WS2812_Lib_for_ESP32.Zip” which locates in this directory, and click OPEN.
6.1.4.2. Sketch_LEDPixel
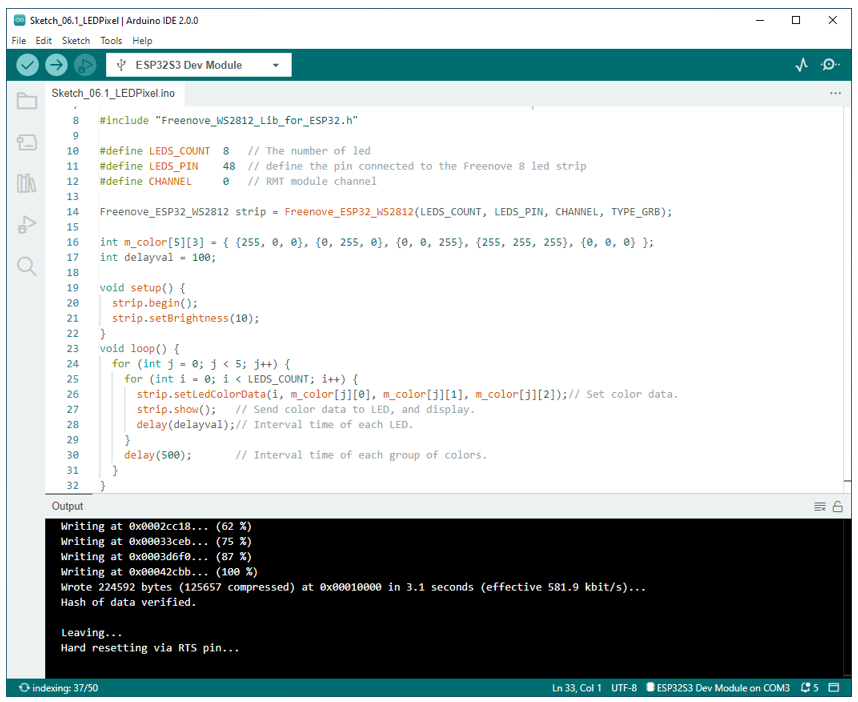
Download the code to ESP32-S3 WROOM and RGB LED begins to light up in red, green, blue, white and black.

The following is the program code:
 1/**********************************************************************
 2  Filename    : NeoPixel
 3  Description : Basic usage of LEDPixel,
 4                Make the strip light up in different colors gradually.
 5  Auther      : www.freenove.com
 6  Modification: 2022/10/20
 7**********************************************************************/
 8#include "Freenove_WS2812_Lib_for_ESP32.h"
 9
10#define LEDS_COUNT  8   // The number of led
11#define LEDS_PIN	  48  // define the pin connected to the Freenove 8 led strip
12#define CHANNEL		  0   // RMT module channel
13
14Freenove_ESP32_WS2812 strip = Freenove_ESP32_WS2812(LEDS_COUNT, LEDS_PIN, CHANNEL, TYPE_GRB);
15
16int m_color[5][3] = { {255, 0, 0}, {0, 255, 0}, {0, 0, 255}, {255, 255, 255}, {0, 0, 0} };
17int delayval = 100;
18
19void setup() {
20	strip.begin();
21	strip.setBrightness(10);
22}
23void loop() {
24	for (int j = 0; j < 5; j++) {
25		for (int i = 0; i < LEDS_COUNT; i++) {
26			strip.setLedColorData(i, m_color[j][0], m_color[j][1], m_color[j][2]);// Set color data.
27			strip.show();   // Send color data to LED, and display.
28			delay(delayval);// Interval time of each LED.
29		}
30		delay(500);       // Interval time of each group of colors.
31	}
32}
To use some libraries, first you need to include the library’s header file.
1#include "Freenove_WS2812_Lib_for_ESP32.h"
Define the pins connected to the ring, the number of LEDs on the ring, and RMT channel values.
1#define LEDS_COUNT  8   // The number of led
2#define LEDS_PIN	  48  // define the pin connected to the Freenove 8 led strip
3#define CHANNEL		  0   // RMT module channel
Use the above parameters to create a LEDPixel object strip.
1Freenove_ESP32_WS2812 strip = Freenove_ESP32_WS2812(LEDS_COUNT, LEDS_PIN, CHANNEL, TYPE_GRB);
Define the color values to be used, as red, green, blue, white, and black.
1int m_color[5][3] = { {255, 0, 0}, {0, 255, 0}, {0, 0, 255}, {255, 255, 255}, {0, 0, 0} };
Define a variable to set the time interval for each led to light up. The smaller the value is, the faster it will light up.
1int delayval = 100;
Initialize strip() in setup() and set the brightness.
1strip.begin();
2strip.setBrightness(10);
In the loop(), there are two “for” loops, the internal for loop to light the LED one by one, and the external for loop to switch colors. strip.setLedColorData() is used to set the color, but it does not change immediately. Only when strip.show() is called will the color data be sent to the LED to change the color.
1for (int j = 0; j < 5; j++) {
2	for (int i = 0; i < LEDS_COUNT; i++) {
3		strip.setLedColorData(i, m_color[j][0], m_color[j][1], m_color[j][2]);// Set color data.
4		strip.show();   // Send color data to LED, and display.
5		delay(delayval);// Interval time of each LED.
6	}
7	delay(500);       // Interval time of each group of colors.
8}
6.1.4.3. Reference
- Freenove_ESP32_WS2812(u16 n = 8, u8 pin_gpio = 2, u8 chn = 0, LED_TYPE t = TYPE_GRB)
Constructor to create a LEDPixel object.
Before each use of the constructor, please add “#include “Freenove_WS2812_Lib_for_ESP32.h”
Parameters
n: The number of led.
pin_gpio: A pin connected to an led.
Chn: RMT channel, which uses channel 0 by default, has a total of eight channels, 0-7. This means that you can use eight LEDPixel modules for the display at the same time, and these modules do not interfere with each other
t: Types of LED.
TYPE_RGB: The sequence of LEDPixel module loading color is red, green and blue.
TYPE_RBG: The sequence of LEDPixel module loading color is red, blue and green.
TYPE_GRB: The sequence of LEDPixel module loading color is green, red and blue.
TYPE_GBR: The sequence of LEDPixel module loading color is green, blue and red.
TYPE_BRG: The sequence of LEDPixel module loading color is blue, red and green.
TYPE_BGR: The sequence of LEDPixel module loading color is blue,g reen and red.
- void begin(void);
Initialize the LEDPixel object
- void setLedColorData (u8 index, u8 r, u8 g, u8 b);
- void setLedColorData (u8 index, u32 rgb);
- void setLedColor (u8 index, u8 r, u8 g, u8 b);
- void setLedColor (u8 index, u32 rgb);
Set the color of led with order number n.
- void show(void);
Send the color data to the led and display the set color immediately.
- void setBrightness(uint8_t);
Set the brightness of the LED.
If you want to learn more about this library, you can visit the following website: https://github.com/Freenove/Freenove_WS2812_Lib_for_ESP32
6.2. Project Rainbow Light
In the previous project, we have mastered the use of LEDPixel. This project will realize a slightly complicated rainbow light. The component list and the circuit are exactly the same as the project fashionable light.
6.2.1. Sketch
Continue to use the following color model to equalize the color distribution of the 8 LEDs and gradually change.

6.2.1.1. Sketch_RainbowLight
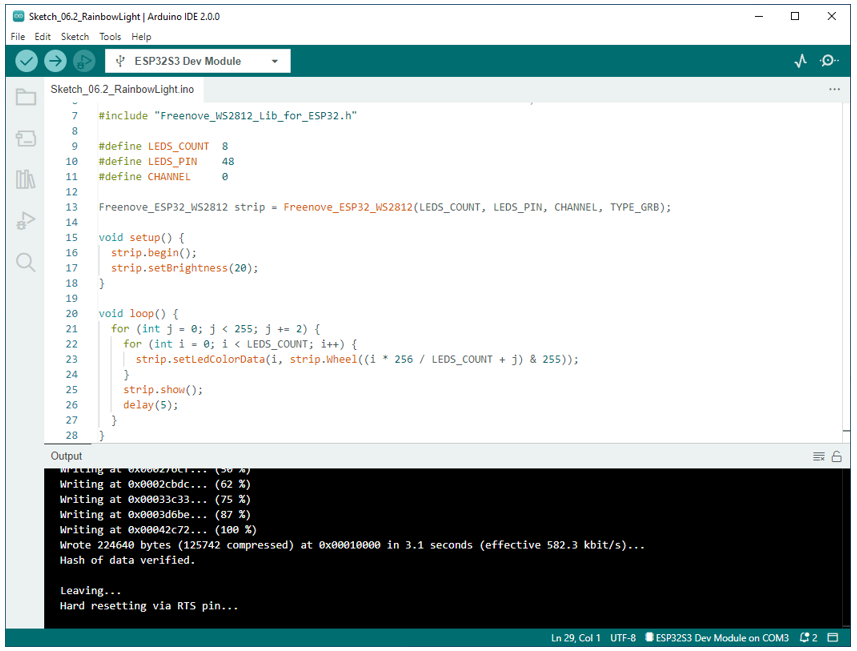
Download the code to ESP32-S3 WROOM, and the Freenove 8 RGB LED Strip displays different colors and the color changes gradually.
The following is the program code:
 1/**********************************************************************
 2  Filename    : RainbowLight
 3  Description : Make the strip light up in rainbow colors.
 4  Auther      : www.freenove.com
 5  Modification: 2022/10/20
 6**********************************************************************/
 7#include "Freenove_WS2812_Lib_for_ESP32.h"
 8
 9#define LEDS_COUNT  8
10#define LEDS_PIN	  48
11#define CHANNEL		  0
12
13Freenove_ESP32_WS2812 strip = Freenove_ESP32_WS2812(LEDS_COUNT, LEDS_PIN, CHANNEL, TYPE_GRB);
14
15void setup() {
16  strip.begin();
17  strip.setBrightness(20);
18}
19
20void loop() {
21  for (int j = 0; j < 255; j += 2) {
22    for (int i = 0; i < LEDS_COUNT; i++) {
23      strip.setLedColorData(i, strip.Wheel((i * 256 / LEDS_COUNT + j) & 255));
24    }
25    strip.show();
26    delay(5);
27  }
28}
In the loop(), two “for” loops are used, the internal “for” loop(for-j) is used to set the color of each LED, and the external “for” loop(for-i) is used to change the color, in which the self-increment value in i+=1 can be changed to change the color step distance. Changing the delay parameter changes the speed of the color change. Wheel(i * 256 / LEDS_COUNT + j) & 255) will take color from the color model at equal intervals starting from i.
1for (int j = 0; j < 255; j += 2) {
2  for (int i = 0; i < LEDS_COUNT; i++) {
3    strip.setLedColorData(i, strip.Wheel((i * 256 / LEDS_COUNT + j) & 255));
4  }
5  strip.show();
6  delay(5);
7}