10. Chapter LVGL Lable
In this chapter, we will learn how to use the label component on the screen.
10.1. Project 10.1 LVGL Lable
We have prepared two examples in the code, through which we will learn how to use the label component, how to display text in different colors, and how to add shadow effects to the text.
10.1.1. Component List
ESP32-S3 WROOM x1
|
USB cable x1
|
2.8-inch Screen
|
ESP32-S3 WROOM Shield x1
|
||


10.1.2. Circuit
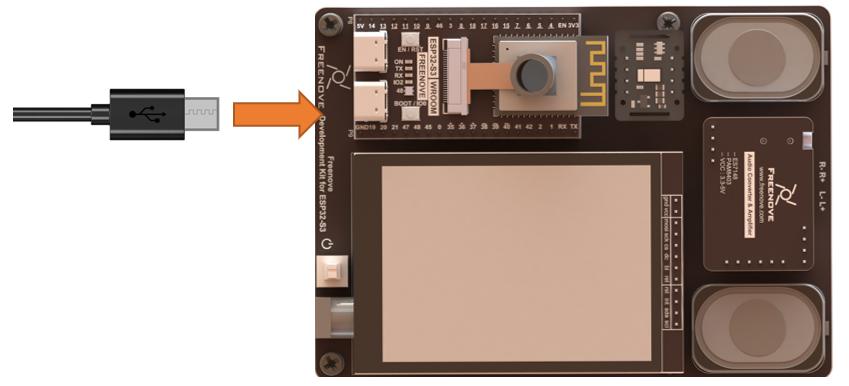
Connect Freenove ESP32-S3 to the computer using the USB cable.
Hardware connection. If you need any support, please feel free to contact us via: support@freenove.com
10.1.3. Sketch
10.1.3.1. Sketch_10_LVGL_Lable
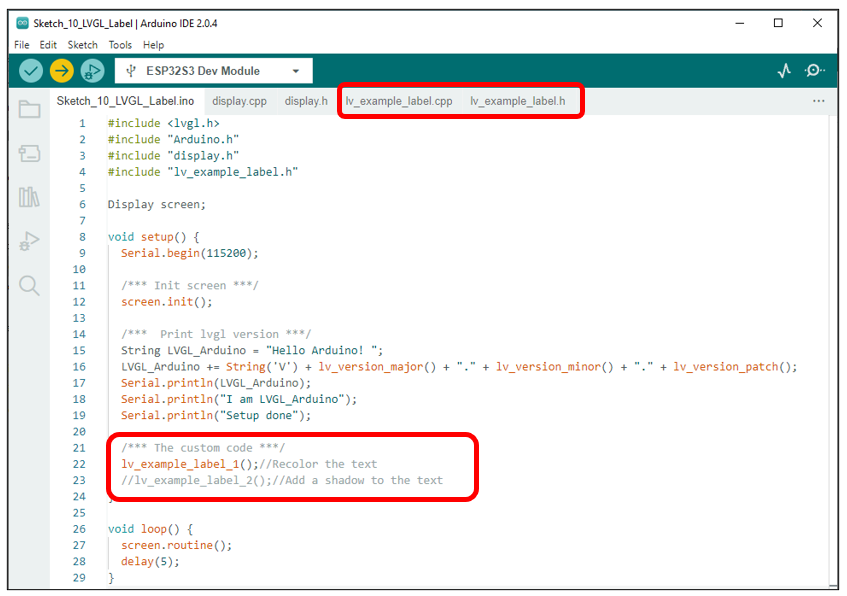
In the code, we have prepared two examples. After compiling and uploading the code with commented lines, the screen will display different content based on each example.
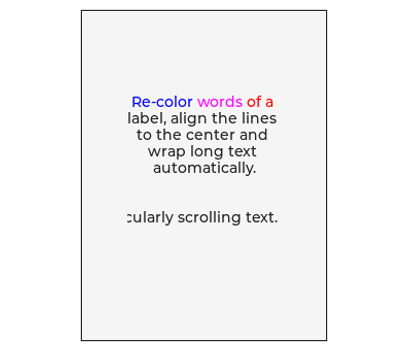
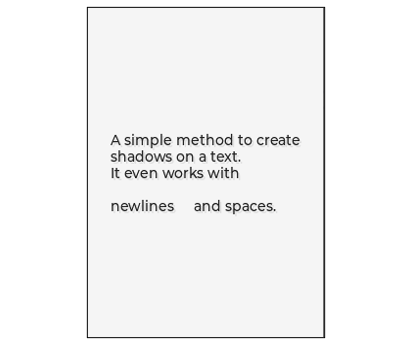
The following images show the display of the two examples.
lv_example_label_1 |
lv_example_label_2 |
|---|---|
|
|
The following is the program code:
10.1.3.2. Sketch_10_LVGL_Lable.ino
 1#include <lvgl.h>
 2#include "Arduino.h"
 3#include "display.h"
 4#include "lv_example_label.h"
 5
 6Display screen;
 7
 8void setup() {
 9  Serial.begin(115200);
10
11  /*** Init screen ***/
12  screen.init();
13
14  /***  Print lvgl version ***/
15  String LVGL_Arduino = "Hello Arduino! ";
16  LVGL_Arduino += String('V') + lv_version_major() + "." + lv_version_minor() + "." + lv_version_patch();
17  Serial.println(LVGL_Arduino);
18  Serial.println("I am LVGL_Arduino");
19  Serial.println("Setup done");
20
21  /*** The custom code ***/
22  lv_example_label_1();//Recolor the text
23  //lv_example_label_2();//Add a shadow to the text
24}
25
26void loop() {
27  screen.routine();
28  delay(5);
29}
To use some libraries, first you need to include their header files.
1#include <lvgl.h>
2#include "Arduino.h"
3#include "display.h"
4#include "lv_example_label.h"
Request a screen operation object to operate the screen.
1Display screen;
Initialize and configure the screen.
1screen.init();
Screen refresh function, by continuously calling this function, the interface can work properly.
1screen.routine();
Here are two examples of lables. We can comment out one of them to display the other. For the specific code, please refer to lv_example_lable.cpp and lv_example_lable.h files.
1/*** The custom code ***/
2lv_example_label_1();//Recolor the text
3//lv_example_label_2();//Add a shadow to the text
10.1.3.3. lv_example_lable.h
Declare two example functions so that they can be called in the ino file.
1#ifndef __LV_EXAMPLE_LABLE_H
2#define __LV_EXAMPLE_LABLE_H
3
4void lv_example_label_1(void);
5void lv_example_label_2(void);
6
7#endif
10.1.3.4. lv_example_lable.cpp
Here is the complete code.
 1
 2#include "lvgl.h"
 3#include "lv_example_label.h"
 4
 5/*************** Example 1 ****************************/
 6/**
 7 * Show line wrap, re-color, line align and text scrolling.
 8 */
 9void lv_example_label_1(void)
10{
11    lv_obj_t * label1 = lv_label_create(lv_scr_act());
12
13    /*
14    LV_LABEL_LONG_WRAP,             Keep the width of the object, wrap the line if the text is too long, and enlarge the height of the object
15    LV_LABEL_LONG_DOT,              Keep the text size, and if it's too long, put dots at the end
16    LV_LABEL_LONG_SCROLL,           Keep the text size and scroll back and forth
17    LV_LABEL_LONG_SCROLL_CIRCULAR,  Keep the text size and scroll the text
18    LV_LABEL_LONG_CLIP,             Keep the size, and clip the text (keep only the front part of the display)
19    */
20
21    /*Support long text, if the width is not enough to display, then continue to display the newline*/
22    lv_label_set_long_mode(label1, LV_LABEL_LONG_WRAP);
23    lv_label_set_recolor(label1, true);                           /*Enable recolor through commands in the text*/
24    lv_label_set_text(label1, "#0000ff Re-color# #ff00ff words# #ff0000 of a # label, align the lines to the center and wrap long text automatically.");
25    lv_obj_set_width(label1, 150);                                /*Set a small width to wrap lines automatically*/
26    lv_obj_set_style_text_align(label1, LV_TEXT_ALIGN_CENTER, 0); /*Set the label width to center*/
27    lv_obj_align(label1, LV_ALIGN_CENTER, 0, -40);                /*Set the label height to a distance of between mid-40 pixels*/
28
29    lv_obj_t * label2 = lv_label_create(lv_scr_act());
30    lv_label_set_long_mode(label2, LV_LABEL_LONG_SCROLL);     /*Circular scroll*/
31    lv_obj_set_width(label2, 150);
32    lv_label_set_text(label2, "It is a circularly scrolling text. ");
33    lv_obj_align(label2, LV_ALIGN_CENTER, 0, 40);
34}
35
36/*************** Example 2 ****************************/
37/**
38 * Create a fake text shadow
39 */
40void lv_example_label_2(void)
41{
42    /*Create a style for the shadow*/
43    static lv_style_t style_shadow;//Apply for a style object
44    lv_style_init(&style_shadow);  //Initialize the object
45    lv_style_set_text_opa(&style_shadow, LV_OPA_30);//Set the opacity to 30
46    lv_style_set_text_color(&style_shadow, lv_color_black());//Set the text color to black
47
48    /*Create a label for the shadow first (it's in the background)*/
49    lv_obj_t * shadow_label = lv_label_create(lv_scr_act());
50    lv_obj_add_style(shadow_label, &style_shadow, 0);
51
52    /*Create the main label*/
53    lv_obj_t * main_label = lv_label_create(lv_scr_act());
54    lv_label_set_text(main_label, "A simple method to create\n"
55                      "shadows on a text.\n"
56                      "It even works with\n\n"
57                      "newlines     and spaces.");
58
59    /*Set the same text for the shadow label*/
60    lv_label_set_text(shadow_label, lv_label_get_text(main_label));
61
62    /*Position the main label*/
63    lv_obj_align(main_label, LV_ALIGN_CENTER, 0, 0);
64
65    /*Shift the second label down and to the right by 2 pixel*/
66    lv_obj_align_to(shadow_label, main_label, LV_ALIGN_TOP_LEFT, 2, 2);
67}
Create a label component in the current interface and assign it to a component type pointer variable label1.
1lv_obj_t * label1 = lv_label_create(lv_scr_act());
Sets the mode of this label component.
1lv_label_set_long_mode(label1, LV_LABEL_LONG_WRAP);
To re-customize the color of the font, please refer to the following two sentences.
1lv_label_set_recolor(label1, true);                           /*Enable recolor through commands in the text*/
2lv_label_set_text(label1, "#0000ff Re-color# #ff00ff words# #ff0000 of a # label, align the lines to the center and wrap long text automatically.");
Set the display width of the label component. If the content to be displayed exceeds this length, the remaining text will be displayed according to the default settings of the label component.
1lv_obj_set_width(label1, 150); /*Set a small width to wrap lines automatically*/
Set the text content of the label component to be displayed in the center.
1lv_obj_set_style_text_align(label1, LV_TEXT_ALIGN_CENTER, 0); /*Set the label width to center*/
Set the label component to be located 40 pixels down from the center of the screen as a reference point.
1lv_obj_align(label1, LV_ALIGN_CENTER, 0, -40); /*Set the label height to a distance of between mid-40 pixels*/
Declare a variable of type “style” and name it “style_shadow”, then initialize this variable.
1static lv_style_t style_shadow;//Apply for a style object
2lv_style_init(&style_shadow);  //Initialize the object
Set the opacity of style_shadow to 30% and the color to black.
1lv_style_set_text_opa(&style_shadow, LV_OPA_30);//Set the opacity to 30
2lv_style_set_text_color(&style_shadow, lv_color_black());//Set the text color to black
Create a label component to serve as the shadow effect with the style set to style_shadow.
1lv_obj_t * shadow_label = lv_label_create(lv_scr_act());
2lv_obj_add_style(shadow_label, &style_shadow, 0);
Define a label component to display the main text and set its content.
1lv_obj_t * main_label = lv_label_create(lv_scr_act());
2lv_label_set_text(main_label, "A simple method to create\n"
3                  "shadows on a text.\n"
4                  "It even works with\n\n"
5                  "newlines     and spaces.");
Read the content of the main_lable1 component and copy the content to the shadow_label component
1lv_label_set_text(shadow_label, lv_label_get_text(main_label));
Display the content of the main_lable1 component in the center of the screen, and use main_lable1 as a reference to display the content of shadow_label1 2 pixels below and 2 pixels to the right of main_lable1, creating a shadow effect.
1/*Position the main label*/
2lv_obj_align(main_label, LV_ALIGN_CENTER, 0, 0);
3
4/*Shift the second label down and to the right by 2 pixel*/
5lv_obj_align_to(shadow_label, main_label, LV_ALIGN_TOP_LEFT, 2, 2);
To learn more abou LVGL, please refer to the link below: