Chapter 13 LVGL
Project 13.1 LVGL
Component List
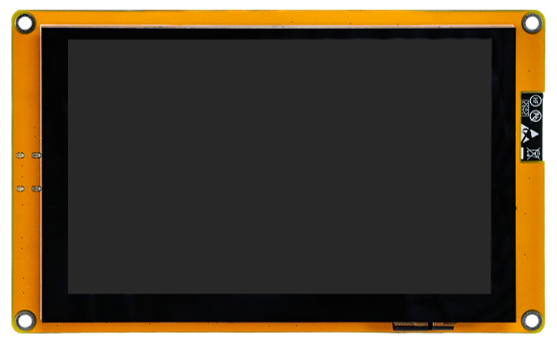
Freenove ESP32-S3 Display x 1
|
USB cable x1
|
Component Knowledge
Features supported by LVGL |
|
1 |
Powerful building blocks such as buttons, charts, lists, sliders, images, and more. |
2 |
Advanced graphics with animation, anti-aliasing, opacity, and smooth scrolling. |
3 |
Various input devices, such as touchpads, mice, keyboards, encoders, and more. |
4 |
Multiple languages with UTF-8 encoding. |
5 |
Multiple display types, including TFT and monochrome displays. |
6 |
Fully customizable graphical elements. |
7 |
LVGL can be used independently of any microcontroller or display hardware. |
8 |
Highly extensible and can be configured to use very little memory (e.g. 64 kB of flash and 16 kB of RAM) |
9 |
It can be used with or without an operating system, and supports external memory and GPUs as optional features. |
10 |
Single-frame buffer operation, even with advanced graphics effects. |
11 |
Written in C language to achieve maximum compatibility (compatible with C++ as well). |
12 |
LVGL has a simulator that allows for embedded GUI design on a PC without any embedded hardware. |
13 |
Resources to help developers quickly get started with the library, including tutorials, examples, and themes. |
14 |
A wide range of resources. |
Circuit
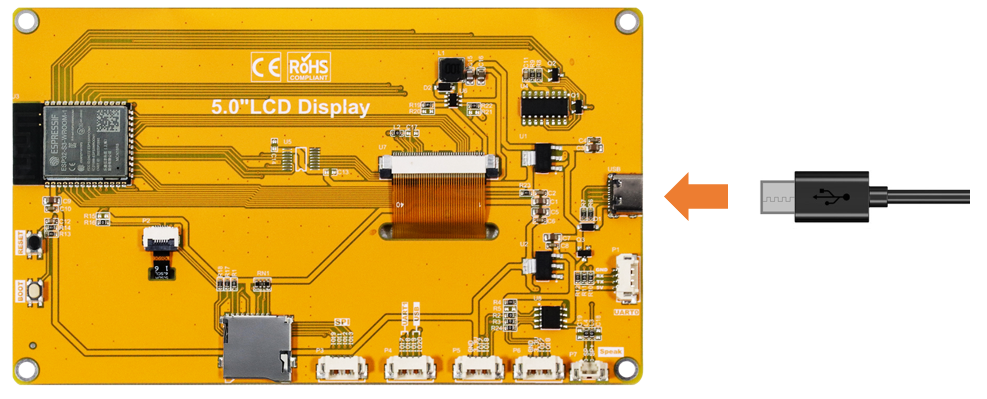
Connect Freenove ESP32-S3 Display to the computer using the USB cable.
Sketch
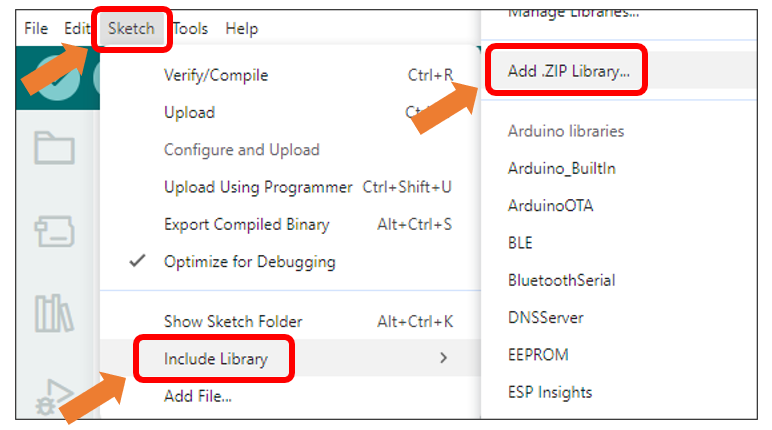
Click Sketch -> Include Library -> Add .ZIP Library…
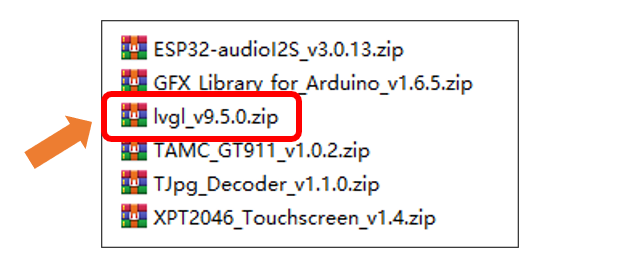
Select lvgl_9.5.0.zip
Open “Sketch_13.1_Lvgl” folder under “Freenove_ESP32_S3_Display_FNK0115\Sketches” and double-click “Sketch_13.1_Lvgl.ino”.
Sketch_13.1_Lvgl
The following is the program code:
 1/*
 2* @ File:   Sketch_13.1_LVGL.ino
 3* @ Author: [Eason Shen]
 4* @ Date:   [2026-07-03]
 5*/
 6
 7#include "lvgl_display.h"
 8
 9static lv_display_t * disp;
10static uint8_t buf[LCD_WIDTH * LCD_HEIGHT / 10 * 2];
11
12void setup() {
13  Serial.begin(115200);
14
15  // Screen initialization
16  Display_Init();
17
18  lv_init();
19
20  /* Setup display abstraction layer */
21  disp = lv_display_create(LCD_WIDTH, LCD_HEIGHT);
22  lv_display_set_flush_cb(disp, my_disp_flush);
23  lv_display_set_buffers(disp, buf, NULL, sizeof(buf), LV_DISPLAY_RENDER_MODE_PARTIAL);
24
25  /* UI initialization and version logging */
26  String LVGL_Arduino = "Hello Arduino! ";
27  LVGL_Arduino += String('V') + lv_version_major() + "." + lv_version_minor() + "." + lv_version_patch();
28
29  Serial.println(LVGL_Arduino);
30  Serial.println("System Ready: LVGL initialized");
31
32  /* Create and center-align a label widget */
33  lv_obj_t *label = lv_label_create(lv_screen_active());
34  lv_label_set_text(label, LVGL_Arduino.c_str());
35  lv_obj_align(label, LV_ALIGN_CENTER, 0, 0);
36  #if defined(FNK0115L_4_3_IPS) || defined(FNK0115N_5_0_TN) || defined(FNK0115Q_5_0_IPS)
37    lv_obj_set_style_text_font(label, &lv_font_montserrat_24, 0);
38  #elif defined(FNK0115B_4_3_TN)
39    lv_obj_set_style_text_font(label, &lv_font_montserrat_14, 0);
40  #endif
41  Turn_On_BL();
42}
43
44void loop() {
45  /* Update library tick and process pending UI tasks */
46  lv_tick_inc(5);
47  lv_timer_handler();
48  delay(5);
49}
Code Explanation
Include the required header file.
1#include "lvgl_display.h"
Declare the LVGL display object.
1static lv_display_t * disp;
Define the display buffer.
1static uint8_t buf[LCD_WIDTH * LCD_HEIGHT / 10 * 2];
Set the baud rate to 115200.
1Serial.begin(115200);
Initialize the screen and LVGL.
1Display_Init();
2
3lv_init();
Configure the display abstraction layer.
1disp = lv_display_create(LCD_WIDTH, LCD_HEIGHT);
2lv_display_set_flush_cb(disp, my_disp_flush);
3lv_display_set_buffers(disp, buf, NULL, sizeof(buf), LV_DISPLAY_RENDER_MODE_PARTIAL);
Create UI display content.
1/* UI initialization and version logging */
2String LVGL_Arduino = "Hello Arduino! ";
3LVGL_Arduino += String('V') + lv_version_major() + "." + lv_version_minor() + "." + lv_version_patch();
4
5Serial.println(LVGL_Arduino);
6Serial.println("System Ready: LVGL initialized");
Create UI widgets.
1/* Create and center-align a label widget */
2lv_obj_t *label = lv_label_create(lv_screen_active());
3lv_label_set_text(label, LVGL_Arduino.c_str());
4lv_obj_align(label, LV_ALIGN_CENTER, 0, 0);
5#if defined(FNK0115L_4_3_IPS) || defined(FNK0115N_5_0_TN) || defined(FNK0115Q_5_0_IPS)
6  lv_obj_set_style_text_font(label, &lv_font_montserrat_24, 0);
7#elif defined(FNK0115B_4_3_TN)
8  lv_obj_set_style_text_font(label, &lv_font_montserrat_14, 0);
9#endif
Turn on the backlight.
1Turn_On_BL();
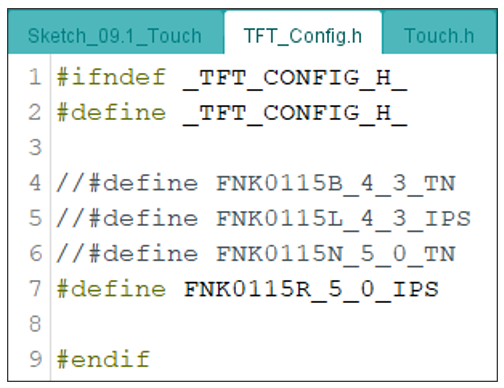
Before uploading the code, open the TFT_Config.h file and uncomment the corresponding line according to your hardware model. As shown in the figure, enabling #define FNK0115R_5_0_IPS selects the FNK0115R 5.0-inch IPS screen.
Note
Make sure that only one device macro definition is enabled.
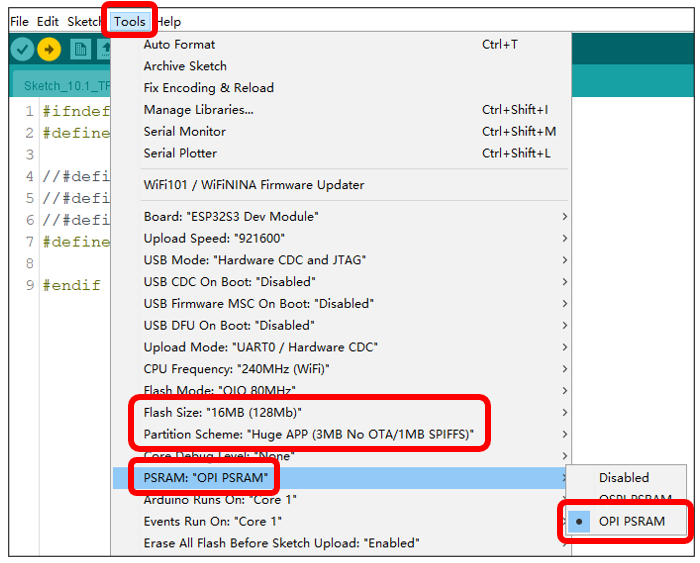
Before uploading the code, change the configuration, enable OPI PSRAM, and configure the Flash settings correctly. Otherwise, the screen will not work properly.
Click “Upload” to upload the code to Freenove ESP32 S3 Display.
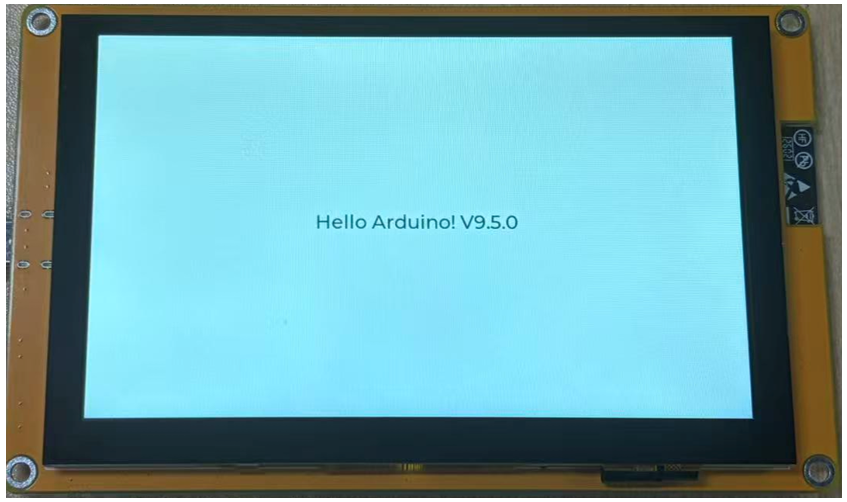
After uploading is complete, the following interface will be displayed.