9. Chapter Thermistor
In this chapter, we will learn about Thermistors which are another kind of Resistor.
9.1. Project Thermometer
A Thermistor is a type of Resistor whose resistance value is dependent on temperature and changes in temperature. Therefore, we can take advantage of this characteristic to make a Thermometer.
9.1.1. Component List
|
|
Thermistor x1
|
|
ADC module x1 |
|
Jumper Wire M/M x14 |
|


9.1.2. Component knowledge
9.1.2.1. Thermistor
Thermistor is a temperature sensitive resistor. When it senses a change in temperature, the resistance of the Thermistor will change. We can take advantage of this characteristic by using a Thermistor to detect temperature intensity. A Thermistor and its electronic symbol are shown below.

The relationship between resistance value and temperature of a thermistor is:
Where:
Rt is the thermistor resistance under T2 temperature;
R is in the nominal resistance of thermistor under T1 temperature;
EXP[n] is nth power of e;
B is for thermal index;
T1, T2 is Kelvin temperature (absolute temperature). Kelvin temperature=273.15 + Celsius temperature.
For the parameters of the Thermistor, we use: B=3950, R=10k, T1=25.
The circuit connection method of the Thermistor is similar to photoresistor, as the following:
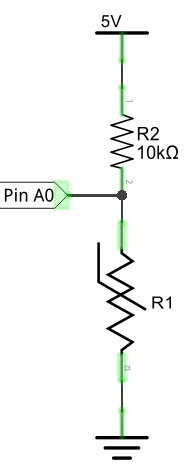
We can use the value measured by the ADC converter to obtain the resistance value of Thermistor, and then we can use the formula to obtain the temperature value.
Therefore, the temperature formula can be derived as:
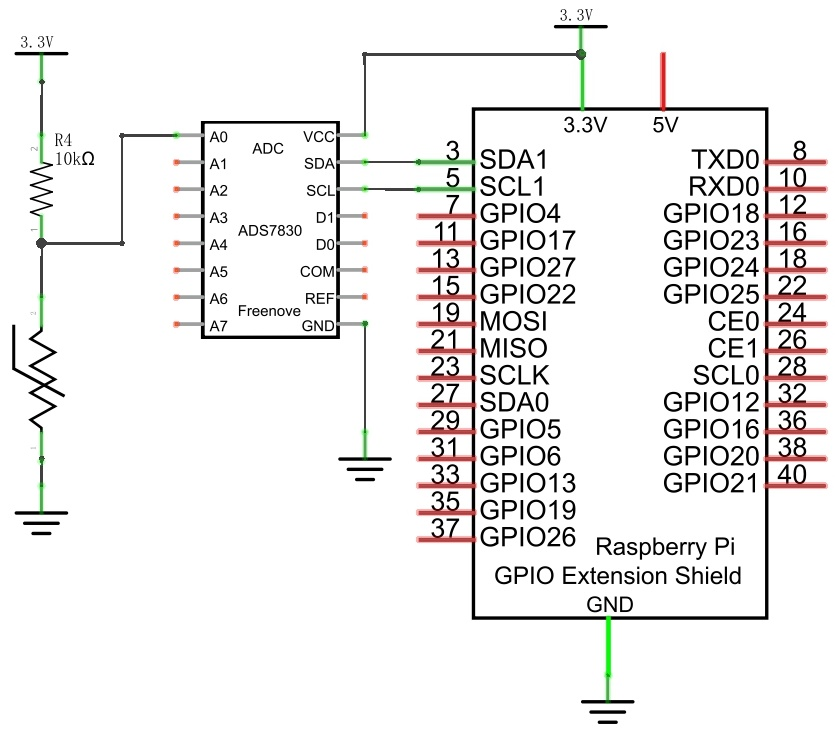
9.1.3. Circuit
The circuit of this project is similar to the one in last chapter. The only difference is that the Photoresistor is replaced by the Thermistor.
Schematic diagram
|
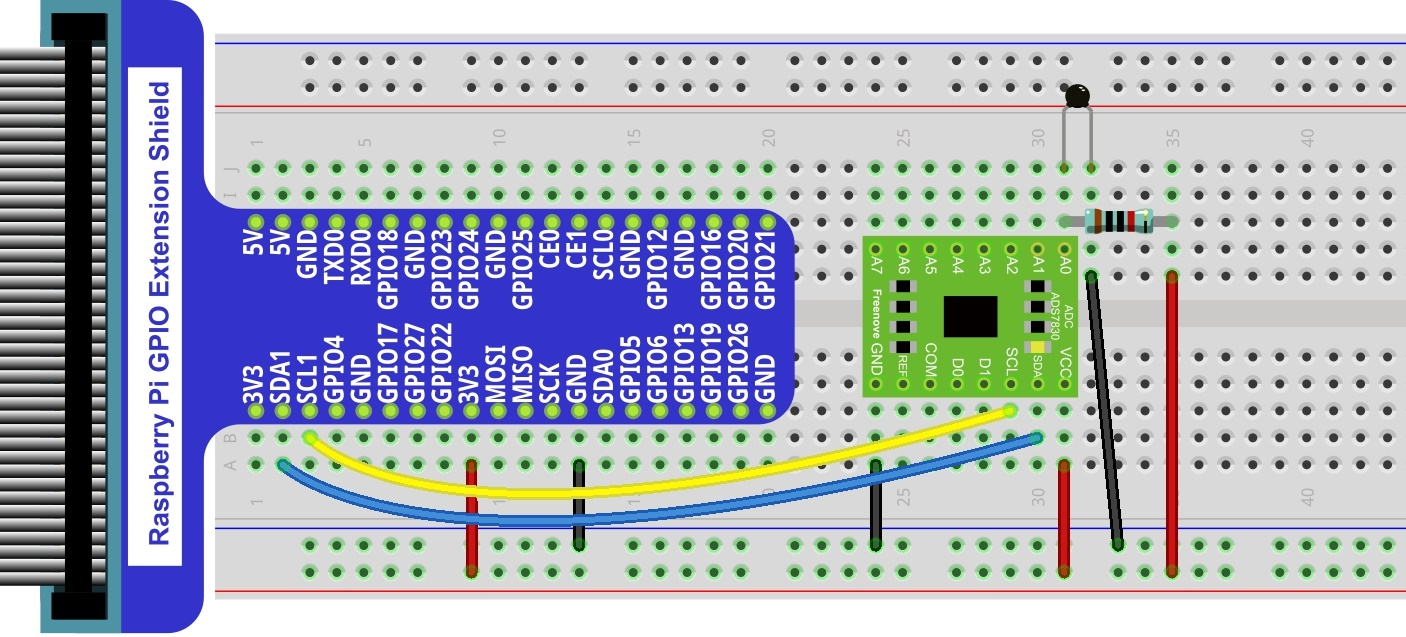
Hardware connection. If you need any support,please feel free to contact us via:
|
9.1.4. Sketch
In this project, we will collect the ADC value of the thermistor and calculate its temperature.
9.1.4.1. Sketch_Thermometer
First, enter where the project is located:
$ cd ~/Freenove_Kit/Pi4j/Sketches/Sketch_09_Thermometer

Enter the command to run the code.
$ jbang Thermometer.java
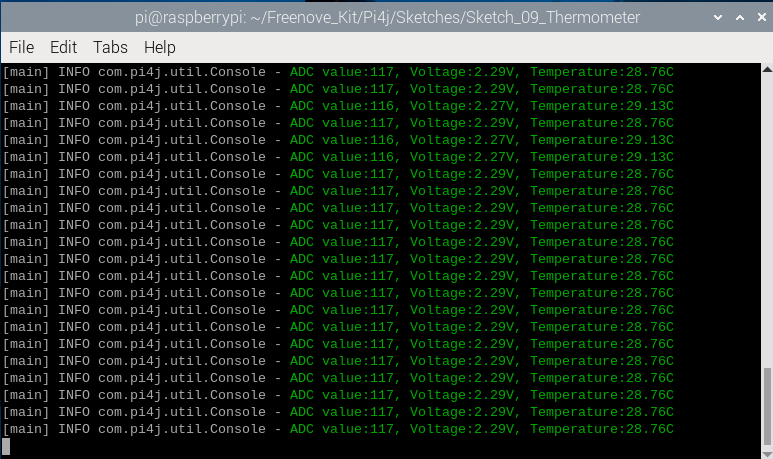
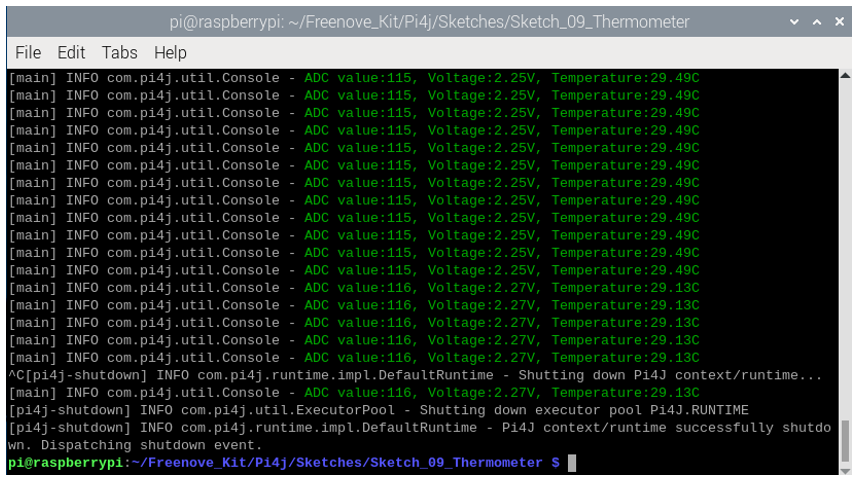
After running the code, the Raspberry Pi will obtain the ADC value of the thermistor and convert it into voltage and temperature values, as shown in the figure below.
Press Ctrl+C to exit the program.
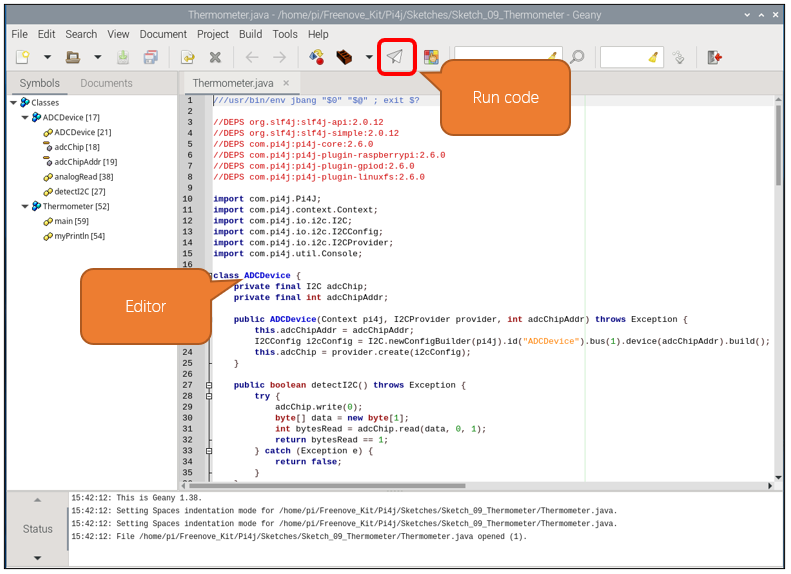
You can open the code with Geany to view and edit it.
$ geany Thermometer.java
Click the icon to run the code.
If the code fails to run, please check Geany Configuration.
The following is program code:
 1///usr/bin/env jbang "$0" "$@" ; exit $?
 2
 3//DEPS org.slf4j:slf4j-api:2.0.12
 4//DEPS org.slf4j:slf4j-simple:2.0.12
 5//DEPS com.pi4j:pi4j-core:2.6.0
 6//DEPS com.pi4j:pi4j-plugin-raspberrypi:2.6.0
 7//DEPS com.pi4j:pi4j-plugin-gpiod:2.6.0
 8//DEPS com.pi4j:pi4j-plugin-linuxfs:2.6.0
 9
10import com.pi4j.Pi4J;
11import com.pi4j.context.Context;
12import com.pi4j.io.i2c.I2C;
13import com.pi4j.io.i2c.I2CConfig;
14import com.pi4j.io.i2c.I2CProvider;
15import com.pi4j.util.Console;
16
17class ADCDevice {
18    private final I2C adcChip;
19    private final int adcChipAddr;
20
21    public ADCDevice(Context pi4j, I2CProvider provider, int adcChipAddr) throws Exception {
22        this.adcChipAddr = adcChipAddr;
23        I2CConfig i2cConfig = I2C.newConfigBuilder(pi4j).id("ADCDevice").bus(1).device(adcChipAddr).build();
24        this.adcChip = provider.create(i2cConfig);
25    }
26
27    public boolean detectI2C() throws Exception {
28        try {
29            adcChip.write(0);
30            byte[] data = new byte[1];
31            int bytesRead = adcChip.read(data, 0, 1);
32            return bytesRead == 1;
33        } catch (Exception e) {
34            return false;
35        }
36    }
37
38    public int analogRead(int chn) {
39        byte command = (byte) (0x84 | (((chn << 2 | chn >> 1) & 0x07) << 4));
40        adcChip.write(command);
41        byte[] data = new byte[1];
42        int bytesRead = adcChip.read(data, 0, 1);
43        if (bytesRead == 1) {
44            int adcValue = data[0] & 0xFF;
45            return adcValue;
46        } else {
47            return -1;
48        }
49    }
50}
51
52public class Thermometer{
53    public static void myPrintln(String format, Object... args) {
54        Console console = new Console();
55        console.println(String.format("\u001B[32m" + format + "\u001B[0m", args));
56    }
57
58    public static void main(String[] args) throws Exception {
59        Context pi4j = Pi4J.newAutoContext();
60        I2CProvider i2CProvider = pi4j.provider("linuxfs-i2c");
61        try {
62            int ADC_CHIP_ADDR = 0x4B;
63            ADCDevice adcDevice = new ADCDevice(pi4j, i2CProvider, ADC_CHIP_ADDR);
64            if (adcDevice.detectI2C()) {
65                int ADC_CHANNEL = 0;
66                while (true) {
67                    int adcValue = adcDevice.analogRead(ADC_CHANNEL);
68                    if (adcValue != -1) {
69                        double voltage = (double)adcValue / 255.0 * 5.0;    // calculate voltage
70                        double Rt = 10 * voltage / (5.0 - voltage);        //calculate resistance value of thermistor
71                        double tempK = 1/(1/(273.15 + 25) + Math.log(Rt/10)/3950.0); //calculate temperature (Kelvin)
72                        double tempC = tempK -273.15;        //calculate temperature (Celsius)
73                        myPrintln("ADC value:%d, Voltage:%.2fV, Temperature:%.2fC", adcValue, voltage, tempC);
74                    } else {
75                        myPrintln("Failed to read data from ADC.");
76                    }
77                    Thread.sleep(100);
78                }
79            } else {
80                myPrintln("ADS7830 device not detected at address 0x" + Integer.toHexString(ADC_CHIP_ADDR));
81            }
82        } finally {
83            pi4j.shutdown();
84        }
85    }
86}
Get the ADC value of the thermistor every 100 milliseconds, convert the ADC value into a temperature value according to the formula introduced at component knowledge section, and print the relevant information on the terminal.
 1int ADC_CHANNEL = 0;
 2while (true) {
 3    int adcValue = adcDevice.analogRead(ADC_CHANNEL);
 4    if (adcValue != -1) {
 5        double voltage = (double)adcValue / 255.0 * 5.0;    // calculate voltage
 6        double Rt = 10 * voltage / (5.0 - voltage);        //calculate resistance value of thermistor
 7        double tempK = 1/(1/(273.15 + 25) + Math.log(Rt/10)/3950.0); //calculate temperature (Kelvin)
 8        double tempC = tempK -273.15;        //calculate temperature (Celsius)
 9        myPrintln("ADC value:%d, Voltage:%.2fV, Temperature:%.2fC", adcValue, voltage, tempC);
10    } else {
11        myPrintln("Failed to read data from ADC.");
12    }
13    Thread.sleep(100);
14}