18. Chapter 74HC595 & 7-Segment Display
In this chapter, we will introduce the 7-Segment Display.
18.1. Project 7-Segment Display
We will use a 74HC595 IC Chip to control a 7-Segment Display and make it display sixteen decimal characters “0” to “F”.
18.1.1. Component List
|
Jumper Wires x30 |
||
74HC595 x1 |
7-Segment Display x1 |
Resistor 220Ω x8 |
|


18.1.2. Component knowledge
18.1.2.1. 7-segment display
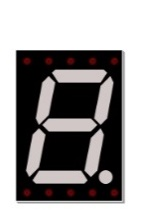
A 7-Segment Display is a digital electronic display device. There is a figure “8” and a decimal point represented, which consists of 8 LEDs. The LEDs have a Common Anode and individual Cathodes. Its internal structure and pin designation diagram is shown below:
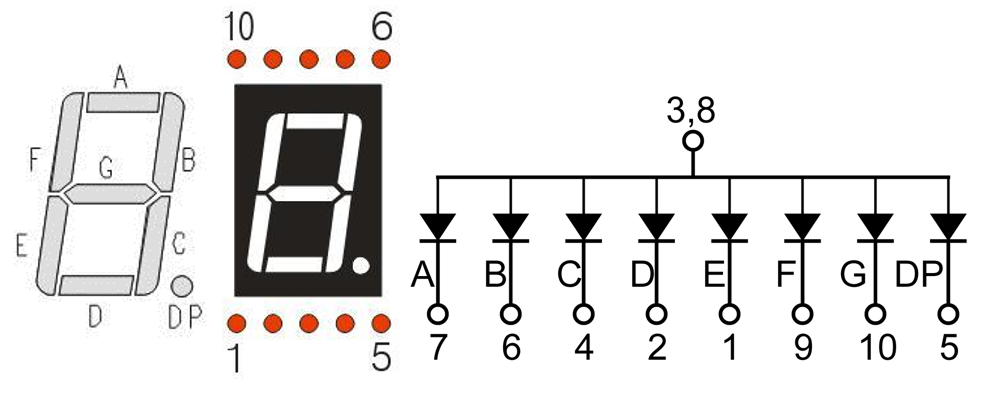
As we can see in the above circuit diagram, we can control the state of each LED separately. Also, by combining LEDs with different states of ON and OFF, we can display different characters (Numbers and Letters). For example, to display a “0”: we need to turn ON LED segments A, B, C, D, E and F, and turn OFF LED segments G and DP.
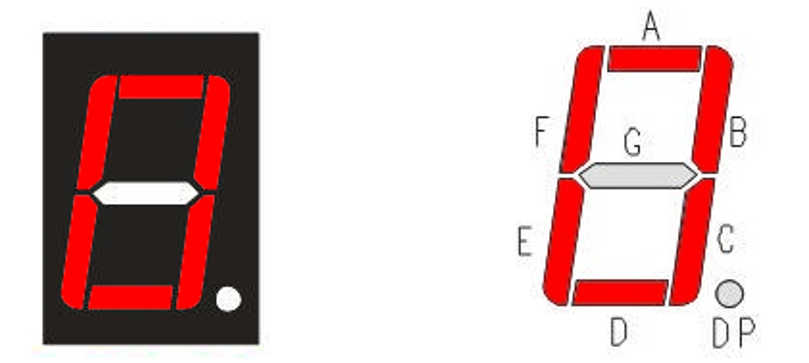
In this project, we will use a 7-Segment Display with a Common Anode. Therefore, when there is an input low level to an LED segment the LED will turn ON. Defining segment “A” as the lowest level and segment “DP” as the highest level, from high to low would look like this: “DP”, “G”, “F”, “E”, “D”, “C”, “B”, “A”. Character “0” corresponds to the code: 1100 0000b=0xc0.
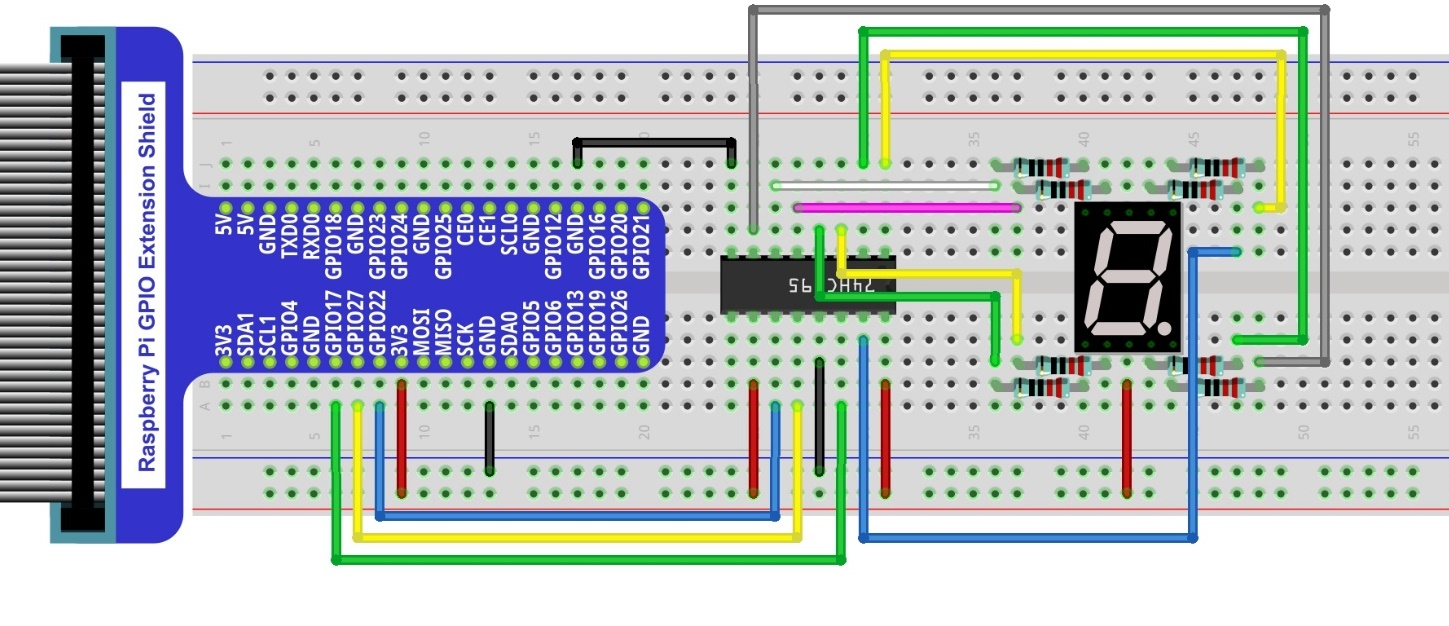
18.1.3. Circuit
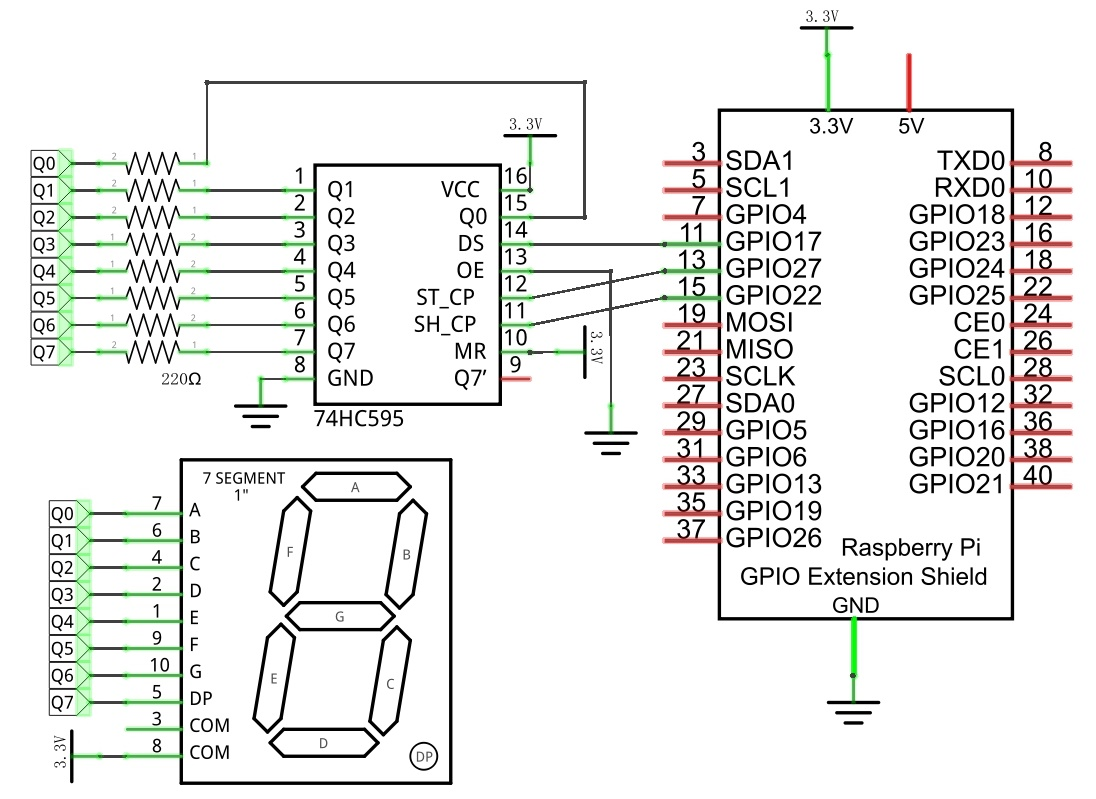
Schematic diagram
|
Hardware connection. If you need any support,please feel free to contact us via:
|
18.1.4. Code
This code uses a 74HC595 IC Chip to control the 7-Segment Display. The use of the 74HC595 IC Chip is generally the same throughout this Tutorial. We need code to display the characters “0” to “F” one character at a time, and then output to display them with the 74HC595 IC Chip.
18.1.4.1. Python Code SevenSegmentDisplay
First, observe the project result, and then learn about the code in detail.
Hint
If you have any concerns, please contact us via: support@freenove.com
Use cd command to enter 18.1.1_SevenSegmentDisplay directory of Python code.
$ cd ~/Freenove_Kit/Code/Python_GPIOZero_Code/18.1.1_SevenSegmentDisplay
Use Python command to execute Python code “SevenSegmentDisplay.py”.
$ python SevenSegmentDisplay.py
After the program is executed, the 7-Segment Display starts to display the characters “0” to “F” in succession.
The following is the program code:
 1#!/usr/bin/env python3
 2#############################################################################
 3# Filename    : SevenSegmentDisplay.py
 4# Description : Control SevenSegmentDisplay with 74HC595
 5# Author      : www.freenove.com
 6# modification: 2023/05/15
 7########################################################################
 8from gpiozero import OutputDevice
 9import time
10
11LSBFIRST = 1
12MSBFIRST = 2
13# define the pins for 74HC595
14dataPin   = OutputDevice(17)      # DS Pin of 74HC595(Pin14)
15latchPin  = OutputDevice(27)      # ST_CP Pin of 74HC595(Pin12)
16clockPin  = OutputDevice(22)      # CH_CP Pin of 74HC595(Pin11)
17# SevenSegmentDisplay display the character "0"- "F" successively
18num = [0xc0,0xf9,0xa4,0xb0,0x99,0x92,0x82,0xf8,0x80,0x90,0x88,0x83,0xc6,0xa1,0x86,0x8e]
19
20def shiftOut(order,val):
21    for i in range(0,8):
22        clockPin.off()
23        if(order == LSBFIRST):
24            dataPin.on() if (0x01&(val>>i)==0x01) else dataPin.off()
25        elif(order == MSBFIRST):
26            dataPin.on() if (0x80&(val<<i)==0x80) else dataPin.off()
27        clockPin.on()
28
29def loop():
30    while True:
31        for i in range(0,len(num)):
32            latchPin.off()
33            shiftOut(MSBFIRST,num[i])  # Send serial data to 74HC595
34            latchPin.on()
35            time.sleep(0.5)
36        for i in range(0,len(num)):
37            latchPin.off()
38            shiftOut(MSBFIRST,num[i]&0x7f) # Use "&0x7f" to display the decimal point.
39            latchPin.on()
40            time.sleep(0.5)
41
42def destroy():
43    dataPin.close()
44    latchPin.close()
45    clockPin.close()
46
47if __name__ == '__main__': # Program entrance
48    print ('Program is starting...' )
49    try:
50        loop()
51    except KeyboardInterrupt:  # Press ctrl-c to end the program.
52        destroy()
53        print("Ending program")
First, we need to create encoding for characters “0” to “F” in the array.
1num = [0xc0,0xf9,0xa4,0xb0,0x99,0x92,0x82,0xf8,0x80,0x90,0x88,0x83,0xc6,0xa1,0x86,0x8e]
In the “for” loop of loop() function, use the 74HC595 IC Chip to output contents of array “num” successively. SevenSegmentDisplay can then correctly display the corresponding characters. Pay attention to this in regard to shiftOut function, the transmission bit, flag bit amd highest bit will be transmitted preferentially.
1for i in range(0,len(num)):
2    latchPin.off()
3    shiftOut(MSBFIRST,num[i]) #Output the figures and the highest level is transfered preferentially.
4    latchPin.on()
5    time.sleep(0.5)
If you want to display the decimal point, make the highest bit of each array “0”, which can be implemented easily by num[i]&0x7f.
1shiftOut(MSBFIRST,num[i]&0x7f) # Use "&0x7f" to display the decimal point.
For more information about the methods used by the OutputDevice class in the GPIO Zero library,please refer to: https://gpiozero.readthedocs.io/en/stable/api_output.html#outputdevice