Chapter 20 LCD1602
In this chapter, we will learn about the LCD1602 Display Screen.
Project 20.1 LCD1602
In this section we learn how to use LCD1602 to display something.
Component List
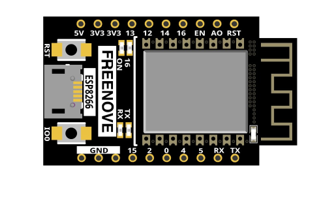
ESP8266 x1
|
USB cable |
Breadboard x1
|
|
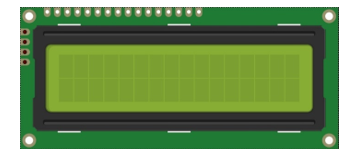
LCD1602 Module x1
|
Jumper wire F/M x6 |
Component knowledge
I2C communication
I2C (Inter-Integrated Circuit) is a two-wire serial communication mode, which can be used for the connection of micro controllers and their peripheral equipment. Devices using I2C communication must be connected to the serial data (SDA) line, and serial clock (SCL) line (called I2C bus). Each device has a unique address and can be used as a transmitter or receiver to communicate with devices connected to the bus.
LCD1602 communication’
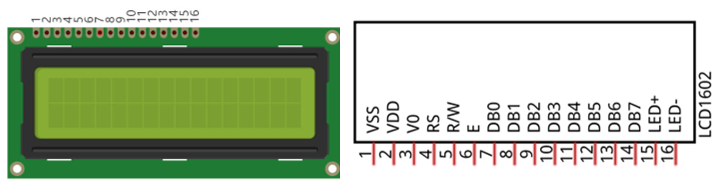
The LCD1602 display screen can display 2 lines of characters in 16 columns. It is capable of displaying numbers, letters, symbols, ASCII code and so on. As shown below is a monochrome LCD1602 display screen along with its circuit pin diagram.
I2C LCD1602 display screen integrates a I2C interface, which connects the serial-input & parallel-output module to the LCD1602 display screen. This allows us to only use 4 lines to the operate the LCD1602.
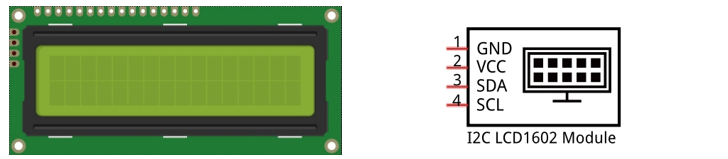
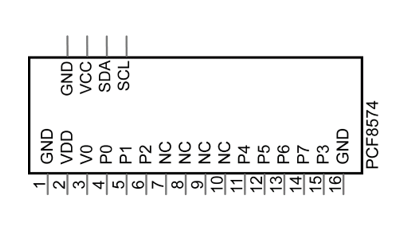
The serial-to-parallel IC chip used in this module is PCF8574T (PCF8574AT), and its default I2C address is 0x27(0x3F).
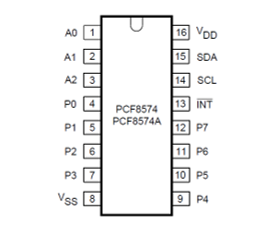
Below is the PCF8574 pin schematic diagram and the block pin diagram:
PCF8574 chip pin diagram: |
PCF8574 chip pin diagram: |
|
|
PCF8574 module pin and LCD1602 pin are corresponding to each other and connected with each other:
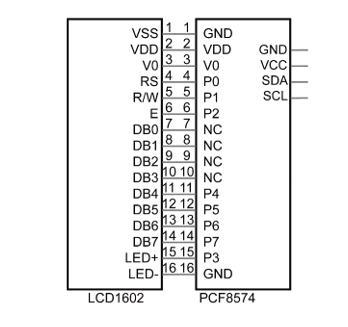
So we only need 4 pins to control the 16 pins of the LCD1602 display screen through the I2C interface.
In this project, we will use the I2C LCD1602 to display some static characters and dynamic variables.
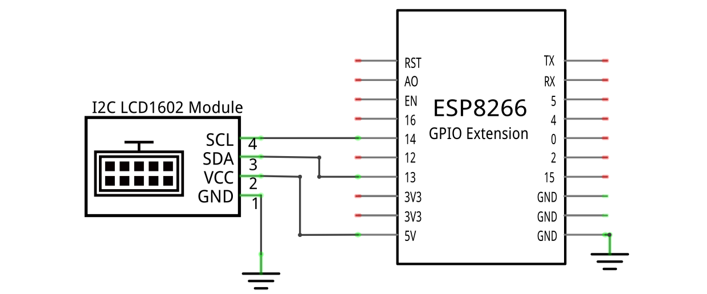
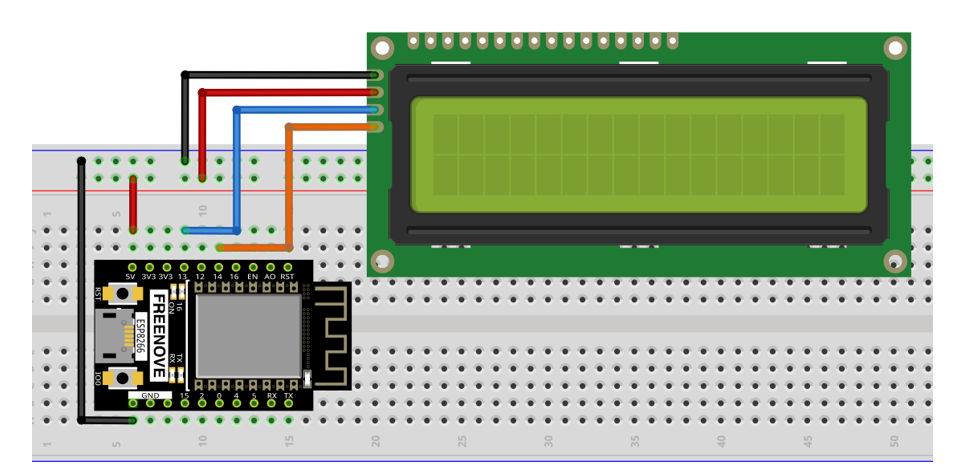
Circuit
Schematic diagram |
|
Hardware connection If you need any support, please feel free to contact us via: support@freenove.com |
|
Sketch
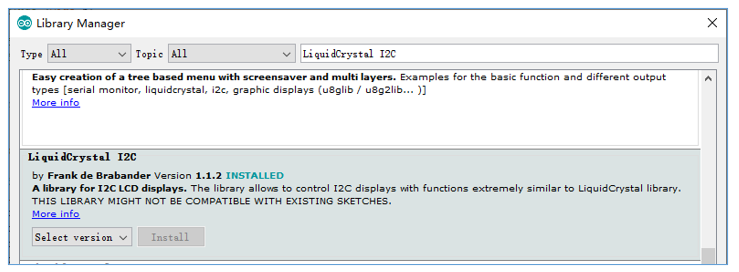
How to install the library
We use the third party library LiquidCrystal I2C. If you haven’t installed it yet, please do so before learning. The steps to add third-party Libraries are as follows: open arduino->Sketch->Include library-> Manage libraries. Enter “ LiquidCrystal I2C” in the search bar and select “ LiquidCrystal I2C “ for installation.
Use I2C LCD 1602 to display characters and variables.
Sketch_20.1_Display_the_string_on_LCD1602
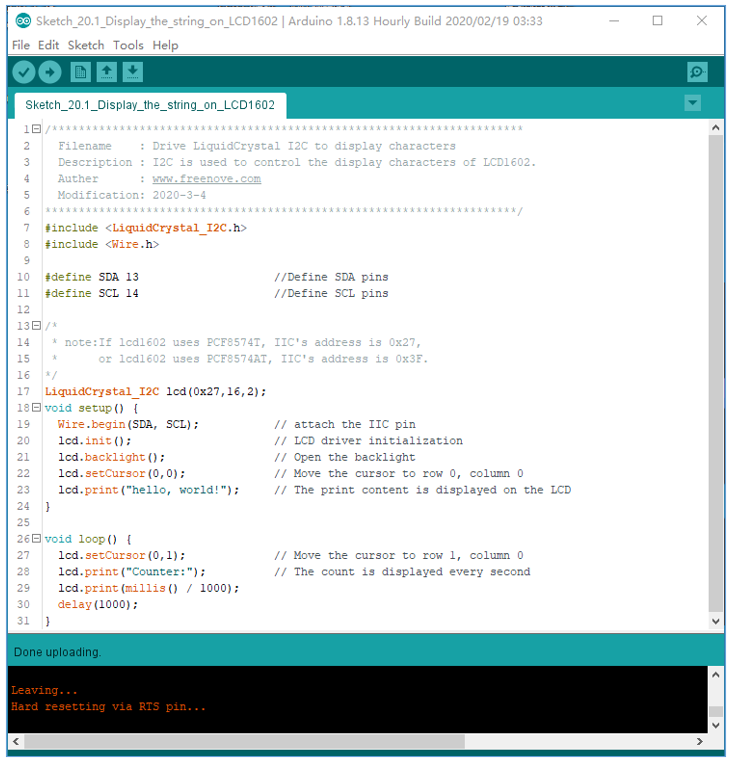
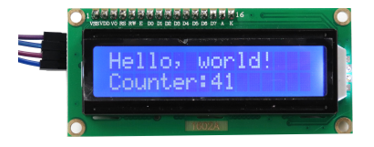
Compile and upload the code to ESP8266 and the LCD1602 displays characters.
The following is the program code:
 1/**********************************************************************
 2  Filename    : Drive LiquidCrystal I2C to display characters
 3  Description : I2C is used to control the display characters of LCD1602.
 4  Auther      : www.freenove.com
 5  Modification: 2020/07/11
 6**********************************************************************/
 7#include <LiquidCrystal_I2C.h>
 8#include <Wire.h>
 9
10#define SDA 13                    //Define SDA pins
11#define SCL 14                    //Define SCL pins
12
13/*
14 * note:If lcd1602 uses PCF8574T, IIC's address is 0x27,
15 *      or lcd1602 uses PCF8574AT, IIC's address is 0x3F.
16*/
17LiquidCrystal_I2C lcd(0x27,16,2);
18void setup() {
19  Wire.begin(SDA, SCL);           // attach the IIC pin
20  if (!i2CAddrTest(0x27)) {
21    lcd = LiquidCrystal_I2C(0x3F, 16, 2);
22  }
23  lcd.init();                     // LCD driver initialization
24  lcd.backlight();                // Open the backlight
25  lcd.setCursor(0,0);             // Move the cursor to row 0, column 0
26  lcd.print("hello, world!");     // The print content is displayed on the LCD
27}
28
29void loop() {
30  lcd.setCursor(0,1);             // Move the cursor to row 1, column 0
31  lcd.print("Counter:");          // The count is displayed every second
32  lcd.print(millis() / 1000);
33  delay(1000);
34}
35
36bool i2CAddrTest(uint8_t addr) {
37  Wire.begin();
38  Wire.beginTransmission(addr);
39  if (Wire.endTransmission() == 0) {
40    return true;
41  }
42  return false;
43}
Include header file of Liquid Crystal Display (LCD)1602 and I2C.
1#include <LiquidCrystal_I2C.h>
2#include <Wire.h>
Instantiate the I2C LCD1602 screen. It should be noted here that if your LCD driver chip uses PCF8574T, set the I2C address to 0x27, and if uses PCF8574AT, set the I2C address to 0x3F.
1LiquidCrystal_I2C lcd(0x27,16,2);
Initialize I2C and set its pins as 13,14. And then initialize LCD1602 and turn on the backlight of LCD.
1Wire.begin(SDA, SCL);           // attach the IIC pin
2lcd.init();                     // LCD driver initialization
3lcd.backlight();                // Turn on the backlight
Move the cursor to the first row, first column, and then display the character.
1lcd.setCursor(0,0);             // Move the cursor to row 0, column 0
2lcd.print("hello, world!");     // The print content is displayed on the LCD
Print the number on the second line of LCD1602.
1void loop() {
2  lcd.setCursor(0,1);             // Move the cursor to row 1, column 0
3  lcd.print("Counter:");          // The count is displayed every second
4  lcd.print(millis() / 1000);
5  delay(1000);
6}
Reference
- class LiquidCrystal
The LiquidCrystal class can manipulate common LCD screens. The first step is defining an object of
LiquidCrystal, for example:
LiquidCrystal_I2C lcd(0x27,16,2);
Instantiate the Lcd1602 and set the I2C address to 0x27, with 16 columns per row and 2 rows per column.
init();
Initializes the Lcd1602’s device
backlight();
Turn on Lcd1602’s backlight.
setCursor(column,row);
Sets the screen’s column and row.
column: The range is 0 to 15.
row: The range is 0 to 1.
print(String);
Print the character string on Lcd1602