Preface
Important Notes
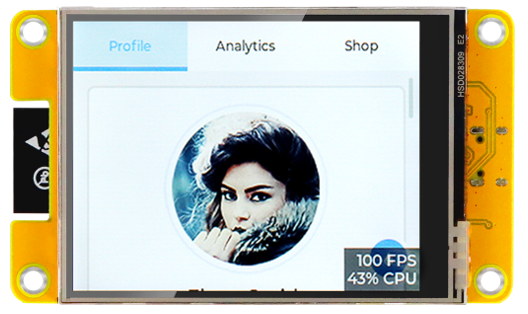
When you first power on the Freenove ESP32 Display, the screen will display a dynamic demo interface, featuring a modern user profile UI.
Please rest assured! This is not “malicious software” or a “used device.”
This is a classic benchmark/demo program built on LVGL, a popular open-source embedded graphics library. It serves as an industry-standard tool to evaluate and demonstrate the development board’s performance in rendering smooth graphics, handling animations, and supporting responsive touch interactions. You can easily overwrite it by uploading a new sketch. When you follow the tutorial to upload your first program, this demo will be automatically erased and replaced.
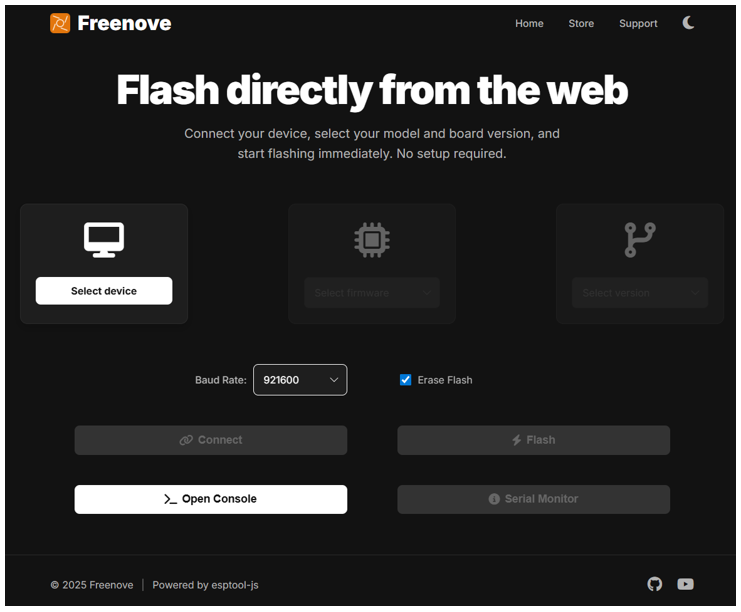
We provide a convenient web-based online flashing tool and a complete flashing tutorial. There’s no need to download any complex software. You can easily complete the flashing process in just a few minutes by selecting the firmware that matches your device model.
If you have any concerns, please feel free to contact us via support@freenove.com
ESP32-WROOM
The ESP32-WROOM offers two antenna options: the PCB on-board antenna and the IPEX antenna.
The PCB on-board antenna is an integrated antenna within the chip module itself, making it compact and convenient for both portability and design.
The IPEX antenna is an external metal antenna connected to the module’s integrated antenna, providing enhanced signal performance.
PCB on-board antenna
|
IPEX antenna
|
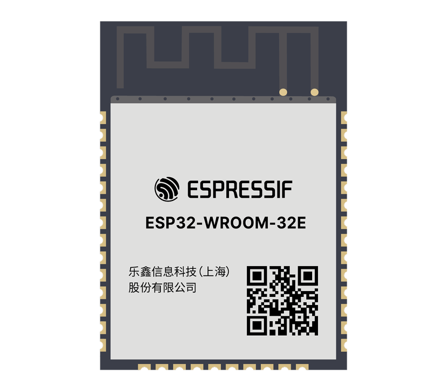
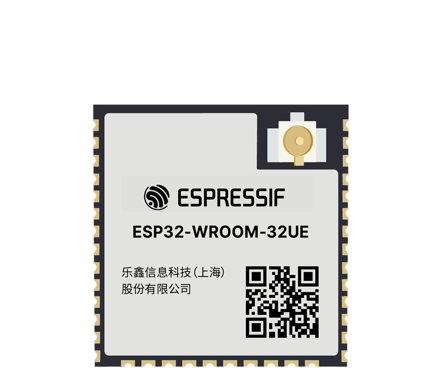
The ESP32-WROOM of this product is based on the ESP32-WROOM-32E module with built-in PCB on-board antenna.
Top
|
Bottom
|
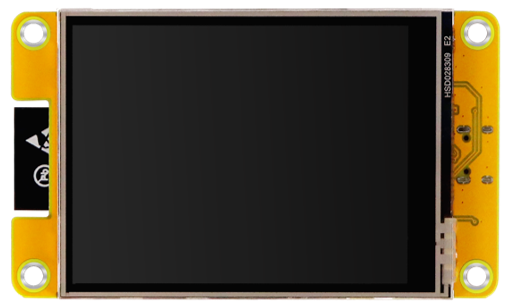
Freenove ESP32 Display is available in six different models. While they may vary in drivers, resolution, or screen size, this guide applies to all of them. For detailed model specifications, please click here.
For datasheet of the ESP32 module, please visit: https://www.espressif.com.cn/sites/default/files/documentation/esp32-wroom-32e_esp32-wroom-32ue_datasheet_en.pdf
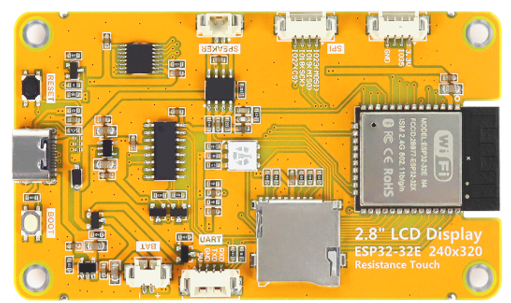
Freenove ESP32 Display
Hardware Interfaces
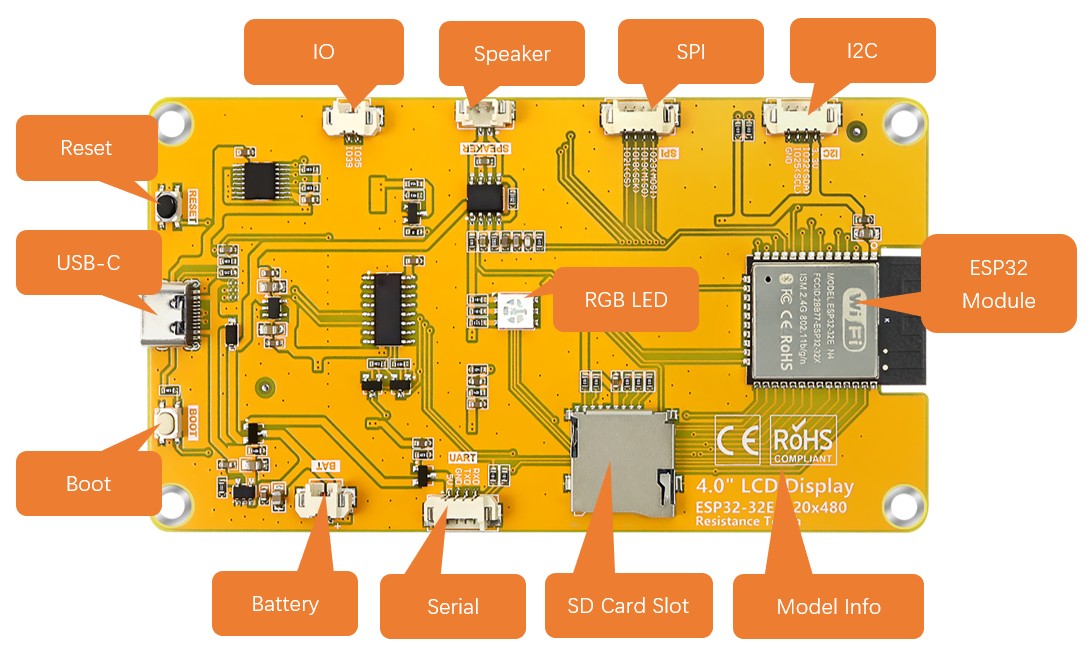
Note
The 2.8-inch version does not provide access to the I2C interface or IO39 pin.
Battery (Optional)
Please note that this product does not come with lithium batteries; please purchase them yourself.
This device supports both USB-powered and lithium battery-powered operation. For optimal safety, USB power is recommended. Due to the hazardous nature of lithium batteries, we advise against their use unless absolutely necessary.
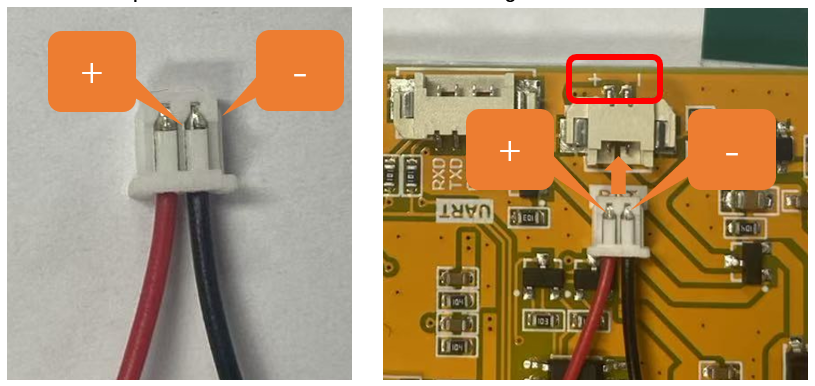
This device features an MX1.25mm connector and supports lithium batteries of various capacities. Note: The input voltage must be maintained within 3.7-4.2V range.
Market-available batteries may feature two distinct wiring configurations where the positive (+) and negative (-) terminals are reversed between models. Please verify the battery’s wiring matches the product requirements (refer to the diagram below) to prevent equipment failure or safety risks due to improper connection.
The red cable is the positive terminal while the black one is negative.
We recommend using a charger specially designed for lithium batteries. Due to various specifications and quality of lithium batteries, using a proper charger helps ensure peak performance, safety, and battery longevity.
While our product also supports USB charging as a backup option, please note that this method does not support fast charging and is limited to standard slow charging.
Speaker
There is a speaker connector (PH1.25mm) on the Freenove ESP32 Display. It is recommended to use an 8Ω 1W speaker.
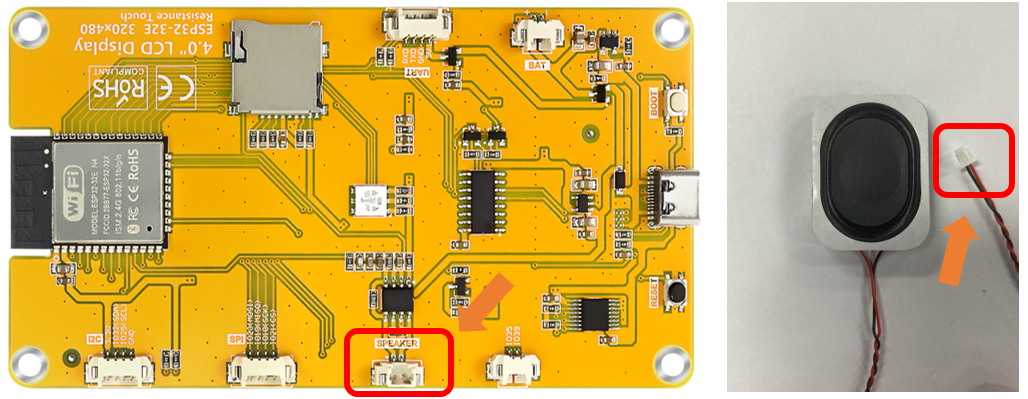
Please note that this kit does not include a speaker. Please buy one yourself.
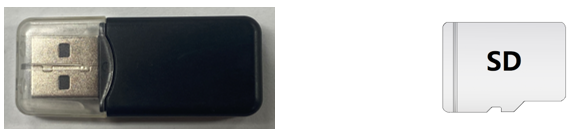
SD Card
The connector circuit uses SPI communication and supports high-speed Micro SD card storage.
Item |
Pins |
Definition |
|---|---|---|
SD Card |
GPIO23 |
SD_CMD |
GPIO18 |
SD_CLK |
|
GPIO19 |
SD_D0 |
|
GPIO5 |
SD_CS |
Note
This product does not include SD cards or SD card readers. Please buy them yourself.
TFT Screen
Freenove ESP32 Display is available in six different models with various TFT screen. This guide applies to all of them. For detailed model specifications, please click here.
Item |
Pins |
Definition |
|---|---|---|
TFT Screen |
GPIO13 |
LCD_MOSI |
GPIO12 |
LCD_MISO |
|
GPIO14 |
LCD_SCK |
|
GPIO2 |
LCD_RS |
|
GPIO15 |
LCD_CS |
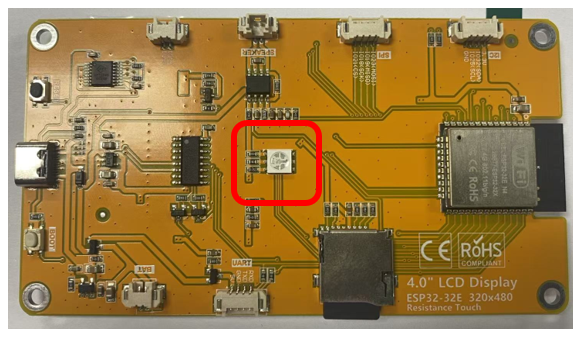
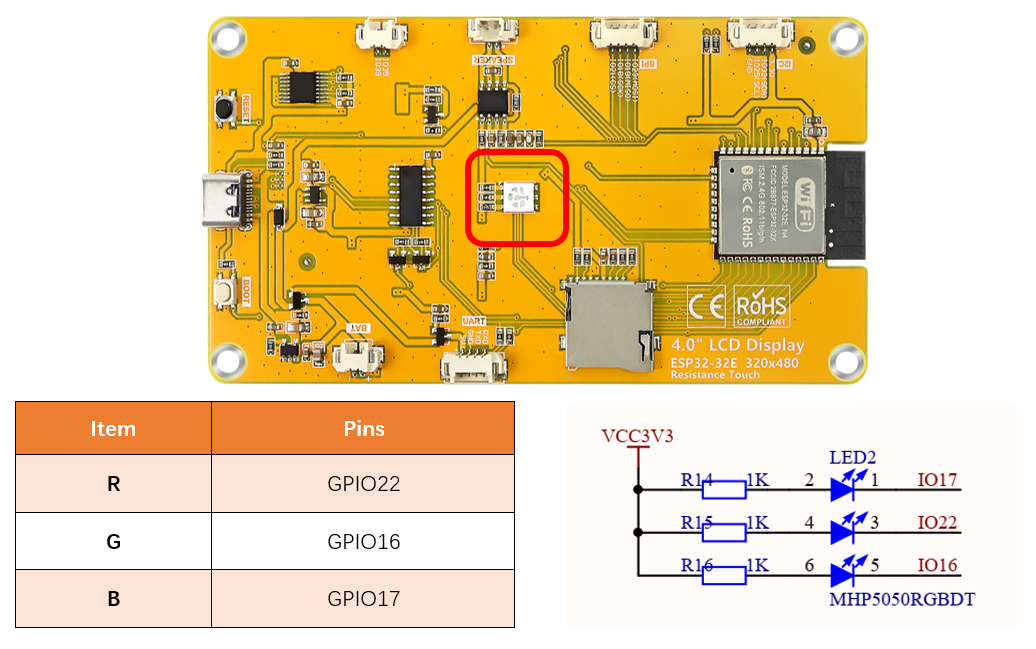
RGB LED
The Freenove ESP32 Display includes an RGB LED (red, green, blue) that can blend colors to create various lighting effects.
Item |
Pins |
|---|---|
R |
GPIO22 |
G |
GPIO16 |
B |
GPIO17 |
GPIO Pinout Table
To learn what each GPIO corresponds to, please refer to the following table.
The functions of the pins are allocated as follows:
ESP32 |
Functions |
Description |
|---|---|---|
GPIO22 |
R |
RGB |
GPIO16 |
G |
|
GPIO17 |
B |
|
GPIO13 |
LCD_MOSI |
TFT_LCD |
GPIO12 |
LCD_MISO |
|
GPIO14 |
LCD_SCK |
|
GPIO2 |
LCD_RS |
|
GPIO15 |
LCD_CS |
|
GPIO23 |
SD_CMD |
SD Card |
GPIO18 |
SD_CLK |
|
GPIO19 |
SD_D0 |
|
GPIO5 |
SD_CS |
For more information, refer to the schematic.
If you have any concerns, please feel free to contact us via support@freenove.com
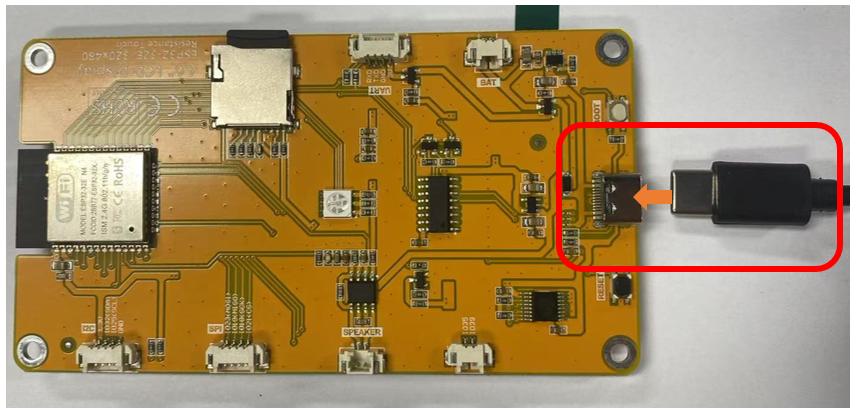
CH340 (Required)
ESP32 uses CH340 to download codes. So before using it, we need to install CH340 driver in our computers.
Windows
Check whether CH340 has been installed
Connect your computer and ESP32-WROOM with a USB cable.
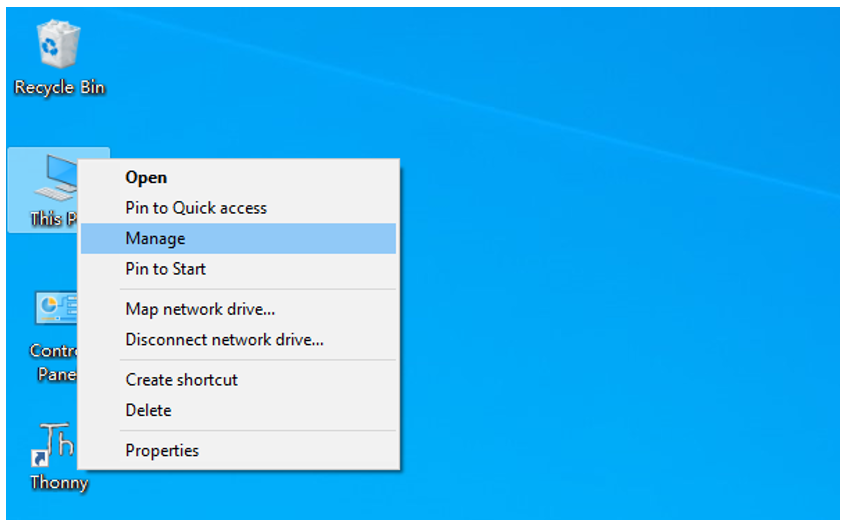
Turn to the main interface of your computer, select “This PC” and right-click to select “Manage”.
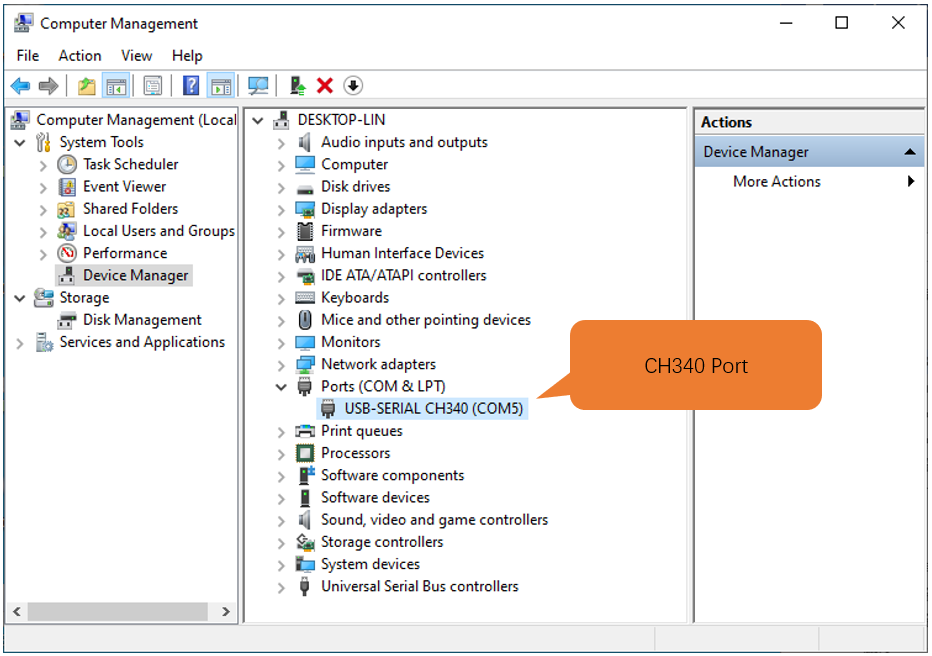
Click “Device Manager”. If your computer has installed CH340, you can see“USB-SERIAL CH340 (COMx)”. And you can click here to move to the next step.
Installing CH340
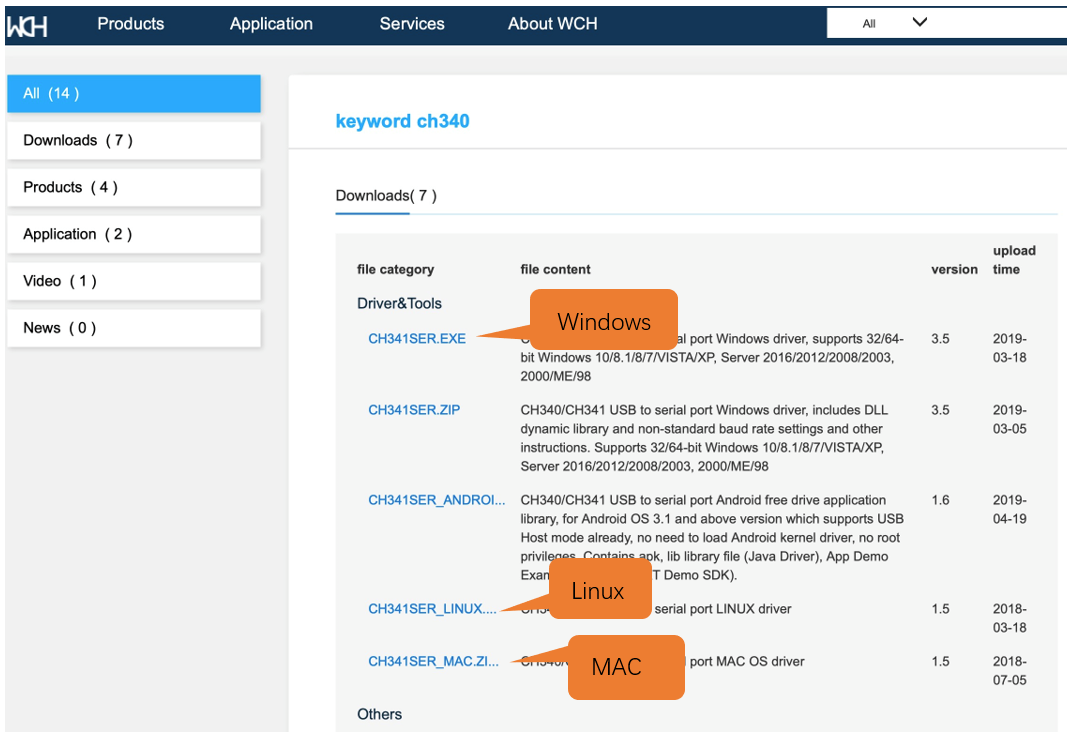
First, download CH340 driver, click http://www.wch-ic.com/search?q=CH340&t=downloads to download the appropriate one based on your operating system.
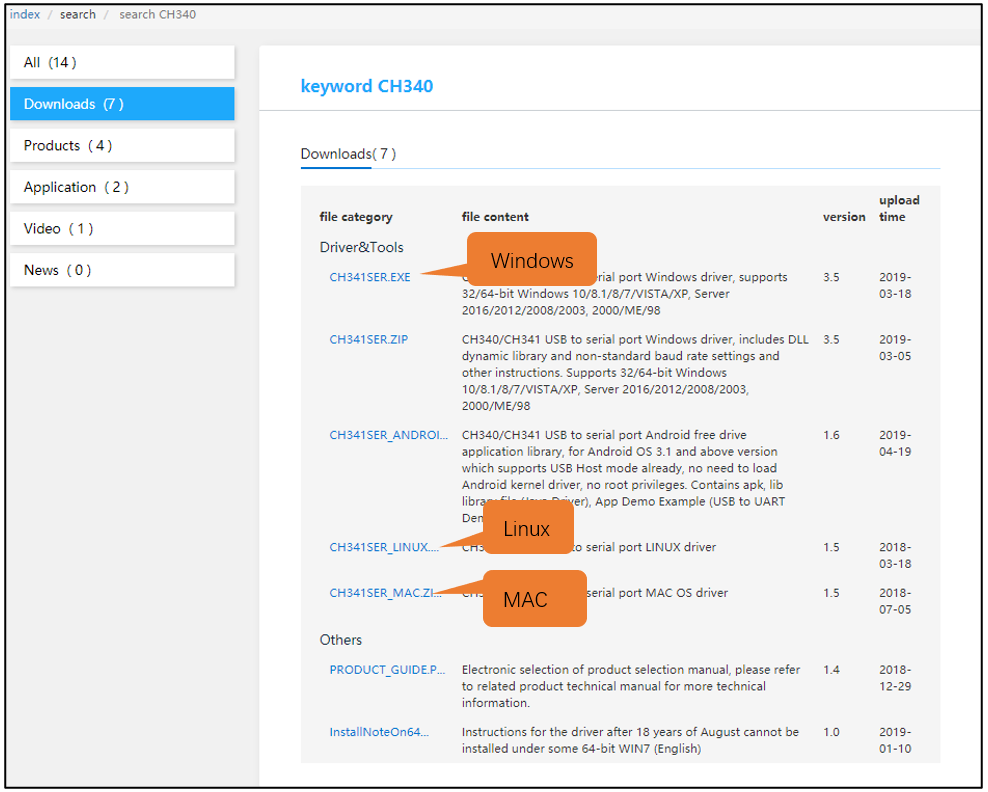
If you would not like to download the installation package, you can open ““Freenove_ESP32_Display/CH340”, we have prepared the installation package.

Open the folder “Freenove_ESP32_Display/CH340/Windows/”
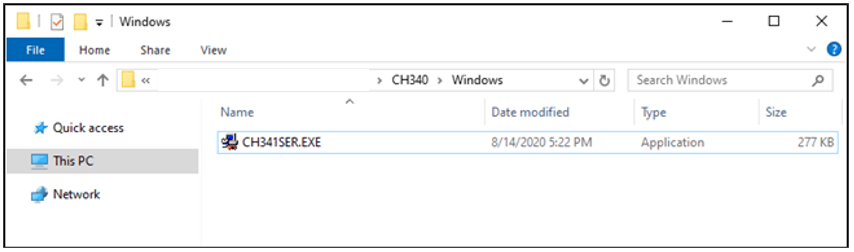
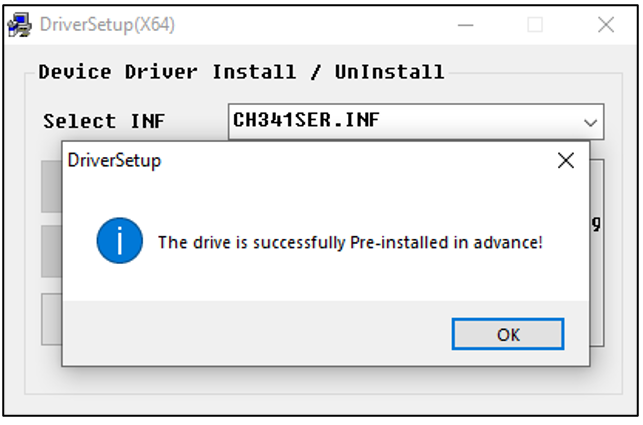
Double click “CH341SER.EXE”.
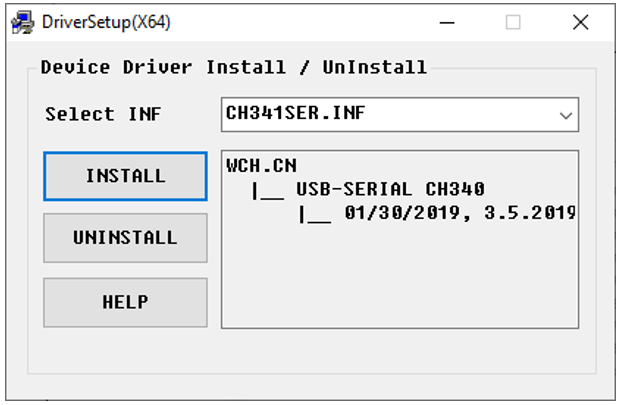
Click “INSTALL” and wait for the installation to complete.
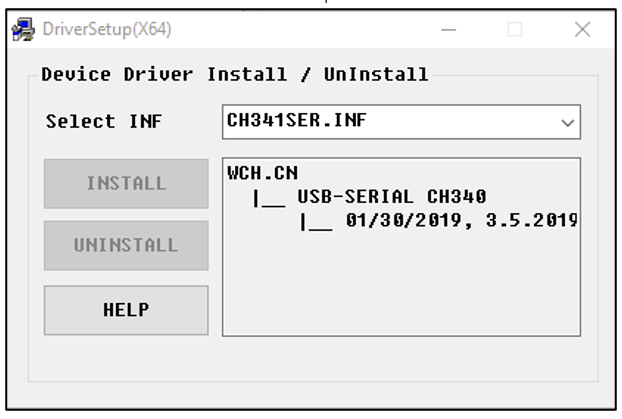
Install successfully. Close all interfaces.
When ESP32 is connected to computer, select “This PC”, right-click to select “Manage” and click “Device Manager” in the newly pop-up dialog box, and you can see the following interface.
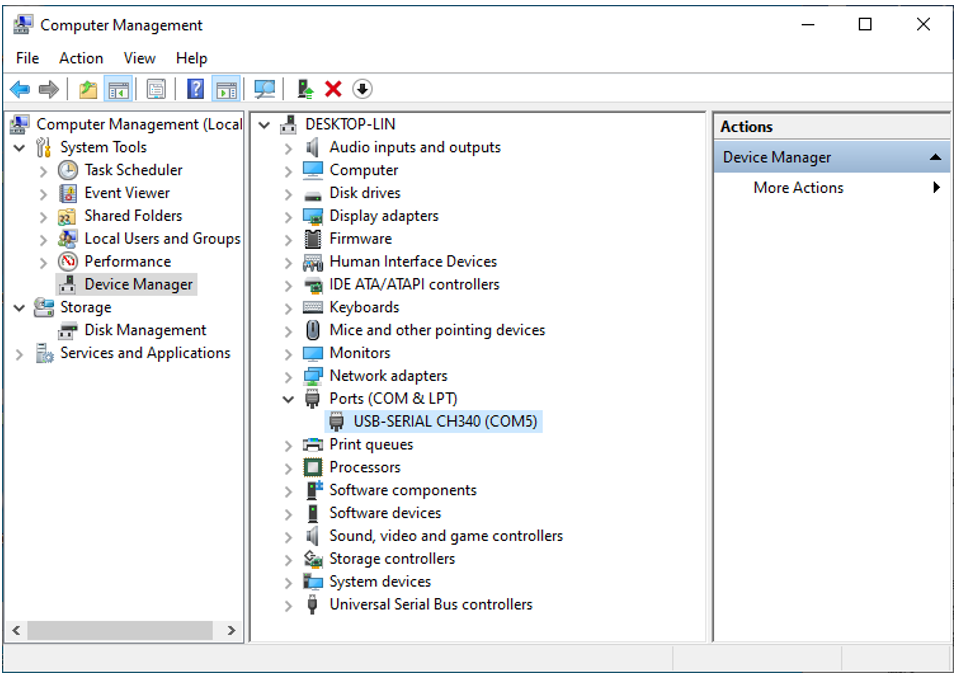
So far, CH340 has been installed successfully. Close all dialog boxes.
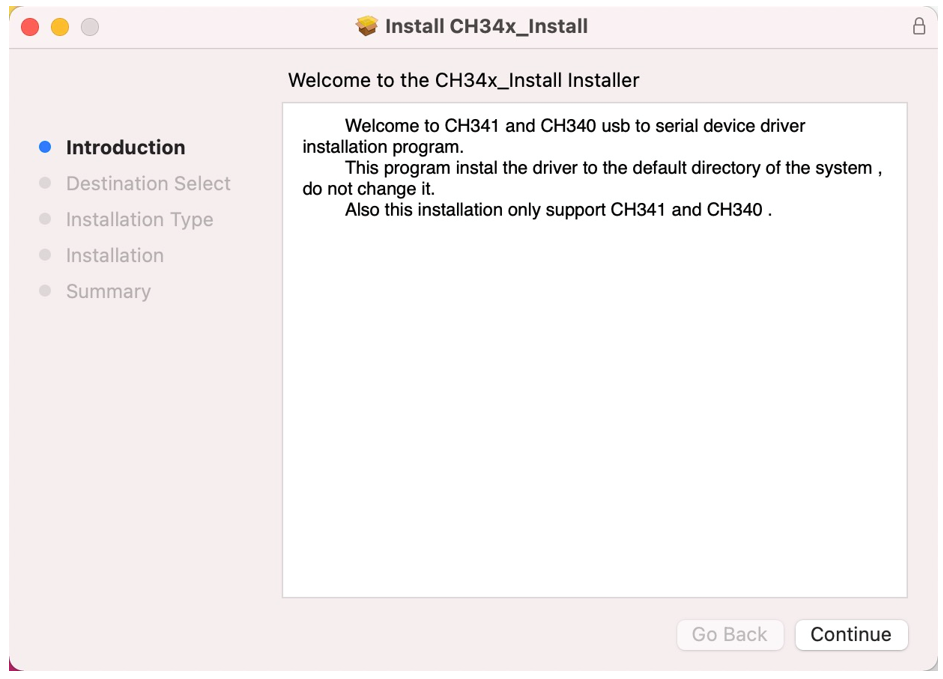
MAC
First, download CH340 driver, click http://www.wch-ic.com/search?q=CH340&t=downloads to download the appropriate one based on your operating system.
If you would not like to download the installation package, you can open “Freenove_ESP32_Display/CH340”. We have prepared the installation package.
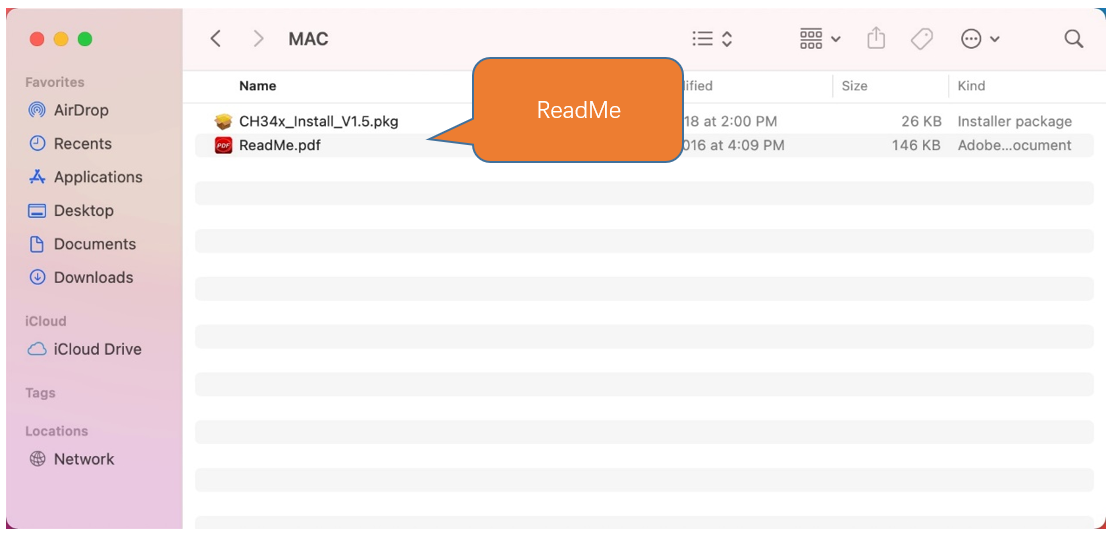
Second, open the folder “Freenove_ESP32_Display/CH340/MAC/”
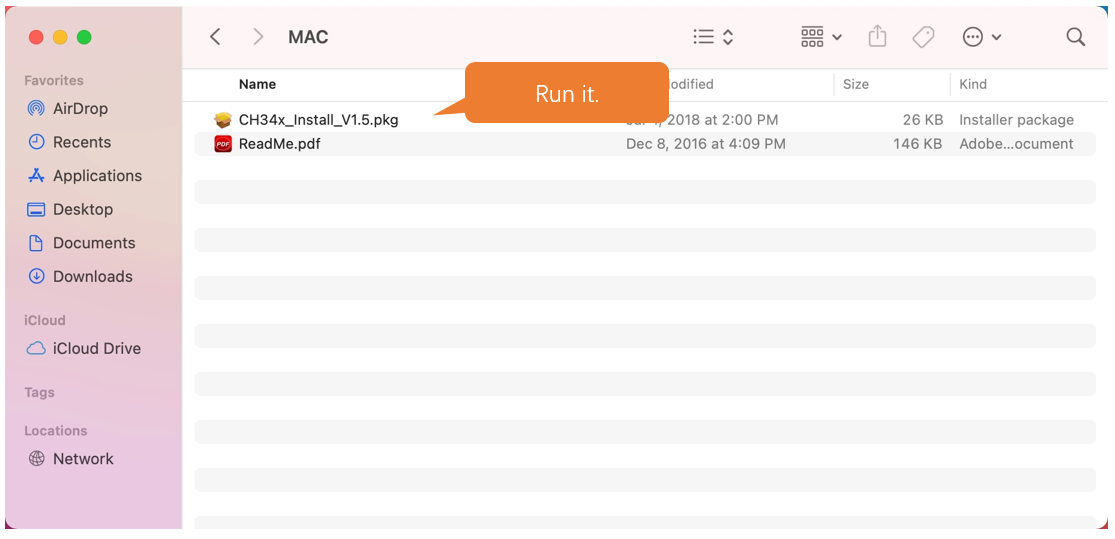
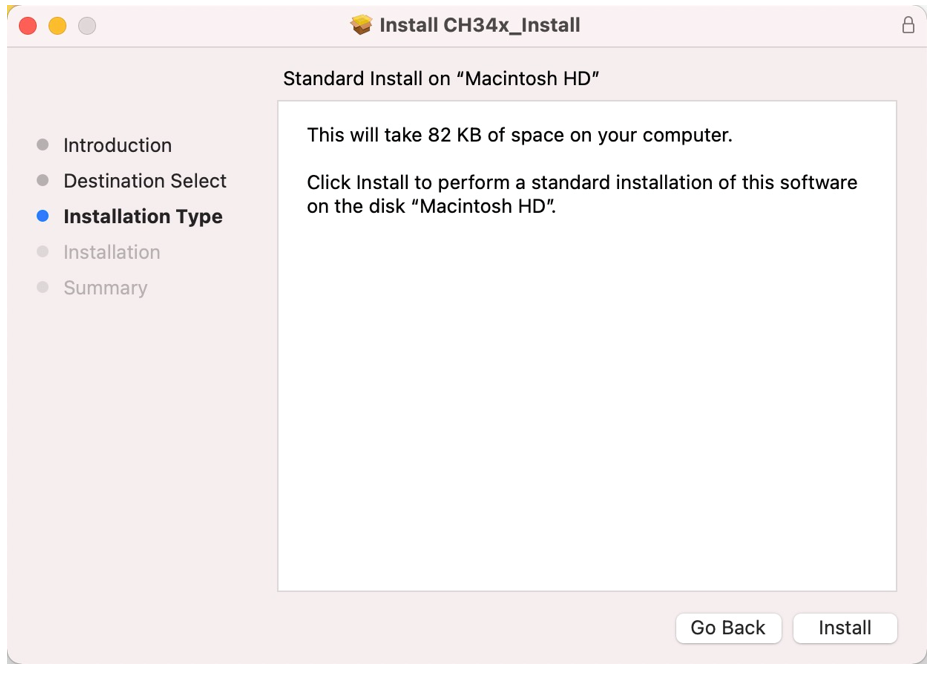
Third, click Continue.
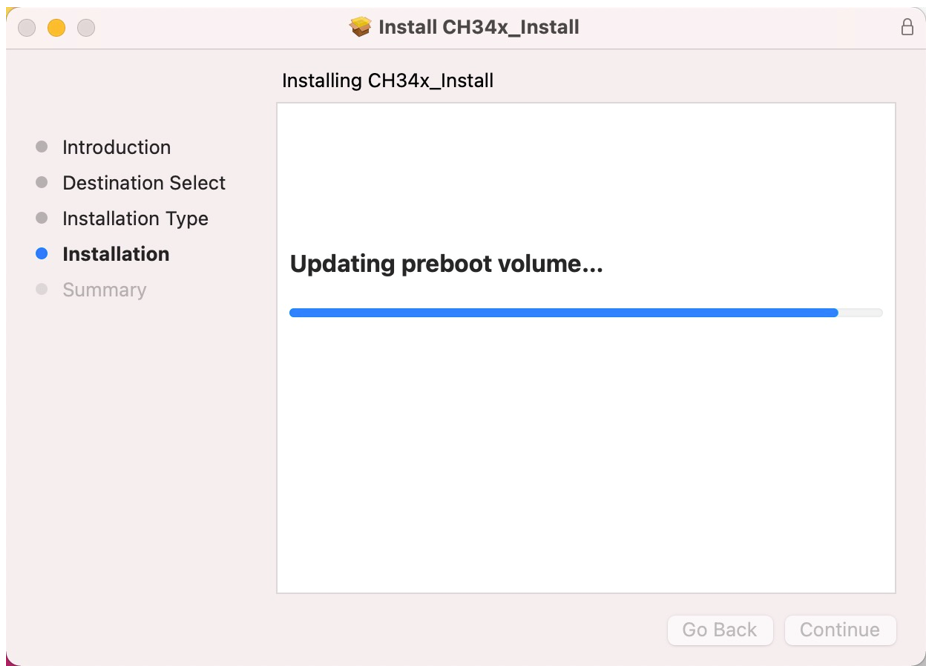
Fourth, click Install.
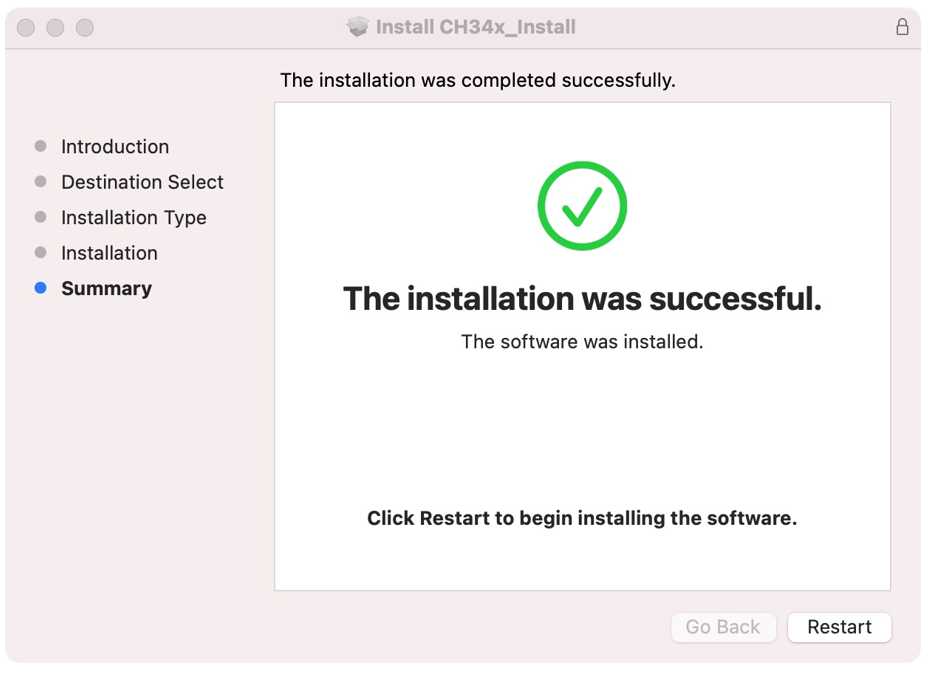
Then, waiting Finish.
Finally, restart your PC.
If it fails to be installed with the above steps, you can refer to readme.pdf to install it.
Programming Software
Arduino Software (IDE) is used to write and upload the code for Arduino Board.
First, install Arduino Software (IDE): visit https://www.arduino.cc/en/software/

Select and download corresponding installer based on your operating system. If you are a Windows user, please select the “Windows” to download and install the driver correctly.
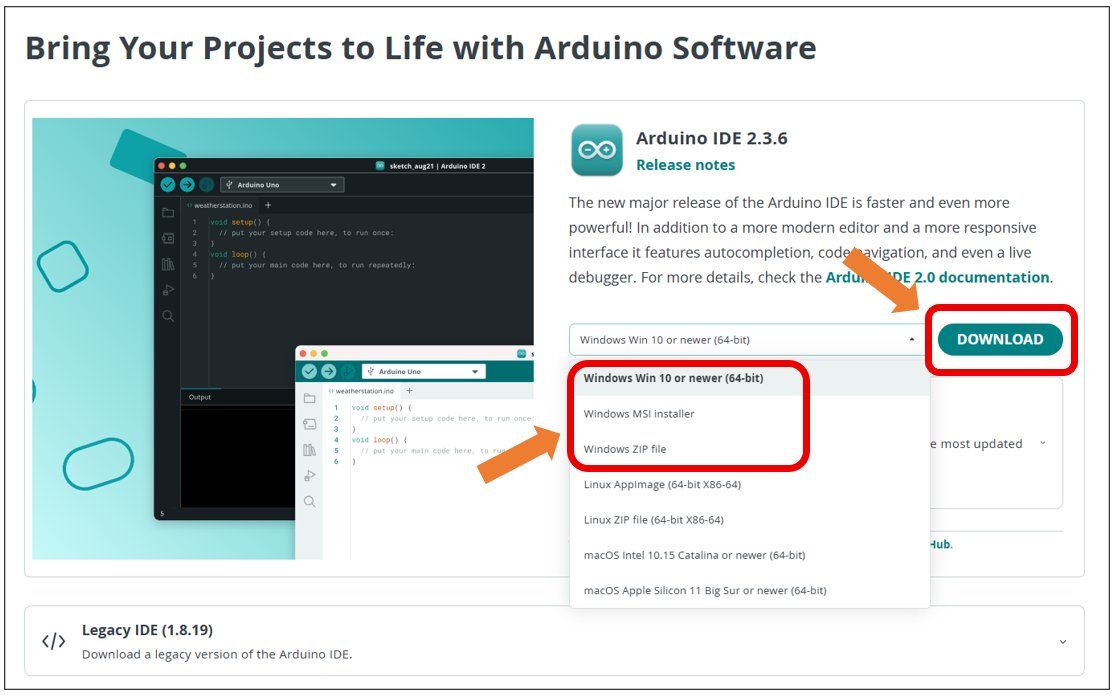
After the downloading completes, run the installer. For Windows users, there may pop up an installation dialog box of driver during the installation process. When it is popped up, please allow the installation.
After installation is completed, an shortcut will be generated in the desktop.
Run it. The interface of the software is as follows:
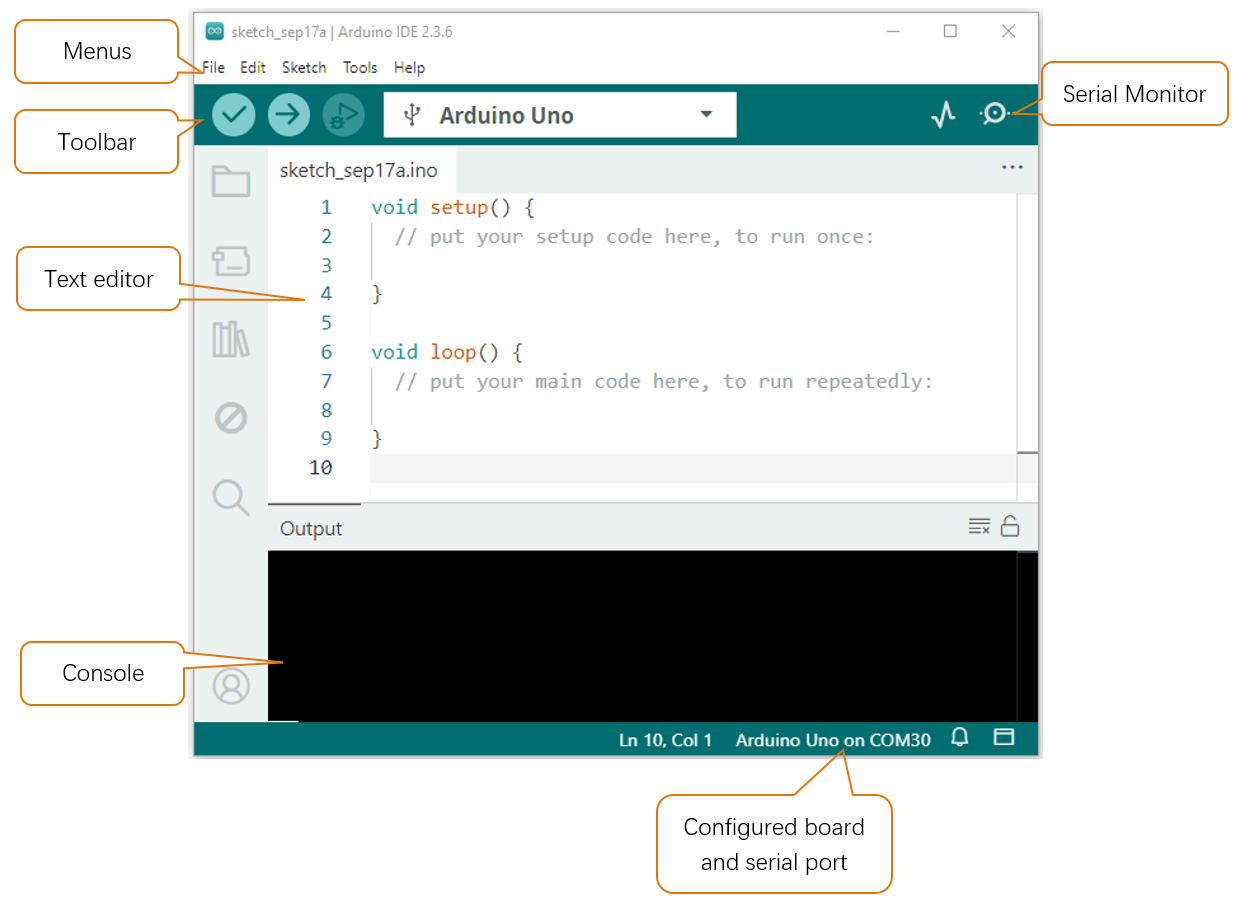
Programs written with Arduino IDE are called sketches. These sketches are written in a text editor and are saved with the file extension.ino. The editor has features for cutting/pasting and for searching/replacing text. The console displays text output by the Arduino IDE, including complete error messages and other information. The bottom right-hand corner of the window displays the configured board and serial port. The toolbar buttons allow you to verify and upload programs, open the serial monitor, and access the serial plotter.
|
Verify Checks your code for errors compiling it. |
|
Upload Compiles your code and uploads it to the configured board. |
|
Debug Troubleshoot code errors and monitor program running status. |
|
Serial Plotter Real-time plotting of serial port data charts. |
|
Serial Monitor Used for debugging and communication between devices and computers. |


Environment Configuration
First, open the software platform Arduino, and then click File in Menus and select Preferences.

Second, click on the symbol behind “Additional Boards Manager URLs”
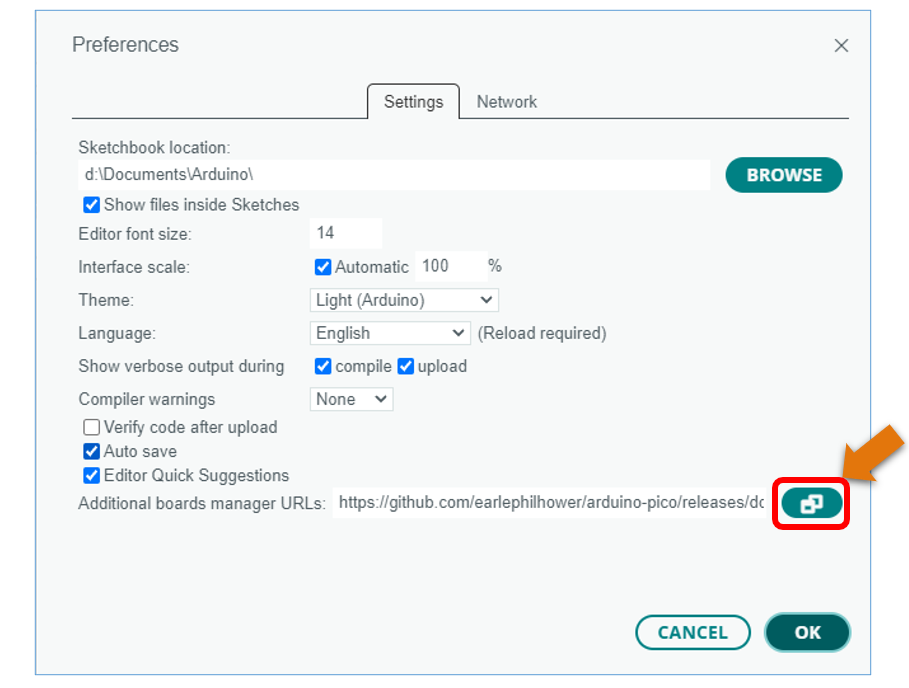
Third, fill in https://raw.githubusercontent.com/espressif/arduino-esp32/gh-pages/package_esp32_index.json in the new window, click OK, and click OK on the Preferences window again.

Note
if you copy and paste the URL directly, you may lose the “-”. Please check carefully to make sure the link is correct.
Fourth, click “Boards Manager”. Enter “esp32” in Boards manager, select 3.2.0, and click “INSTALL”.
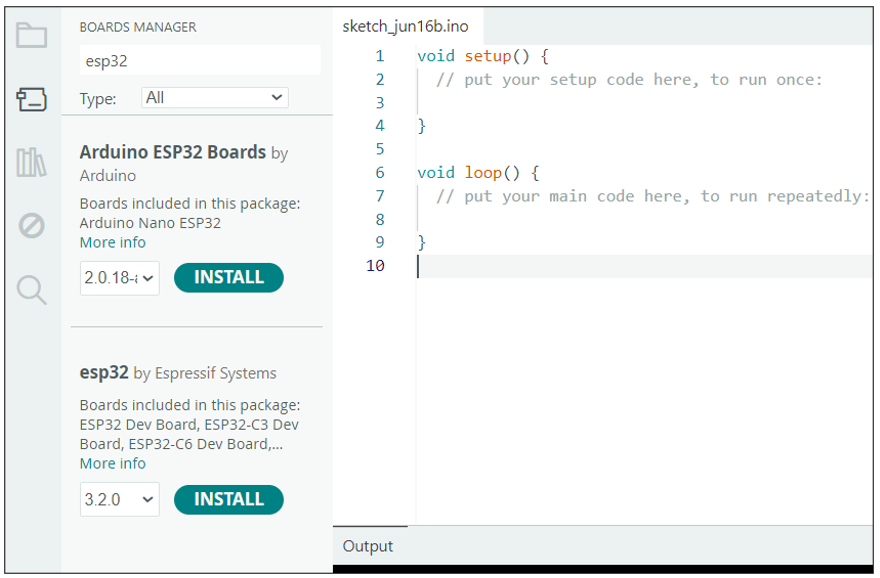
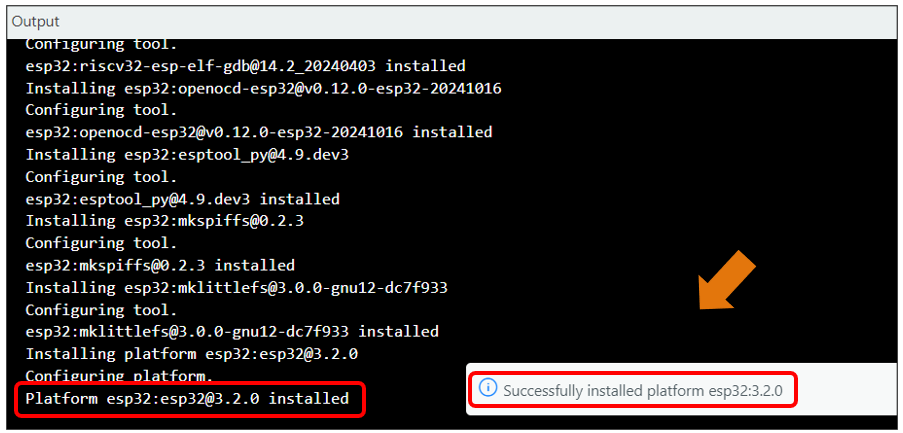
Arduino will download these files automatically. Wait for the installation to complete.
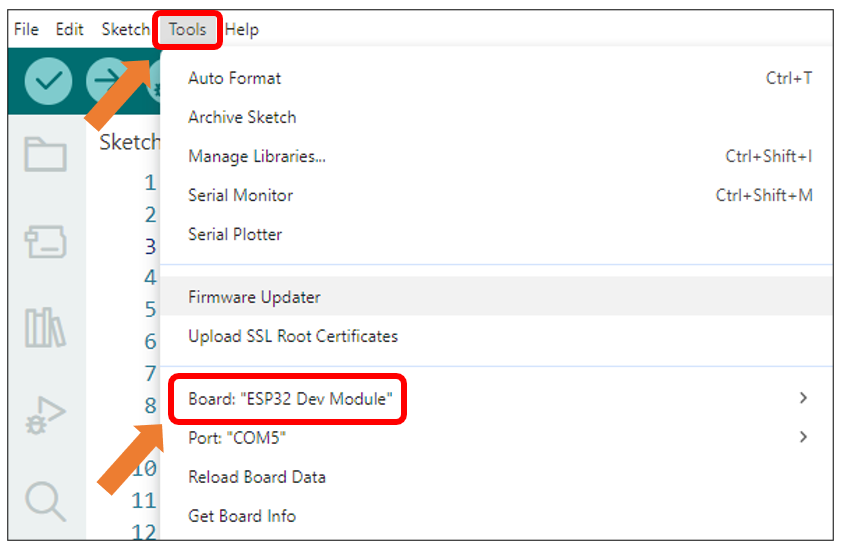
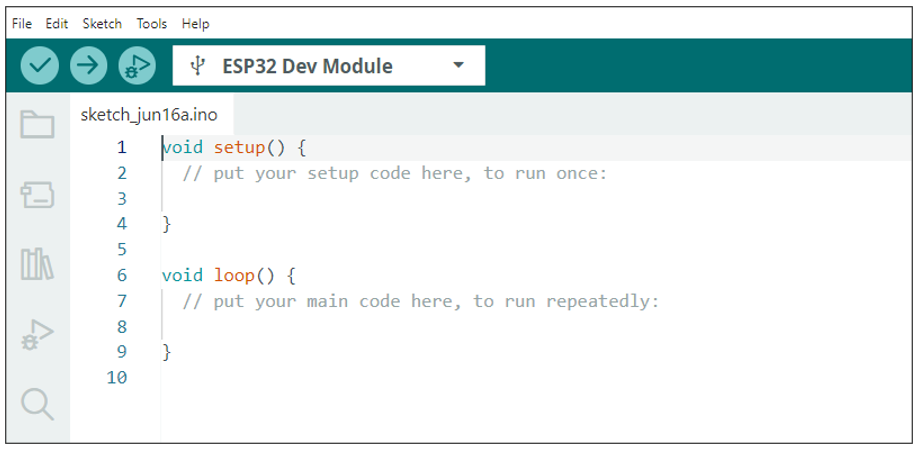
When finishing installation, click Tools in the Menus again and select Board: “ESP32 Dev Module”, and then you can see information of ESP32.
Library Installation
Before starting the learning process, it is necessary to install some libraries in advance to enable the code to be compiled properly. For convenience, we have already packaged these libraries and placed them in the Freenove_ESP32_Display/Libraries folder. Please refer to the following steps to install these libraries into the Arduino IDE.
Open Arduino IDE.
Select Sketch->Include Library->Add .ZIP library…
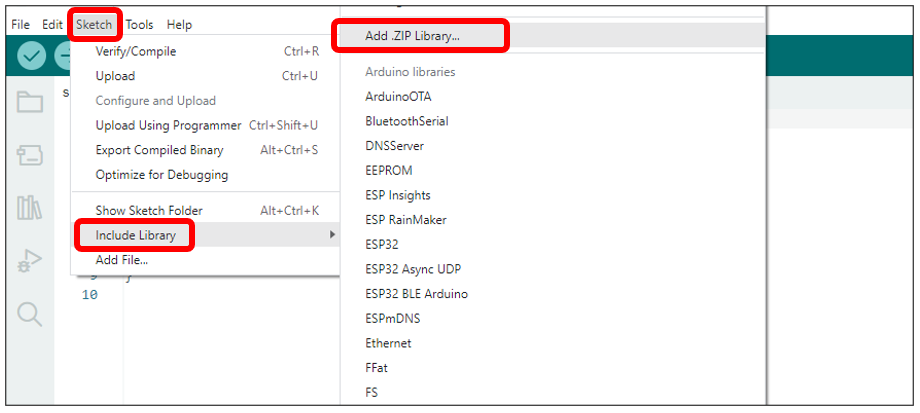
On the newly pop-up window, select the files from the Freenove_ESP32_Display /Libraries. Click Open to install the library.
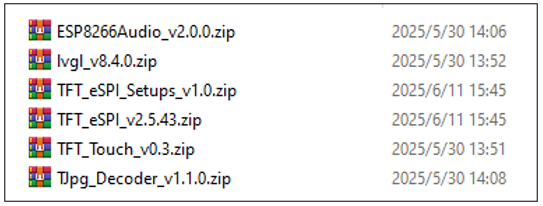
Repeat the above steps until all the six libraries are installed to Arduino. So far, all libraries have been installed.
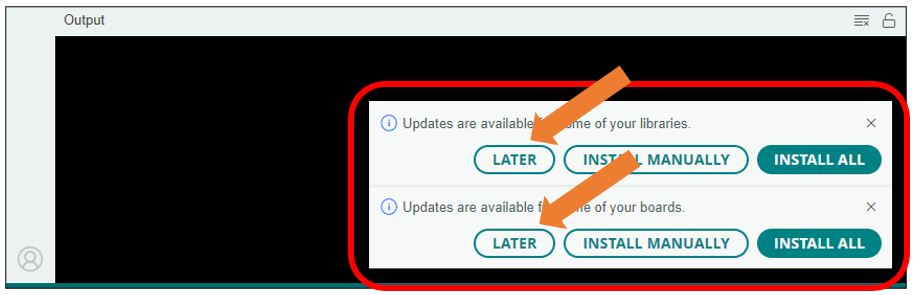
Note
Some libraries are not the latest version. Please do not update them even if it prompts every time you open the IDE. Just click LATER. Otherwise, it may lead to compilation failure.