3. Chapter LED Bar Graph
We have learned how to control one LED to blink. Next, we will learn how to control a number of LEDs
3.1. Project Flowing Water Light
In this project, we use a number of LEDs to make a flowing water light.
3.1.1. Component List
|
Jumper Wires x1 |
Bar Graph LED x1 |
Resistor 220Ω x10 |


3.1.2. Component knowledge
Let us learn about the basic features of these components to use and understand them better.
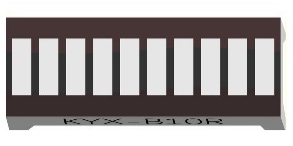
3.1.2.1. Bar Graph LED
A Bar Graph LED has 10 LEDs integrated into one compact component. The two rows of pins at its bottom are paired to identify each LED like the single LED used earlier.

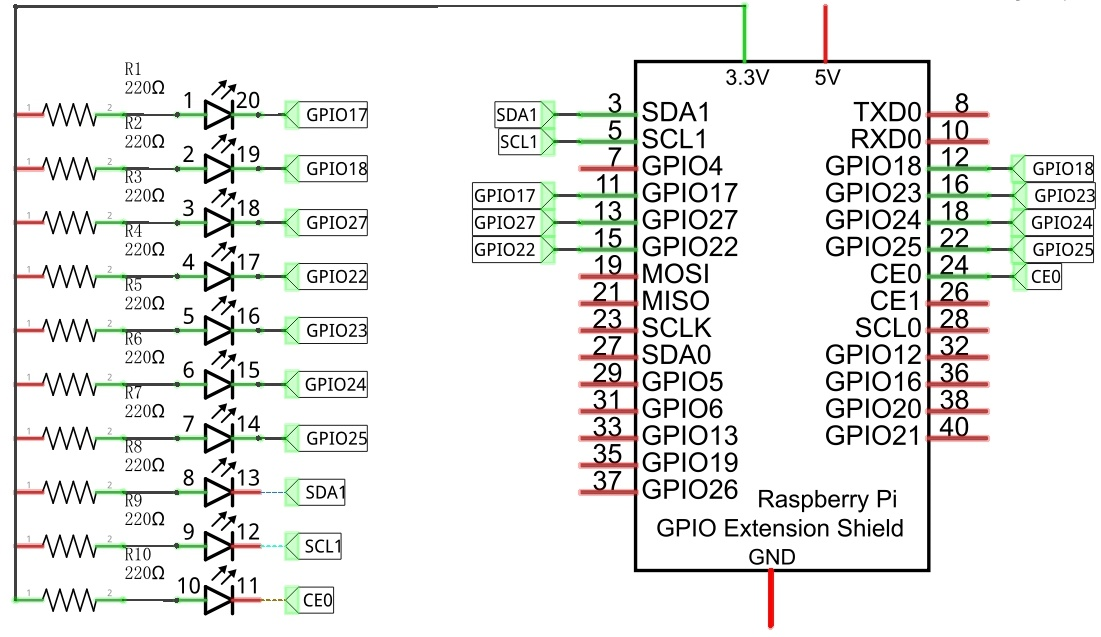
3.1.3. Circuit
A reference system of labels is used in the circuit diagram below. Pins with the same network label are connected together.
Schematic diagram
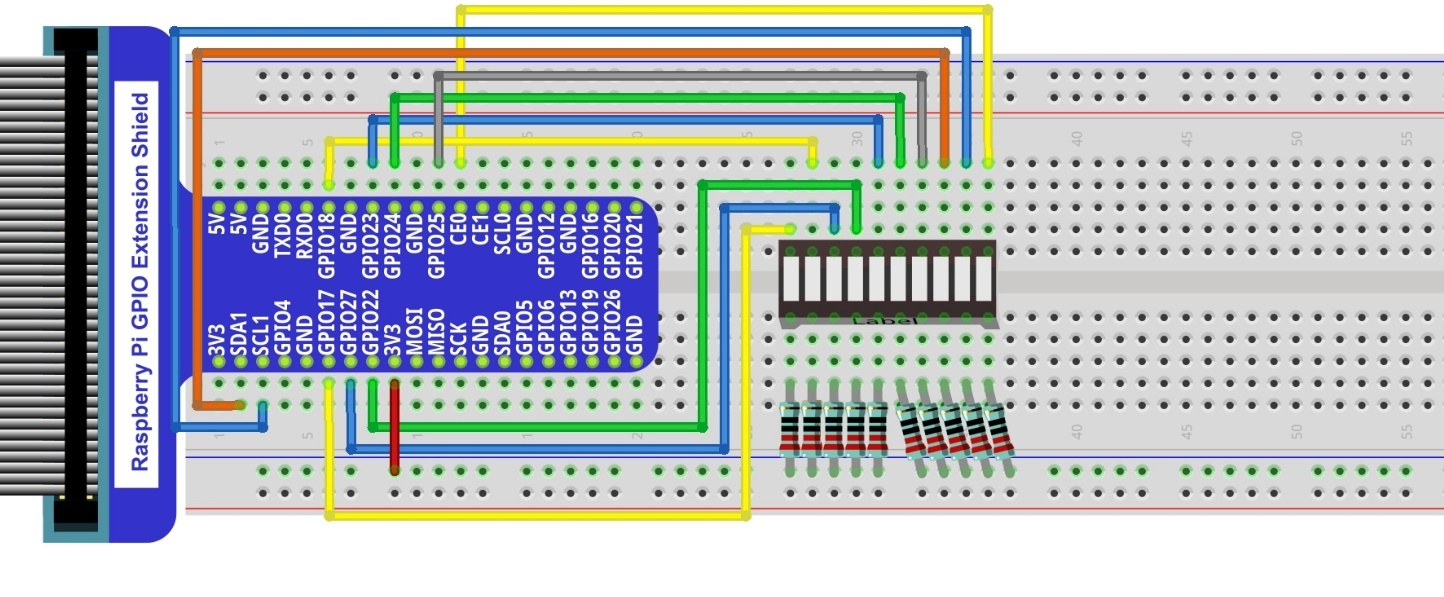
Hardware connection. If you need any support, please feel free to contact us via: support@freenove.com
Note
If LEDbar doesn’t work, rotate LEDbar 180° to try. The label is random.
In this circuit, the cathodes of the LEDs are connected to the GPIO, which is different from the previous circuit. The LEDs turn ON when the GPIO output is low level in the program.
3.1.4. Code
This project is designed to make a flowing water lamp, which are these actions: First turn LED #1 ON, then turn it OFF. Then turn LED #2 ON, and then turn it OFF… and repeat the same to all 10 LEDs until the last LED is turns OFF. This process is repeated to achieve the “movements” of flowing water.
3.1.4.1. C Code LightWater
First, observe the project result, and then learn about the code in detail.
Hint
If you have any concerns, please contact us via: support@freenove.com
Use
cdcommand to enter03.1.1_LightWaterdirectory of C code.
$ cd ~/Freenove_Kit/Code/C_Code/03.1.1_LightWater
Use the following command to compile
LightWater.cand generate executable fileLightWater.
$ gcc LightWater.c -o LightWater -lwiringPi
Then run the generated file “LightWater”.
$ sudo ./LightWater
After the program is executed, you will see that Bar Graph LED starts with the flowing water pattern flashing from left to right and then back from right to left.
The following is the program code:
 1/**********************************************************************
 2* Filename    : LightWater.c
 3* Description : Use LEDBar Graph(10 LED)
 4* Author      : www.freenove.com
 5* modification: 2019/12/27
 6**********************************************************************/
 7#include <wiringPi.h>
 8#include <stdio.h>
 9
10#define ledCounts 10
11int pins[ledCounts] = {0,1,2,3,4,5,6,8,9,10};
12
13void main(void)
14{
15	int i;
16	printf("Program is starting ... \n");
17
18	wiringPiSetup(); //Initialize wiringPi.
19
20	for(i=0;i<ledCounts;i++){       //Set pinMode for all led pins to output
21		pinMode(pins[i], OUTPUT);
22	}
23	while(1){
24		for(i=0;i<ledCounts;i++){   // move led(on) from left to right
25			digitalWrite(pins[i],LOW);
26			delay(100);
27			digitalWrite(pins[i],HIGH);
28		}
29		for(i=ledCounts-1;i>-1;i--){   // move led(on) from right to left
30			digitalWrite(pins[i],LOW);
31			delay(100);
32			digitalWrite(pins[i],HIGH);
33		}
34	}
35}
In the program, configure the GPIO0-GPIO9 to output mode. Then, in the endless “while” loop of main function, use two “for” loop to realize flowing water light from left to right and from right to left.
 1while(1){
 2	for(i=0;i<ledCounts;i++){   // move led(on) from left to right
 3		digitalWrite(pins[i],LOW);
 4		delay(100);
 5		digitalWrite(pins[i],HIGH);
 6	}
 7	for(i=ledCounts-1;i>-1;i--){   // move led(on) from right to left
 8		digitalWrite(pins[i],LOW);
 9		delay(100);
10		digitalWrite(pins[i],HIGH);
11	}
12}