5. Chapter RGB LED
In this chapter, we will learn how to control a RGB LED.
An RGB LED has 3 LEDs integrated into one LED component. It can respectively emit Red, Green and Blue light. In order to do this, it requires 4 pins (this is also how you identify it). The long pin (1) is the common which is the Anode (+) or positive lead, the other 3 are the Cathodes (-) or negative leads. A rendering of a RGB LED and its electronic symbol are shown below. We can make RGB LED emit various colors of light and brightness by controlling the 3 Cathodes (2, 3 & 4) of the RGB LED

Red, Green, and Blue light are called 3 Primary Colors when discussing light (Note: for pigments such as paints, the 3 Primary Colors are Red, Blue and Yellow). When you combine these three Primary Colors of light with varied brightness, they can produce almost any color of visible light. Computer screens, single pixels of cell phone screens, neon lamps, etc. can all produce millions of colors due to phenomenon.

RGB
If we use a three 8 bit PWM to control the RGB LED, in theory, we can create 28*28*28=16777216 (16 million) colors through different combinations of RGB light brightness.
Next, we will use RGB LED to make a multicolored LED.
5.1. Project RainbowLED
5.1.1. Component List
Raspberry Pi (with 40 GPIO) x1 GPIO Extension Board & Ribbon Cable x1 Breadboard x1 |
RGB LED x1
|
Jumper Wire
|
Resistor 220Ω x3
|


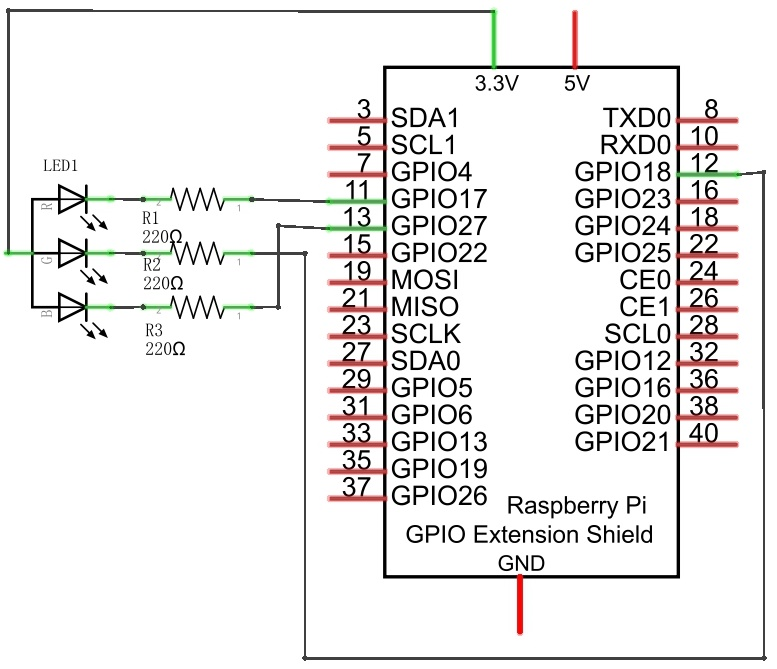
5.1.2. Circuit
Schematic diagram
|
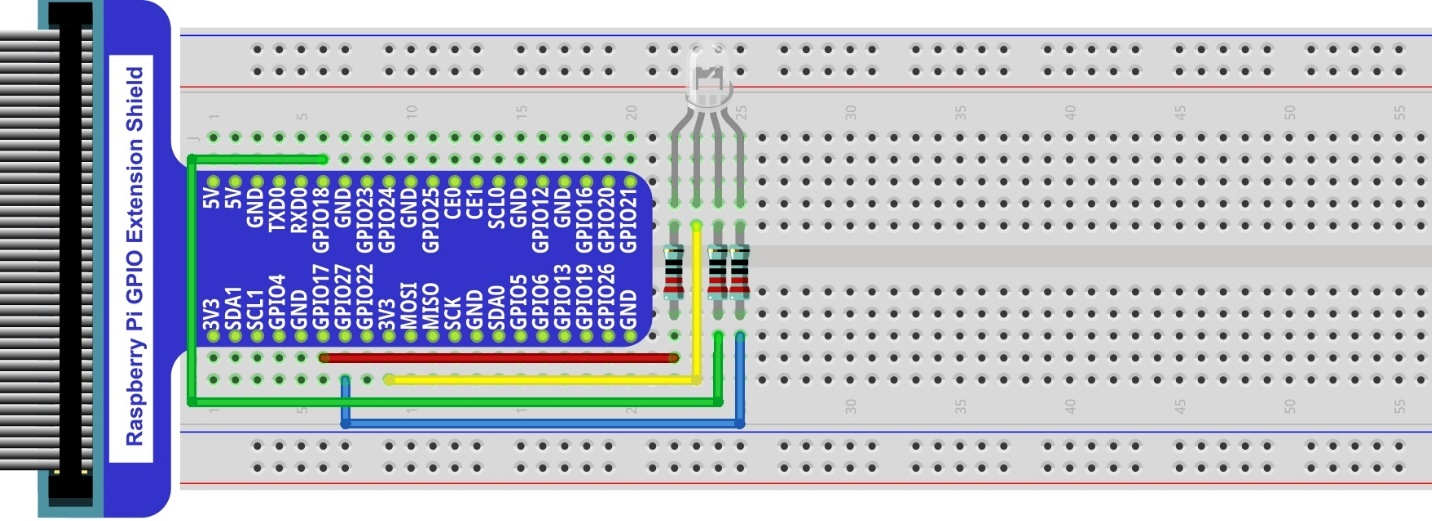
Hardware connection. If you need any support,please feel free to contact us via:
|
5.1.3. Sketch
In this chapter, we will control the RGB LED with 3 PWMs.
5.1.3.1. Sketch_05_RainbowLED
First, enter where the project is located:
$ cd ~/Freenove_Kit/Pi4j/Sketches/Sketch_05_RainbowLED

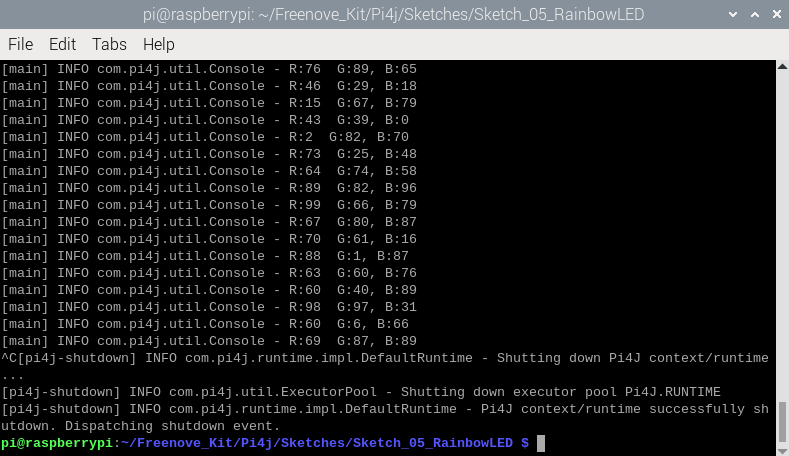
Enter the command to run the code.
$ jbang RainbowLED.java

When the code is running, the RGB LED randomly emits various colors.
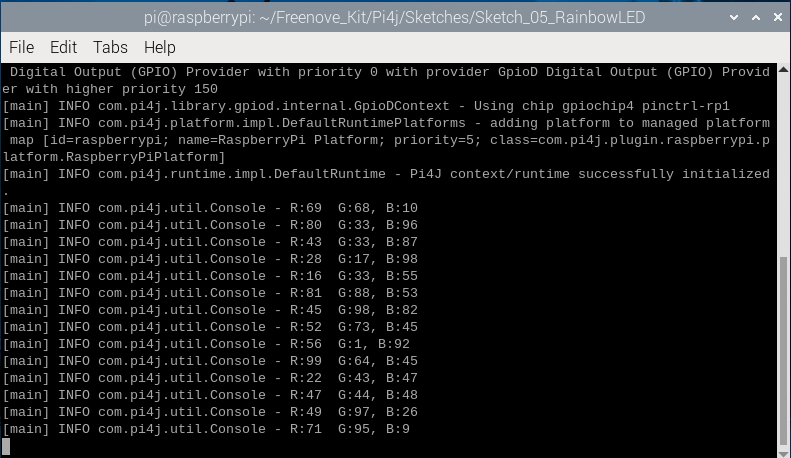
Press Ctr+C to exit the program.
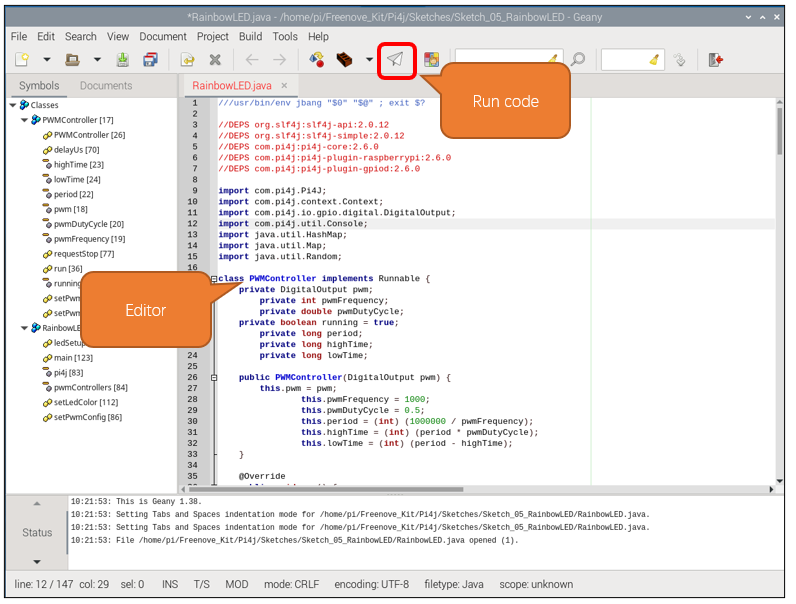
You can open the code with Geany to view and edit it, with the following command.
$ geany RainbowLED.java
Click the icon to run the code.
If the code fails to run, please check Geany Configuration.
The following is program code:
  1///usr/bin/env jbang "$0" "$@" ; exit $?
  2
  3//DEPS org.slf4j:slf4j-api:2.0.12
  4//DEPS org.slf4j:slf4j-simple:2.0.12
  5//DEPS com.pi4j:pi4j-core:2.6.0
  6//DEPS com.pi4j:pi4j-plugin-raspberrypi:2.6.0
  7//DEPS com.pi4j:pi4j-plugin-gpiod:2.6.0
  8
  9import com.pi4j.Pi4J;
 10import com.pi4j.context.Context;
 11import com.pi4j.io.gpio.digital.DigitalOutput;
 12import com.pi4j.util.Console;
 13import java.util.HashMap;
 14import java.util.Map;
 15import java.util.Random;
 16
 17class PWMController implements Runnable {
 18    private DigitalOutput pwm;
 19    private int pwmFrequency;
 20    private double pwmDutyCycle;
 21    private boolean running = true;
 22    private long period;
 23    private long highTime;
 24    private long lowTime;
 25
 26    public PWMController(DigitalOutput pwm) {
 27        this.pwm = pwm;
 28        this.pwmFrequency = 1000;
 29        this.pwmDutyCycle = 0.5;
 30        this.period = (int) (1000000 / pwmFrequency);
 31        this.highTime = (int) (period * pwmDutyCycle);
 32        this.lowTime = (int) (period - highTime);
 33    }
 34
 35    @Override
 36    public void run() {
 37        while (running) {
 38            if(highTime!=0){
 39                pwm.high();
 40                delayUs(highTime);
 41            }
 42            if(lowTime!=0){
 43                pwm.low();
 44                delayUs(lowTime);
 45            }
 46        }
 47    }
 48
 49    public void setPwmFrequency(int frequency) {
 50        if(frequency!=0){
 51            this.pwmFrequency = frequency;
 52            this.period = (int) (1000000 / pwmFrequency);
 53            this.highTime = (int) (period * pwmDutyCycle);
 54            this.lowTime = (int) (period - highTime);
 55        }
 56        else{
 57            this.pwmFrequency = 0;
 58            this.period = (int) (1000);
 59            this.highTime = (int) (0);
 60            this.lowTime = (int) (period - highTime);
 61        }
 62    }
 63
 64    public void setPwmDutyCycle(double dutyCycle) {
 65        this.pwmDutyCycle = dutyCycle;
 66        this.highTime = (int) (period * pwmDutyCycle);
 67        this.lowTime = (int) (period - highTime);
 68    }
 69
 70    private void delayUs(long us) {
 71        long startTime = System.nanoTime();
 72        long endTime = startTime + (us * 1000);
 73        while (System.nanoTime() < endTime) {
 74        }
 75    }
 76
 77    public void requestStop() {
 78        running = false;
 79    }
 80}
 81
 82public class RainbowLED {
 83    private static final Context pi4j = Pi4J.newAutoContext();
 84    private static final Map<Integer, PWMController> pwmControllers = new HashMap<>();
 85
 86    public static void setPwmConfig(int pin) throws Exception {
 87        DigitalOutput led = pi4j.dout().create(pin);
 88        PWMController pwmController = new PWMController(led);
 89        Thread pwmThread = new Thread(pwmController, "PWM LED Controller " + pin);
 90        pwmControllers.put(pin, pwmController);
 91        pwmThread.start();
 92        Runtime.getRuntime().addShutdownHook(new Thread(() -> {
 93            pwmController.requestStop();
 94            try {
 95                pwmThread.join();
 96            } catch (InterruptedException e) {
 97                Thread.currentThread().interrupt();
 98            }
 99        }));
100    }
101
102    public static void ledSetup(int[] pins) {
103        for (int pin : pins) {
104            try {
105                setPwmConfig(pin);
106            } catch (Exception e) {
107                e.printStackTrace();
108            }
109        }
110    }
111
112    public static void setLedColor(int[] pins, int r, int g, int b) {
113        if (pins.length >= 3) {
114            PWMController red = pwmControllers.get(pins[0]);
115            PWMController green = pwmControllers.get(pins[1]);
116            PWMController blue = pwmControllers.get(pins[2]);
117            if (red != null) red.setPwmDutyCycle((double) r / 100.0);
118            if (green != null) green.setPwmDutyCycle((double) g / 100.0);
119            if (blue != null) blue.setPwmDutyCycle((double) b / 100.0);
120        }
121    }
122
123    public static void main(String[] args) throws Exception {
124        final var console = new Console();
125        int[] LED_PINS = {17, 18, 27};
126        Random random = new Random();
127
128        try {
129            ledSetup(LED_PINS);
130            while (true) {
131                int red = random.nextInt(101);
132                int green = random.nextInt(101);
133                int blue = random.nextInt(101);
134                console.println("R:%d  G:%d, B:%d", red, green, blue);
135                setLedColor(LED_PINS, red, green, blue);
136                Thread.sleep(500);
137            }
138        }
139        finally {
140            for (PWMController controller : pwmControllers.values()) {
141                controller.requestStop();
142            }
143            pi4j.shutdown();
144        }
145    }
146}
Import Pi4j library, context management, digital output interface, HashMap class and Map interface, and random function library.
1import com.pi4j.Pi4J;
2import com.pi4j.context.Context;
3import com.pi4j.io.gpio.digital.DigitalOutput;
4import com.pi4j.util.Console;
5import java.util.HashMap;
6import java.util.Map;
7import java.util.Random;
Initialize the pins corresponding to the RGB lights and print a stack trace if an exception occurs.
1public static void ledSetup(int[] pins) {
2    for (int pin : pins) {
3        try {
4            setPwmConfig(pin);
5        } catch (Exception e) {
6            e.printStackTrace();
7        }
8    }
9}
Configure the RGB colored lights and adjust the brightness of the LED by adjusting the duty cycle of PWM.
 1public static void setLedColor(int[] pins, int r, int g, int b) {
 2    if (pins.length >= 3) {
 3        PWMController red = pwmControllers.get(pins[0]);
 4        PWMController green = pwmControllers.get(pins[1]);
 5        PWMController blue = pwmControllers.get(pins[2]);
 6        if (red != null) red.setPwmDutyCycle((double) r / 100.0);
 7        if (green != null) green.setPwmDutyCycle((double) g / 100.0);
 8        if (blue != null) blue.setPwmDutyCycle((double) b / 100.0);
 9    }
10}
Create a console instance, define an array of GPIO pins for LED connections, and create a random number generator instance.
1final var console = new Console();
2int[] LED_PINS = {17, 18, 27};
3Random random = new Random();
Initialize the array of GPIO pins connected to the LEDs, generate 3 new random numbers every 500 milliseconds as brightness values for the RGB lights, and print prompt messages on the console.
 1try {
 2    ledSetup(LED_PINS);
 3    while (true) {
 4        int red = random.nextInt(101);
 5        int green = random.nextInt(101);
 6        int blue = random.nextInt(101);
 7        console.println("R:%d  G:%d, B:%d", red, green, blue);
 8        setLedColor(LED_PINS, red, green, blue);
 9        Thread.sleep(500);
10    }
11}
At the end of the program, stop all PWM controllers and close the Pi4J context.
1finally {
2    for (PWMController controller : pwmControllers.values()) {
3        controller.requestStop();
4    }
5    pi4j.shutdown();
6}