5. Chapter Two Electronic Button Switch
5.1. Project 05.0_Two_Electronic_Button_LED, 05.1_Squash0 and 5.2_Jump
5.1.1. Components
Raspberry Pi (with 40 GPIO) x1 GPIO Extension Board & Ribbon Cable x1 Breadboard x1 |
Push Button x2 |
Jumper Wire
|
Resistor 10kΩ x4 |


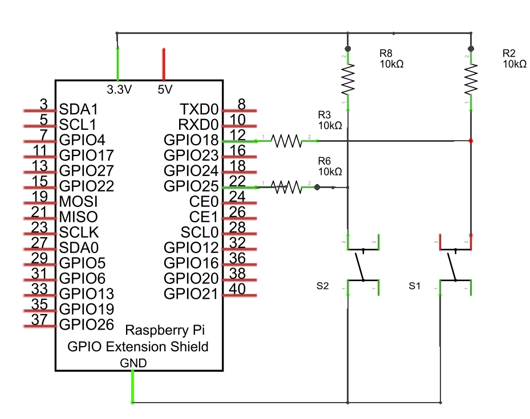
5.1.2. Circuit
Schematic diagram
|
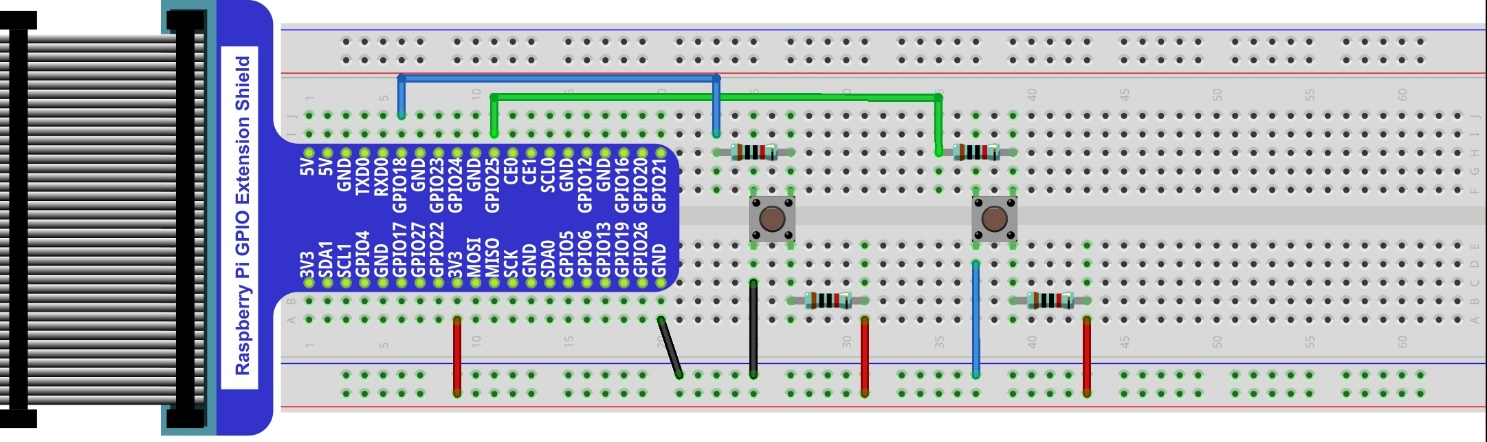
Hardware connection. If you need any support,please feel free to contact us via:
|
5.1.3. Code
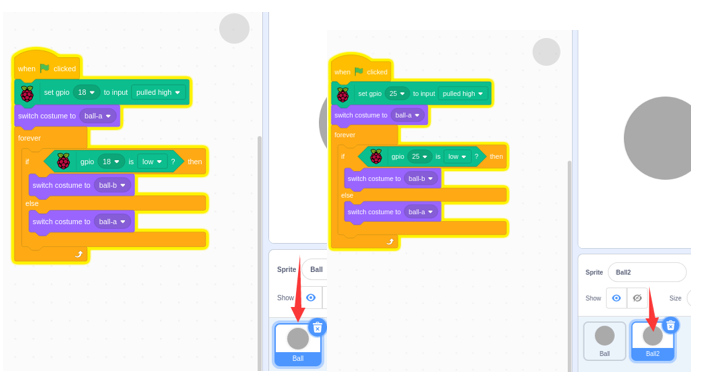
5.1.3.1. Two_Electronic_Button_LED
Load the code to scratch3.
Freenove_Kit/Code/Scratch3/04.1_Keyboard_RGBLED.sb3
Click the green flag. Then press two button switches to observe the change.
There are two balls. We need write two sections of code for two GPIOs.
5.1.3.2. Squash
Load the code to scratch3.
Freenove_Kit/Code/Scratch3/05.1_Squash.sb3
Click the green flag. Press the two button swtiches to move the green paddle.
There are two sprites moveing. So we need write two section of code. One is for ball. Another is for paddle.
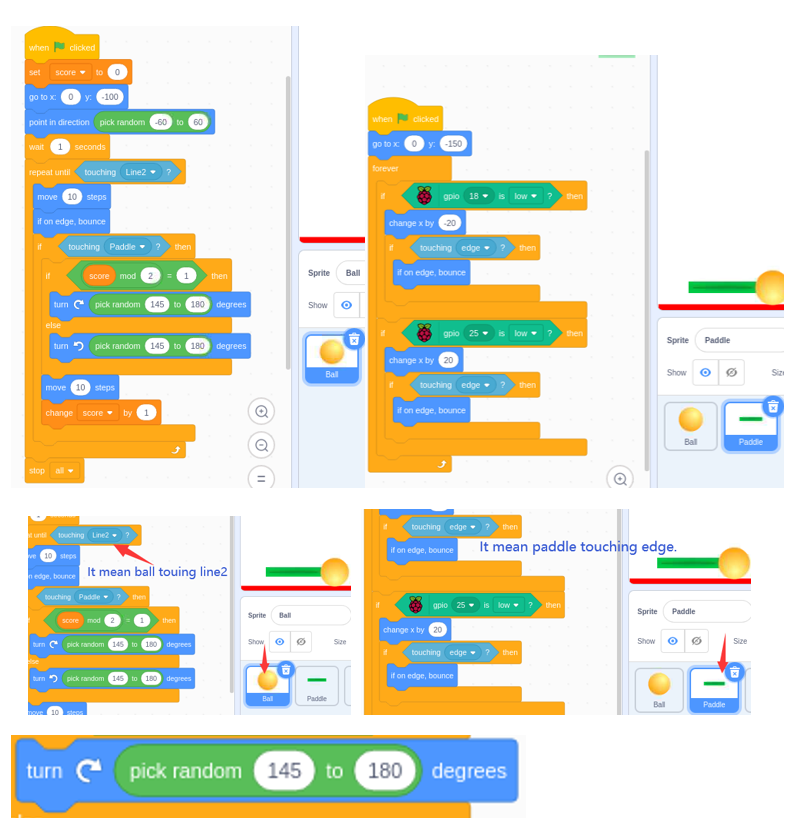
Pick random “range”. It can ne any one of 145~180, like: 145 150 180 146.
5.1.3.3. Jump
Load the code to scratch3.
Freenove_Kit/Code/Scratch3/05.2_Jump.sb3
Click the green flag. Press the two button swtiches to make the sprite go through the line and not touch the other items..

A or B or C. One of them is true. The whold result would be true. It mean the sprite1 cannot tounch any of others.