Installing an Operating System
The first step is to install an operating system on your RPi so that it can be programmed and function. If you have installed a system in your RPi, you can start from Chapter 0 Preparation.
Component List
Required Components
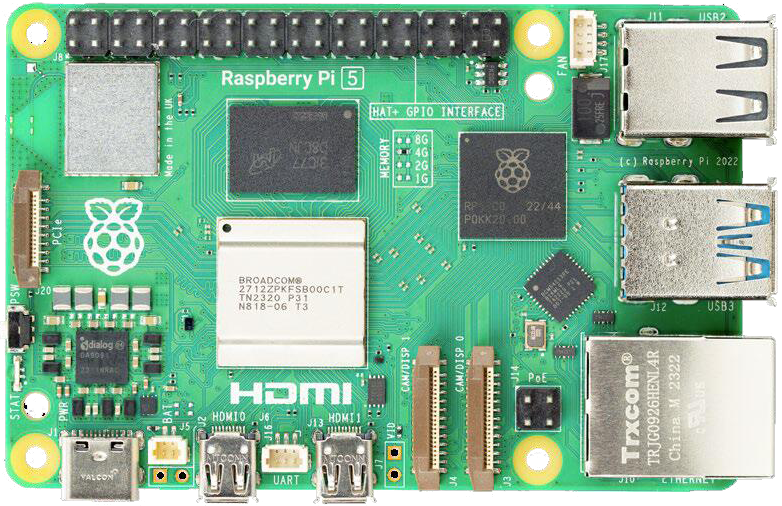
Any Raspberry Pi with 40 GPIO |
5V/3A Power Adapter. Note: Different versions of Raspberry Pi have different power requirements (please check the power requirements for yours on the chart in the following page.) |
|
|
Micro or Type-C USB Cable x1 |
Micro SD Card (TF Card) x1, Card Reader x1 |
|
|


Power requirements of various versions of Raspberry Pi are shown in following table:
Product |
Recommended PSU current capacity |
Maximum total USB peripheral current draw |
Typical bare-board active current consumption |
|---|---|---|---|
Raspberry Pi 1 Model A |
700mA |
500mA |
200mA |
Raspberry Pi 1 Model B |
1.2A |
500mA |
500mA |
Raspberry Pi 1 Model A+ |
700mA |
500mA |
180mA |
Raspberry Pi 1 Model B+ |
1.8A |
1.2A |
330mA |
Raspberry Pi 2 Model B |
1.8A |
1.2A |
350mA |
Raspberry Pi 3 Model B |
2.5A |
1.2A |
400mA |
Raspberry Pi 3 Model A+ |
2.5A |
Limited by PSU, board, and connector ratings only. |
350mA |
Raspberry Pi 3 Model B+ |
2.5A |
1.2A |
500mA |
Raspberry Pi 4 Model B |
3.0A |
1.2A |
600mA |
Raspberry Pi 5 |
5.0A |
1.6A (600mA if using a 3A power supply) |
800mA |
Raspberry Pi 400 |
3.0A |
1.2A |
800mA |
Raspberry Pi Zero |
1.2A |
Limited by PSU, board, and connector ratings only |
100mA |
See also
For more details, please refer to https://www.raspberrypi.org/help/faqs/#powerReqs
In addition, RPi also needs an Ethernet network cable used to connect it to a WAN (Wide Area Network).
The Raspberry Pi 5 provides 1.6A of power to downstream USB peripherals when connected to a power supply capable of 5A at +5V (25W). When connected to any other compatible power supply, the Raspberry Pi 5 restricts downstream USB devices to 600mA of power.
Optional Components
Under normal circumstances, there are two ways to login to Raspberry Pi:
Using a stand-alone monitor.
Using a remote desktop or laptop computer monitor “sharing” the PC monitor with your RPi.
Required Accessories for Monitor
If you choose to use an independent monitor, mouse and keyboard, you also need the following accessories:
A display with a HDMI interface
A Mouse and a Keyboard with an USB interface
As to Pi Zero and Pi Zero W, you also need the following accessories:
A Mini-HDMI to HDMI Adapter and Cable.
A Micro-USB to USB-A Adapter and Cable (Micro USB OTG Cable).
A USB HUB.
USB to Ethernet Interface or USB Wi-Fi receiver.
For different Raspberry Pi Modules, the optional items may vary slightly but they all aim to convert the interfaces to Raspberry Pi standards.
Pi Zero |
Pi A+ |
Pi Zero W |
Pi 3A+ |
Pi B+/2B |
Pi 3B/3B+ |
Pi 4B |
Pi 5 |
|
|---|---|---|---|---|---|---|---|---|
Monitor |
Yes (All) |
|||||||
Mouse |
Yes (All) |
|||||||
Keyboard |
Yes (All) |
|||||||
Micro-HDMI to HDMI Adapter & Cable |
Yes |
No |
Yes |
No |
No |
No |
No |
No |
Micro-HDMI to HDMI Adapter & Cable |
No |
Yes |
||||||
Micro-USB to USB-A Adapter & Cable (Micro USB OTG Cable) |
Yes |
No |
Yes |
No |
||||
USB HUB |
Yes |
Yes |
Yes |
Yes |
No |
No |
No |
No |
USB to Ethernet Interface |
select one from two or select two from two |
optional |
Internal Integration |
Internal Integration |
||||
USB Wi-Fi Receiver |
Internal Integration |
optional |
||||||
Required Accessories for Remote Desktop
If you do not have an independent monitor, or if you want to use a remote desktop, you first need to login to Raspberry Pi through SSH, and then open the VNC or RDP service.
This requires the following accessories.
Pi Zero |
Pi Zero W |
Pi A+ |
Pi 3A+ |
Pi B+/2B |
Pi 3B/3B+/4B/5 |
|
|---|---|---|---|---|---|---|
Micro-USB to USB-A Adapter & Cable (Micro USB OTG Cable) |
Yes |
Yes |
No |
NO |
||
USB to Ethernet interface |
Yes |
Yes |
Yes |
|||
Raspberry Pi OS
Without Screen - Use Raspberry Pi - under Windows PC
With Screen - Use Raspberry Pi - under Windows PC
Automatically Method
You can follow the official method to install the system for raspberry pi via visiting link below:
https://projects.raspberrypi.org/en/projects/raspberry-pi-setting-up/2
In this way, the system will be downloaded automatically via the application.
Manually Method
After installing the Imager Tool in the link above. You can also download the system manually first.
Visit https://www.raspberrypi.org/downloads/


And then the zip file is downloaded.
Write System to Micro SD Card
First, put your Micro SD card into card reader and connect it to USB port of PC.

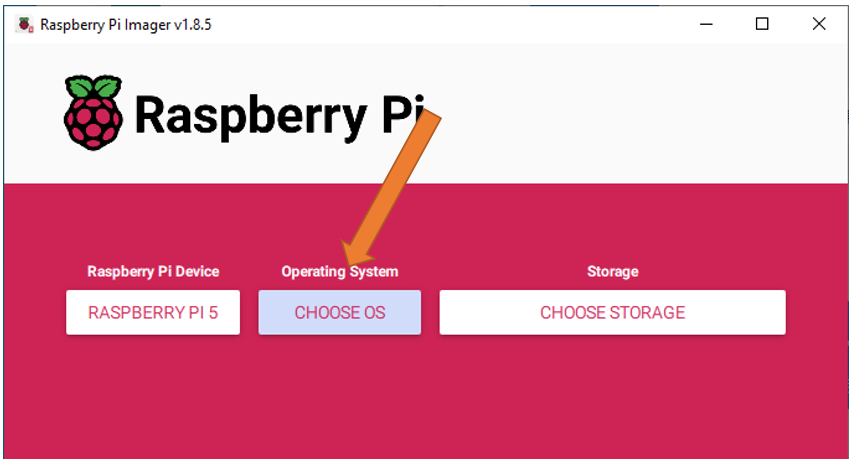
Then open imager toll. Clicked Choose Device.
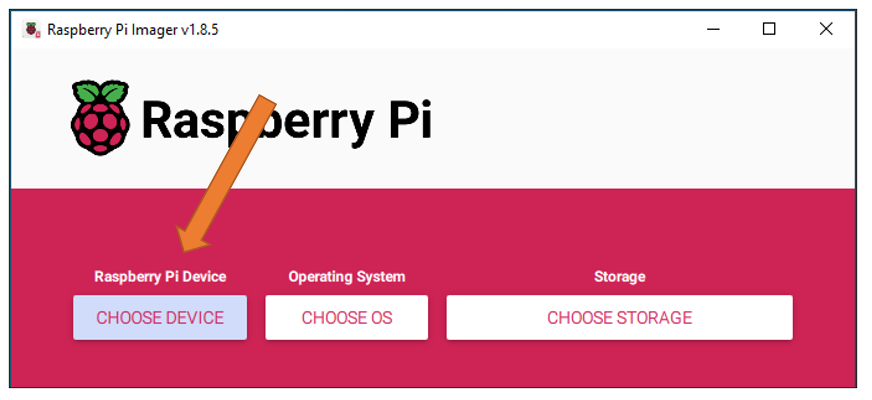
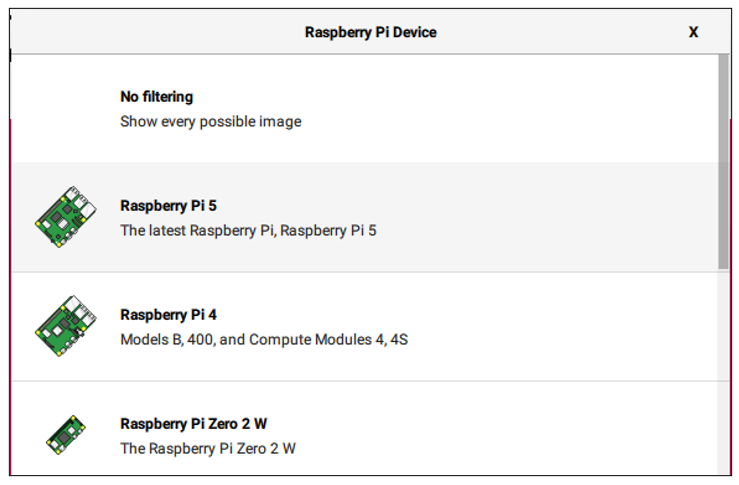
Select a Raspberry PI Device based on your Raspberry PI version. It will help us filter out the right version of the system for the Raspberry PI.
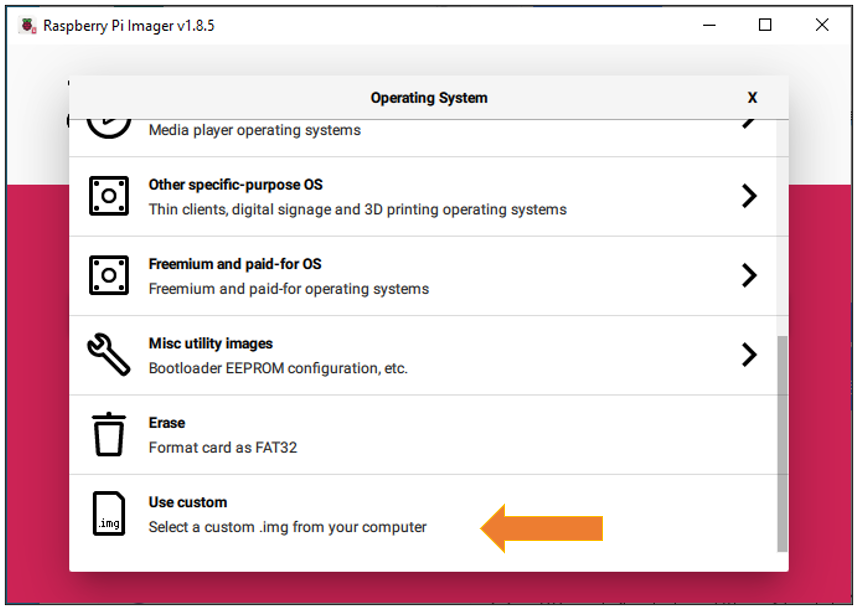
Clicked Operating System.
Choose system that you just downloaded in Use custom.
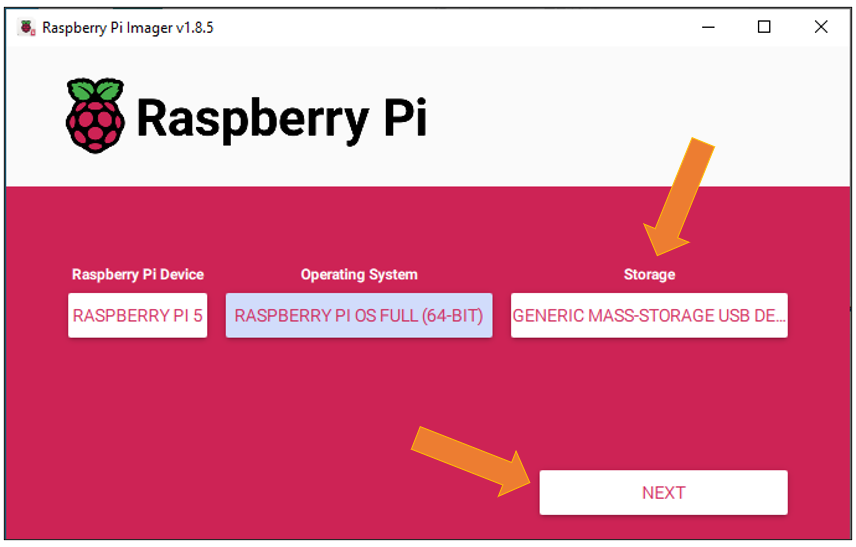
Choose the SD card. Then click “Next”.
You can configure the Raspberry PI according to your needs.
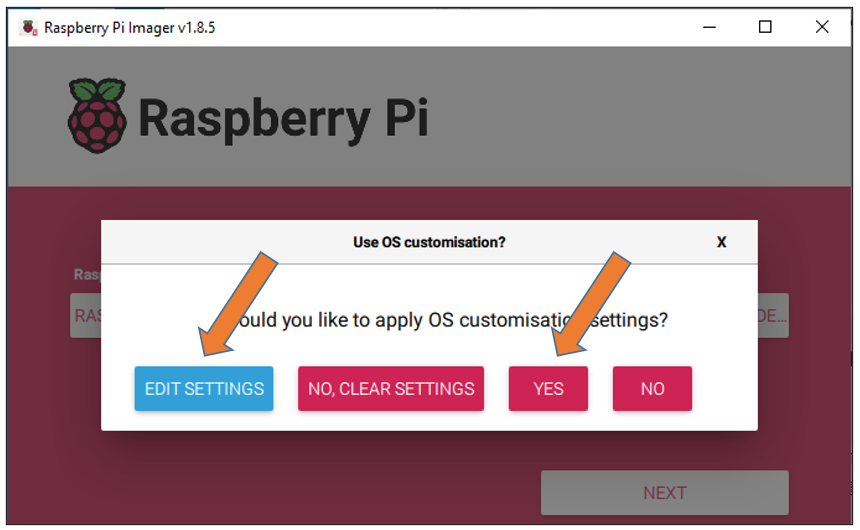
Enable ssh and configure WiFi
On the GENERAL screen, configure your information based on your actual situation.
Enable SSH on the SERVICES page.


Click Save, in the new screen, click Yes, wait for SD to brush into the Raspberry system.

Insert SD card
Then remove SD card from card reader and insert it into Raspberry Pi.

Connect to the power supply and wait for the Raspberry PI to turn on.
Getting Started with Raspberry Pi
Monitor desktop
If you do not have a spare monitor, please skip to next section Remote desktop & VNC. If you have a spare monitor, please follow the steps in this section.
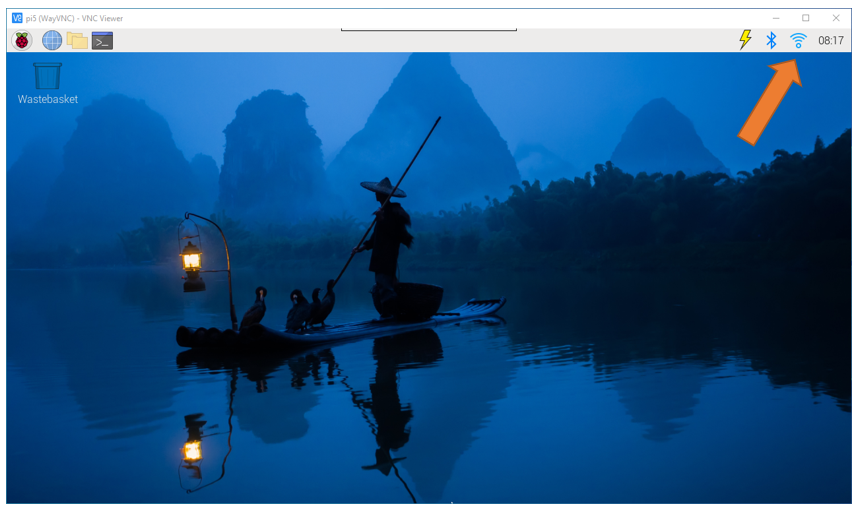
After the system is written successfully, take out Micro SD Card and put it into the SD card slot of RPi. Then connect your RPi to the monitor through the HDMI port, attach your mouse and keyboard through the USB ports, attach a network cable to the network port and finally, connect your power supply (making sure that it meets the specifications required by your RPi Module Version. Your RPi should start (power up). Later, after setup, you will need to enter your user name and password to login. The default user name: pi; password: raspberry. After login, you should see the following screen.

Congratulations! You have successfully installed the RASPBERRY PI OS operating system on your RPi.
Raspberry Pi 5, 4B, 3B+/3B integrates a Wi-Fi adaptor. You can use it to connect to your Wi-Fi. Then you can use the wireless remote desktop to control your RPi. This will be helpful for the following work. Raspberry Pi of other models can use wireless remote desktop through accessing an external USB wireless card.

Remote desktop & VNC
If you have logged in Raspberry Pi via display, you can skip to VNC Viewer & VNC.
If you don’t have a spare display, mouse and keyboard for your RPi, you can use a remote desktop to share a display, keyboard, and mouse with your PC. Below is how to use: MAC OS remote desktop and Windows OS remote desktop.
MAC OS Remote Desktop
Open the terminal and type following command. If this command doesn’t work, please move to next page.
$ ssh pi@raspberrypi.local
The password is raspberry by default, case sensitive. You may need to type yes during the process.


You can also use the IP address to log in Pi.
Enter router client to inquiry IP address named “raspberry pi”. For example, I have inquired to my RPi IP address, and it is “192.168.1.95”.
Open the terminal and type following command.
$ ssh pi@192.168.1.95
When you see pi@raspberrypi:~ $, you have logged in Pi successfully. Then you can skip to next section.

Then you can skip to VNC Viewer & VNC.
Windows OS Remote Desktop
If you are using win10, you can use follow way to login Raspberry Pi without desktop. Press Win+R. Enter cmd. Then use this command to check IP:
$ ping -4 raspberrypi.local

$ ssh pi@xxxxxxxxxxx(IP address)
Enter the following command:
$ ssh pi@192.168.1.95

VNC Viewer & VNC
Enable VNC
Type the following command. And select Interface Options -> P5 VNC -> Enter -> Yes -> OK. Here Raspberry Pi may need be restarted, and choose ok. Then open VNC interface.
$ sudo raspi-config


and the following dialog box pops up.
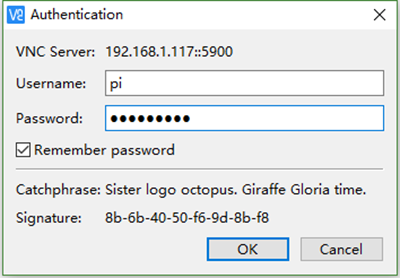
Enter username: pi and Password: raspberry. And click OK.
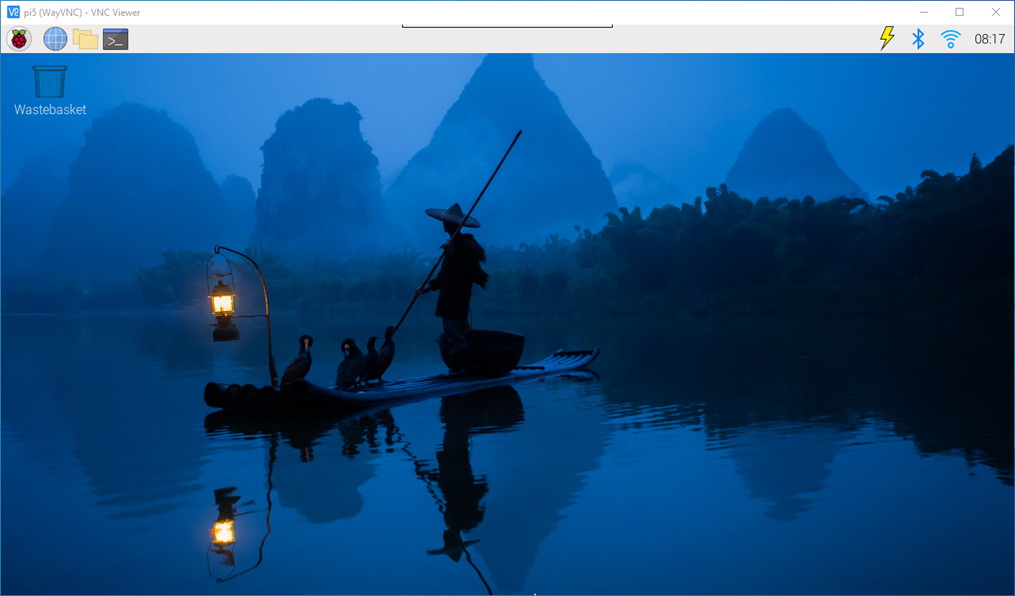
Here, you have logged in to Raspberry Pi successfully by using VNC Viewer
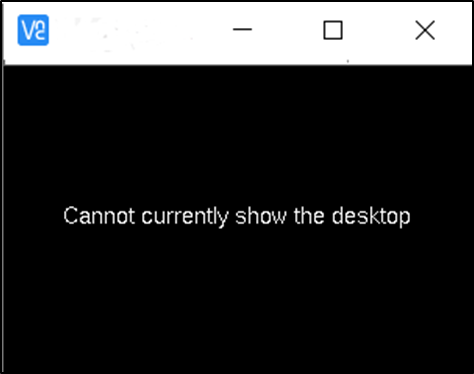
If there is black window, please set resolution.
set resolution
You can also set other resolutions.
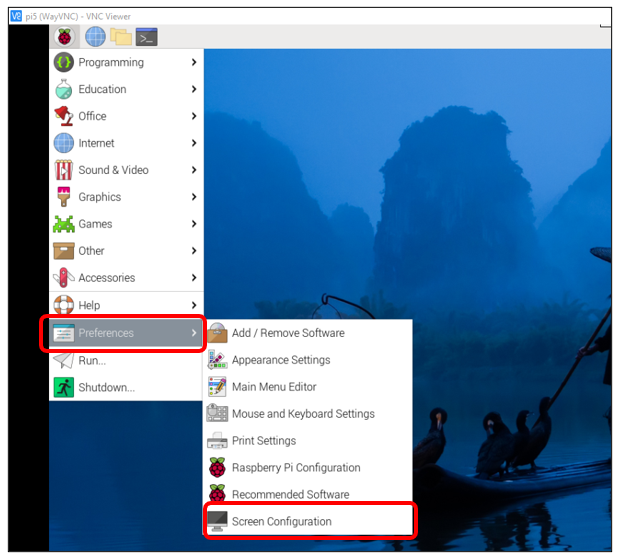
If you don’t know what resolution to set properly, you can try 1920x1080.

In addition, your VNC Viewer window may zoom your Raspberry Pi desktop. You can change it. On your VNC View control panel, click right key. And select Properties->Options label->Scaling. Then set proper scaling.

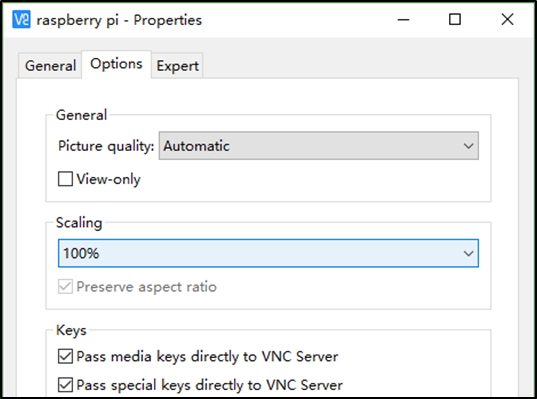
Here, you have logged in to Raspberry Pi successfully by using VNC Viewer and operated proper setting.
Raspberry Pi 5/4B/3B+/3B integrates a Wi-Fi adaptor.If you did not connect Pi to WiFi. You can connect it to wirelessly control the robot.