13. Chapter Servo
Previously, we learned how to control the speed and rotational direction of a DC Motor. In this chapter, we will learn about Servos which are a rotary actuator type motor that can be controlled rotate to specific angles.
13.1. Project Servo Sweep
First, we need to learn how to make a Servo rotate.
13.1.1. Component List
|
Servo x1 |
Jumper Wires x3
|
|


13.1.2. Component knowledge
13.1.2.1. Servo
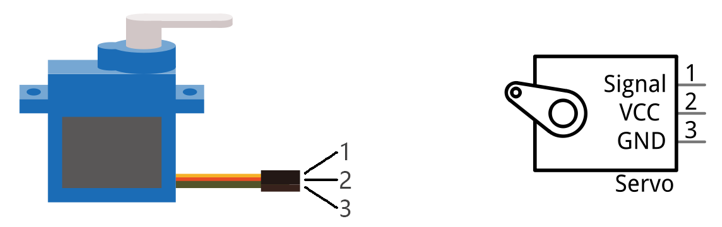
Servo is a compact package which consists of a DC Motor, a set of reduction gears to provide torque, a sensor and control circuit board. Most Servos only have a 180-degree range of motion via their “horn”. Servos can output higher torque than a simple DC Motor alone and they are widely used to control motion in model cars, model airplanes, robots, etc. Servos have three wire leads which usually terminate to a male or female 3-pin plug. Two leads are for electric power: Positive (2-VCC, Red wire), Negative (3-GND, Brown wire), and the signal line (1-Signal, Orange wire) as represented in the Servo provided in your Kit.
We will use a 50Hz PWM signal with a duty cycle in a certain range to drive the Servo. The lasting time 0.5ms-2.5ms of PWM single cycle high level corresponds to the Servo angle 0 degrees - 180 degree linearly. Part of the corresponding values are as follows:
Note: the lasting time of high level corresponding to the servo angle is absolute instead of accumulating. For example, the high level time lasting for 0.5ms correspond to the 0 degree of the servo. If the high level time lasts for another 1ms, the servo rotates to 45 degrees.
High level time |
Servo angle |
|---|---|
0.5ms |
0 degree |
1ms |
45 degree |
1.5ms |
90 degree |
2ms |
135 degree |
2.5ms |
180 degree |
When you change the Servo signal value, the Servo will rotate to the designated angle.
13.1.3. Circuit
Use caution when supplying power to the Servo it should be 5V. Make sure you do not make any errors when connecting the Servo to the power supply.
Schematic diagram
|
Hardware connection. If you need any support,please feel free to contact us via:
|


13.1.4. Sketch
In this chapter, we will learn how to control the servo to rotate at the range of 0 to 180 degrees.
13.1.4.1. Sketch_13_1_Sweep
First, enter where the project is located:
$ cd ~/Freenove_Kit/Pi4j/Sketches/Sketch_13_1_Sweep

Enter the command to run the code.
$ jbang Sweep.java

When the code is running, you can see the servo rotate between 0 to 180 degrees.
Meanwhile, the messages are printed on the terminal.
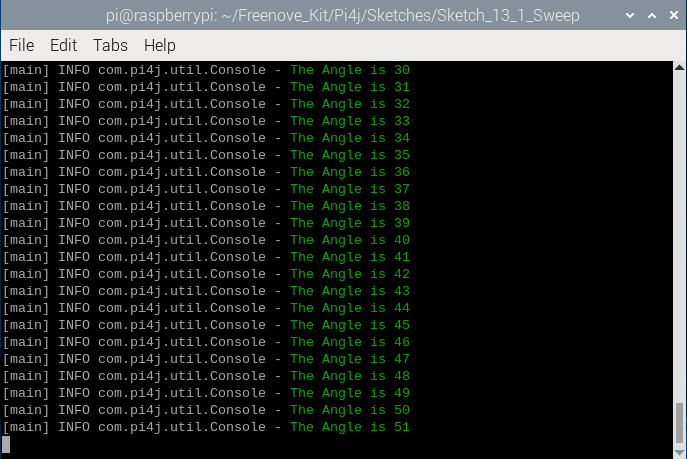
Press Ctrl+C to exit the code.
You can run the following command to open the code with Geany to view and edit it.
$ geany Sweep.java
Click the icon to run the code.
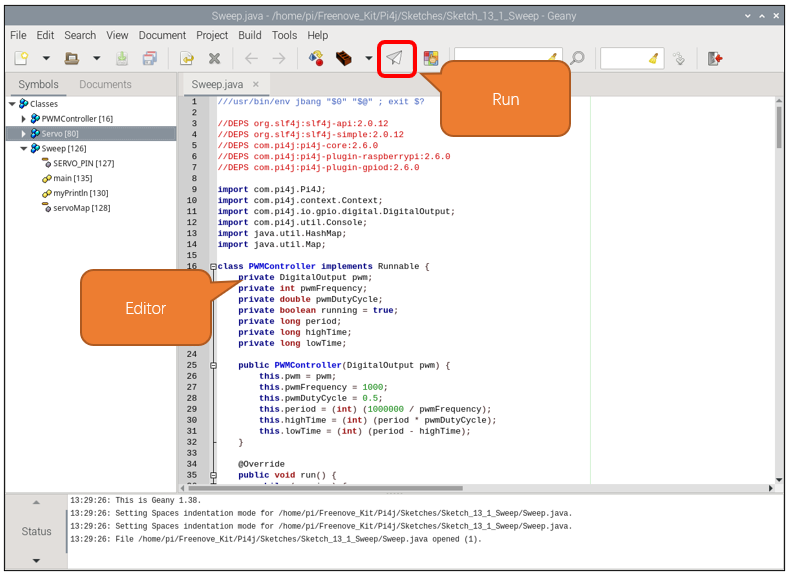
If the code fails to run, please check Geany Configuration.
The following is program code:
  1///usr/bin/env jbang "$0" "$@" ; exit $?
  2
  3//DEPS org.slf4j:slf4j-api:2.0.12
  4//DEPS org.slf4j:slf4j-simple:2.0.12
  5//DEPS com.pi4j:pi4j-core:2.6.0
  6//DEPS com.pi4j:pi4j-plugin-raspberrypi:2.6.0
  7//DEPS com.pi4j:pi4j-plugin-gpiod:2.6.0
  8
  9import com.pi4j.Pi4J;
 10import com.pi4j.context.Context;
 11import com.pi4j.io.gpio.digital.DigitalOutput;
 12import com.pi4j.util.Console;
 13import java.util.HashMap;
 14import java.util.Map;
 15
 16class PWMController implements Runnable {
 17    private DigitalOutput pwm;
 18    private int pwmFrequency;
 19    private double pwmDutyCycle;
 20    private boolean running = true;
 21    private long period;
 22    private long highTime;
 23    private long lowTime;
 24
 25    public PWMController(DigitalOutput pwm) {
 26        this.pwm = pwm;
 27        this.pwmFrequency = 1000;
 28        this.pwmDutyCycle = 0.5;
 29        this.period = (int) (1000000 / pwmFrequency);
 30        this.highTime = (int) (period * pwmDutyCycle);
 31        this.lowTime = (int) (period - highTime);
 32    }
 33
 34    @Override
 35    public void run() {
 36        while (running) {
 37            if (highTime != 0) {
 38                pwm.high();
 39                delayUs(highTime);
 40            }
 41            if (lowTime != 0) {
 42                pwm.low();
 43                delayUs(lowTime);
 44            }
 45        }
 46    }
 47
 48    public void setPwmFrequency(int frequency) {
 49        if (frequency != 0) {
 50            this.pwmFrequency = frequency;
 51            this.period = (int) (1000000 / pwmFrequency);
 52            this.highTime = (int) (period * pwmDutyCycle);
 53            this.lowTime = (int) (period - highTime);
 54        } else {
 55            this.pwmFrequency = 0;
 56            this.period = (int) (1000);
 57            this.highTime = (int) (0);
 58            this.lowTime = (int) (period - highTime);
 59        }
 60    }
 61
 62    public void setPwmDutyCycle(double dutyCycle) {
 63        this.pwmDutyCycle = dutyCycle;
 64        this.highTime = (int) (period * pwmDutyCycle);
 65        this.lowTime = (int) (period - highTime);
 66    }
 67
 68    private void delayUs(long us) {
 69        long startTime = System.nanoTime();
 70        long endTime = startTime + (us * 1000);
 71        while (System.nanoTime() < endTime) {
 72        }
 73    }
 74
 75    public void requestStop() {
 76        running = false;
 77    }
 78}
 79
 80class Servo {
 81    private final int pin;
 82    private final PWMController pwmController;
 83    private final Context pi4j;
 84
 85    public Servo(int pin) throws Exception {
 86        this.pin = pin;
 87        this.pi4j = Pi4J.newAutoContext();
 88        DigitalOutput pwm = pi4j.dout().create(pin);
 89        this.pwmController = new PWMController(pwm);
 90
 91        Thread pwmThread = new Thread(pwmController, "PWM Controller for Servo on PIN " + pin);
 92        pwmThread.start();
 93
 94        Runtime.getRuntime().addShutdownHook(new Thread(() -> {
 95            pwmController.requestStop();
 96            try {
 97                pwmThread.join();
 98            } catch (InterruptedException e) {
 99                Thread.currentThread().interrupt();
100            }
101        }));
102    }
103
104    public void setFrequency(int frequency) {
105        pwmController.setPwmFrequency(frequency);
106    }
107
108    public void setDutyCycle(double dutyCycle) {
109        pwmController.setPwmDutyCycle(dutyCycle);
110    }
111
112    public void setAngle(int angle) {
113        if (angle > 180 || angle < 0) {
114            return;
115        }
116        double dutyCycle = (((double) angle / 180.0 * 2) + 0.5) / 20;
117        pwmController.setPwmDutyCycle(dutyCycle);
118    }
119
120    public void shutdown() {
121        pwmController.requestStop();
122        pi4j.shutdown();
123    }
124}
125
126public class Sweep {
127    private static int SERVO_PIN = 18;
128    private static final Map<Integer, Servo> servoMap = new HashMap<>();
129
130    public static void myPrintln(String format, Object... args) {
131        Console console = new Console();
132        console.println(String.format("\u001B[32m" + format + "\u001B[0m", args));
133    }
134
135    public static void main(String[] args) throws Exception {
136        servoMap.put(SERVO_PIN, new Servo(SERVO_PIN));
137        Servo servo = servoMap.get(SERVO_PIN);
138        servo.setFrequency(50);
139        servo.setDutyCycle(0.075);
140
141        myPrintln("Start sweeping ...");
142        Thread.sleep(3000);
143
144        try {
145            while (true) {
146                for (int i = 0; i < 180; i++) {
147                    servo.setAngle(i);
148                    myPrintln("The Angle is %d", i);
149                    Thread.sleep(20);
150                }
151                for (int i = 180; i > 0; i--) {
152                    servo.setAngle(i);
153                    myPrintln("The Angle is %d", i);
154                    Thread.sleep(20);
155                }
156            }
157        } finally {
158            if (servo != null) {
159                servo.shutdown();
160            }
161        }
162    }
163}
Servo constructor, initializes the servo control pins, and adds a JVM shutdown hook to ensure that the PWM controller and Pi4J context are properly closed when the program exits.
 1public Servo(int pin) throws Exception {
 2    this.pin = pin;
 3    this.pi4j = Pi4J.newAutoContext();
 4    DigitalOutput pwm = pi4j.dout().create(pin);
 5    this.pwmController = new PWMController(pwm);
 6
 7    Thread pwmThread = new Thread(pwmController, "PWM Controller for Servo on PIN " + pin);
 8    pwmThread.start();
 9
10    Runtime.getRuntime().addShutdownHook(new Thread(() -> {
11        pwmController.requestStop();
12        try {
13            pwmThread.join();
14        } catch (InterruptedException e) {
15            Thread.currentThread().interrupt();
16        }
17    }));
18}
Set the PWM duty cycle according to the angle to control the servo to rotate to the specified position.
1public void setAngle(int angle) {
2    if (angle > 180 || angle < 0) {
3        return;
4    }
5    double dutyCycle = (((double) angle / 180.0 * 2) + 0.5) / 20;
6    pwmController.setPwmDutyCycle(dutyCycle);
7}
Initialize the servo controller and store it in servoMap.
1servoMap.put(SERVO_PIN, new Servo(SERVO_PIN));
Get the servo controller from servoMap.
1Servo servo = servoMap.get(SERVO_PIN);
The signal period of the servo is 20ms. According to the formula f=1/T, the frequency of the servo is set to 50Hz.
To control the servo to rotate to 0 degrees, a 1.5ms high level is required. 1.5ms/20ms=0.075, so the duty cycle of the servo is 0.075. Similarly, if you want the servo to rotate to 180 degrees, a 2.5ms high level is required, 2.5ms/20ms=0.375. You only need to modify the duty cycle value to control the rotation of the servo.
1servo.setFrequency(50);
2servo.setDutyCycle(0.075);
The main code controls the servo to rotate between 0-180 degrees and prints prompt information on the terminal interface.
 1while (true) {
 2    for (int i = 0; i < 180; i++) {
 3        servo.setAngle(i);
 4        myPrintln("The Angle is %d", i);
 5        Thread.sleep(20);
 6    }
 7    for (int i = 180; i > 0; i--) {
 8        servo.setAngle(i);
 9        myPrintln("The Angle is %d", i);
10        Thread.sleep(20);
11    }
12}