Chapter 22 Smart home
In this chapter, we will use ESP8266 to make a simple smart home.We will learn how to control LED lights through web pages.
Project 22.1 Control_LED_through_Web
In this project, we need to build a Web Service and then use ESP8266 to control the LED through the Web browser of the phone or PC.Through this example, you can remotely control the appliances in your home to achieve smart home.
Component List
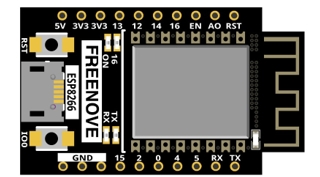
ESP8266 x1 |
USB cable |
|
|

Component knowledge
HTML
HyperText Markup Language (HTML) is a standard Markup Language for creating web pages.It includes a set of tags that unify documents on the network and connect disparate Internet resources into a logical whole.HTML text is descriptive text composed of HTML commands that describe text, graphics, animations, sounds, tables, links, etc.The extension of the HTML file is HTM or HTML.Hyper Text is a way to organize information.It uses hyperlinks to associate words and charts in Text with other information media.These related information media may be in the same Text, other files, or files located on a remote computer.This way of organizing information connects the information resources distributed in different places, which is convenient for people to search and retrieve information.
The nature of the Web is hypertext Markup Language (HTML), which can be combined with other Web technologies (e.g., scripting languages, common gateway interfaces, components, etc.) to create powerful Web pages. Thus, HYPERtext Markup Language (HTML) is the foundation of World Wide Web (Web) programming, that is, the World Wide Web is based on hypertext. Hypertext Markup Language is called hypertext Markup language because the text contains so-called “hyperlink” points.
You can build your own WEB site using HTML, which runs on the browser and is parsed by the browser.
Example analysis is shown in the figure below:
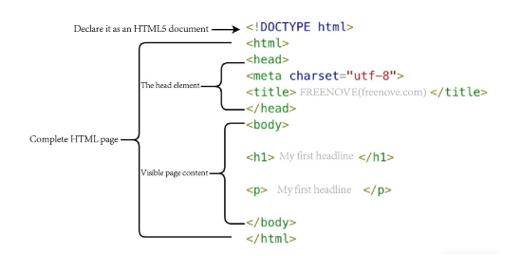
<!DOCTYPE html>: Declare it as an HTML5 document
<html>: Is the root element of an HTML page
<head>: Contains meta data for the document, such as < meta charset=”utf-8”> Define the web page encoding format to UTF-8.
<title>: Notesthe title of the document
<body>: Contains visible page content
<h1>: Define a big heading
<p>: Define a paragraph
For more information, please visit: https://developer.mozilla.org/en-US/docs/Web/HTML
Circuit
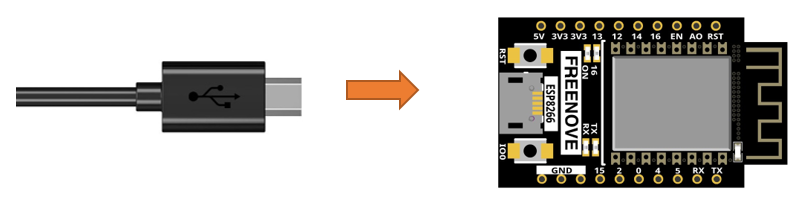
Connect Freenove ESP8266 to the computer using USB cable.
Code
Move the program folder “Freenove_Ultimate_Starter_Kit_for_ESP8266/Python/Python_Codes” to disk(D) in advance with the path of “D:/Micropython_Codes”.
Open “Thonny”, click “This computer” -> “D:” -> “Micropython_Codes” -> “22.1_Control_LED_through_Web”. and double click “Control_LED_through_Web”.
22.1_Control_LED_through_Web
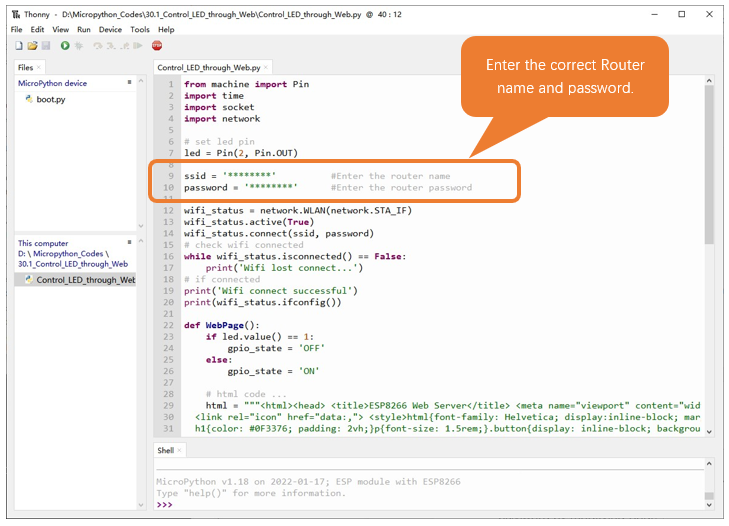
Because the names and passwords of routers in various places are different, before the Code runs, users need to enter the correct router’s name and password in the box as shown in the illustration above.
After making sure the router name and password are entered correctly, compile and upload codes to ESP8266, wait for ESP8266 to connect to your router and print the IP address assigned by the router to ESP8266 in “Shell”.
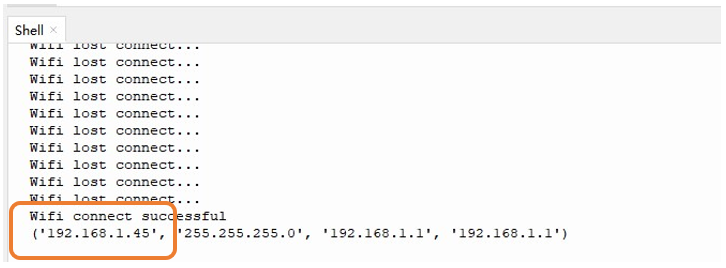
When ESP8266 successfully connects to “ssid”, “Shell” displays the IP address assigned to ESP8266 by the router. Access http://192.168.1.45 in a computer browser on the LAN. As shown in the following figure:
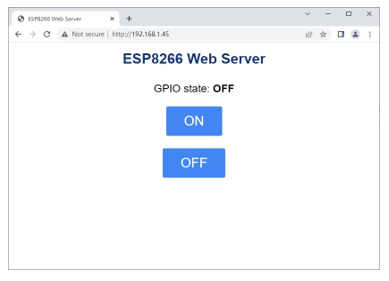
You can click the corresponding button to control the LED on and off.
The following is the program code:
 1from machine import Pin
 2import time
 3import socket
 4import network
 5
 6# set led pin
 7led = Pin(2, Pin.OUT)
 8
 9ssid = '********'          #Enter the router name
10password = '********'      #Enter the router password
11
12wifi_status = network.WLAN(network.STA_IF)
13wifi_status.active(True)
14wifi_status.connect(ssid, password)
15# check wifi connected
16while wifi_status.isconnected() == False:
17    print('Wifi lost connect...')
18# if connected
19print('Wifi connect successful')
20print(wifi_status.ifconfig())
21
22def WebPage():
23    if led.value() == 1:
24        gpio_state = 'OFF'
25    else:
26        gpio_state = 'ON'
27
28    # html code ...
29    html = """
30    <html>
31        <head>
32            <title>ESP8266 Web Server</title>
33            <meta name="viewport" content="width=device-width, initial-scale=1">
34            <link rel="icon" href="data:,">
35            <style>
36                html{font-family: Helvetica; display:inline-block; margin: 0px auto; text-align: center;}
37                h1{color: #0F3376; padding: 2vh;}
38                p{font-size: 1.5rem;}
39                button{display: inline-block; background-color: #4286f4; border: none;border-radius: 4px; color: white; padding: 16px 40px; text-decoration: none; font-size: 30px; margin: 2px; cursor: pointer;}
40                button2{background-color: #4286f4;}
41            </style>
42        </head>
43        <body> <h1>ESP8266 Web Server</h1>
44          <p>GPIO state: <strong>""" + gpio_state + """</strong></p>
45          <p><a href="/?led=on"><button class="button">ON</button></a></p>
46          <p><a href="/?led=off"><button class="button button2">OFF</button></a></p>
47        </body>
48    </html>
49    """
50    return html
51
52s = socket.socket(socket.AF_INET, socket.SOCK_STREAM)
53s.bind(('', 80))
54s.listen(5)
55try:
56    while True:
57        conn, addr = s.accept()
58        print('Connection: %s' % str(addr))
59        req = conn.recv(1024)
60        req = str(req)
61        print('Connect = %s' % req)
62        led_on = req.find('/?led=on')
63        led_off = req.find('/?led=off')
64        if led_on == 6:
65            print('LED ON')
66            led.value(0)
67        else:
68            print('LED OFF')
69            led.value(1)
70        if led.value() == 1:
71            gpio_state = 'OFF'
72        else:
73            gpio_state = 'ON'
74        response = WebPage()
75        conn.send('HTTP/1.1 200 OK\n')
76        conn.send('Content-Type: text/html\n')
77        conn.send('Connection: close\n\n')
78        conn.sendall(response)
79        conn.close()
80except:
81    pass
Import socket module and Import network module.
1import socket
2import network
Enter correct AP name and password.
1ssid = '********'          #Enter the router name
2password = '********'      #Enter the router password
Set ESP8266 in Station mode and connect it to your router.
1wifi_status = network.WLAN(network.STA_IF)
2wifi_status.active(True)
3wifi_status.connect(ssid, password)
“Shell” displays the IP address assigned to ESP8266.
1print(wifi_status.ifconfig())
Click the button on the web page to control the LED light on and off.
 1if led_on == 6:
 2    print('LED ON')
 3    led.value(0)
 4else:
 5    print('LED OFF')
 6    led.value(1)
 7if led.value() == 1:
 8    gpio_state = 'OFF'
 9else:
10    gpio_state = 'ON'