42. Chapter USB HID
In this chapter, we will learn how to use a control board with keyboard and mouse APIs to emulate mouse and keyboard actions. This feature can be used to create game controllers, keyboard extensions, or other Human Interface Devices (HID).
42.1. Project Mouse control
In this project, we learn how to emulate a mouse control.
42.1.1. Component List
Control board x1
|
|||
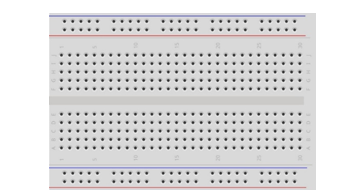
Breadboard x1
|
GPIO Extension Board x1
|
||
USB cable x1
|
Jumper M/M x12
|
||
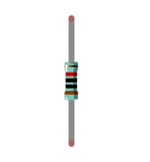
Resistor 10kΩ x8
|
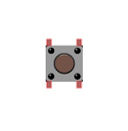
Push button Switch x4 |
||


42.1.2. Component knowledge
42.1.2.1. Human Interface Device (HID)
Human Interface Devices (HID) are devices designed for human use (such as keyboards, mice, game controllers, etc.), which often send data to the computer via USB. When you press a key on the keyboard, you send data to the computer, the computer reads the data and then activates the corresponding key.
HID, or Human-Interface Devices, is a category of computer devices designed for direct interaction with humans and are typically used for input purposes. This category includes devices such as keyboards, mice, and game controllers. With the control board (V5), you can simulate these devices, unlocking a multitude of possibilities for DIY projects.
The control board (V5) has built-in support for HID, a feature found on most modern development boards but not on previous UNO versions.
The control board (V5) is more than just a powerful development board; it also has built-in support for Human-Interface Devices (HID). This allows you to use the board to simulate devices such as mice and keyboards, adding a new level of interactivity to your projects.
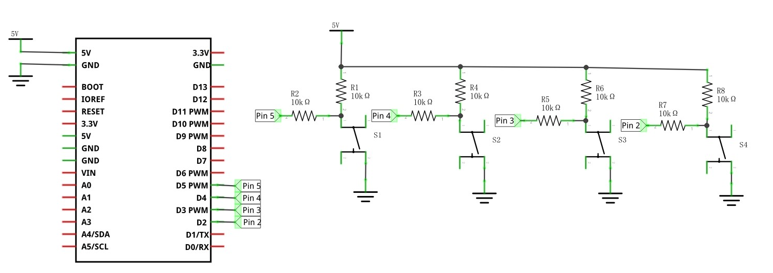
42.1.3. Circuit
Schematic diagram |
|
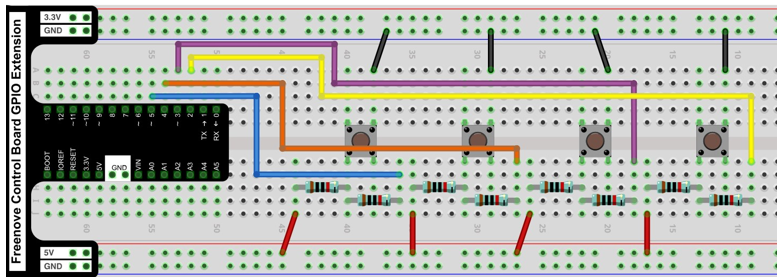
Hardware connection If you need any support, please feel free to contact us via: support@freenove.com |
|
42.1.4. Sketch
42.1.4.1. Sketch_42.1.1
Upload the code to the control board, and you can easily control the movement of the mouse with the buttons. Here, four buttons are set up to control the mouse for moving up, down, left, and right.
The following is the program code:
 1/**********************************************************************
 2  Filename    : Sketch_42.1.1_HID_Mouse
 3
 4  Description : This code is designed to control mouse cursor movement using an Arduino Uno R4.
 5  When the button connected to pin 7 is pressed, the mouse moves 10 units to the right.
 6  Uncommenting the respective sections below the main loop will change the direction of movement.
 7
 8  Auther      : www.freenove.com
 9  Modification: 2024/08/05
10**********************************************************************/
11
12#include <Mouse.h>  // Include the Mouse library for mouse control
13
14const int upButton = 2;  // Define the pin where the button is connected
15const int downButton  = 3;  // Define the pin where the button is connected
16const int leftButton  = 4;  // Define the pin where the button is connected
17const int rightButton = 5;  // Define the pin where the button is connected
18
19void setup() {
20  pinMode(upButton, INPUT_PULLUP);  // Set the button pin as an input
21  pinMode(downButton, INPUT_PULLUP);  // Set the button pin as an input
22  pinMode(leftButton, INPUT_PULLUP);  // Set the button pin as an input
23  pinMode(rightButton, INPUT_PULLUP);  // Set the button pin as an input
24  Mouse.begin();           // Initialize mouse control
25  delay(1000);             // Wait for 1 second (1000 milliseconds) for hardware initialization
26}
27
28void loop() {
29  // Check if the button is pressed (HIGH)
30  if (digitalRead(rightButton) == LOW) {
31    //right
32    Mouse.move(10, 0);  // Move the mouse 10 units to the right
33    delay(200);         // Wait for 200 milliseconds to slow down mouse movement
34  }
35  if (digitalRead(leftButton) == LOW) {
36    //Left
37    Mouse.move(-10, 0);
38    delay(200);
39  }
40  if (digitalRead(downButton) == LOW) {
41    // Down
42    Mouse.move(0, 10);
43    delay(200);
44  }
45  if (digitalRead(upButton) == LOW) {
46    // Up
47    Mouse.move(0, -10);
48    delay(200);
49  }
50}
Include the mouse library for mouse control.
1#include <Mouse.h> // Include the Mouse library for mouse control
Determine whether a button is press, and execute corresponding mouse movement.
 1// Check if the button is pressed (HIGH)
 2if (digitalRead(rightButton) == LOW) {
 3  //right
 4  Mouse.move(10, 0);  // Move the mouse 10 units to the right
 5  delay(200);         // Wait for 200 milliseconds to slow down mouse movement
 6}
 7if (digitalRead(leftButton) == LOW) {
 8  //Left
 9  Mouse.move(-10, 0);
10  delay(200);
11}
12if (digitalRead(downButton) == LOW) {
13  // Down
14  Mouse.move(0, 10);
15  delay(200);
16}
17if (digitalRead(upButton) == LOW) {
18  // Up
19  Mouse.move(0, -10);
20  delay(200);
21}
42.2. Project Keypad Control
In this project, we will control keyboard input through buttons.
42.2.1. Component List
Control board x1
|
|||
Breadboard x1
|
GPIO Extension Board x1
|
||
USB cable x1
|
Jumper M/M x12
|
||
Resistor 10kΩ x8
|
Push button Switch x4 |
||
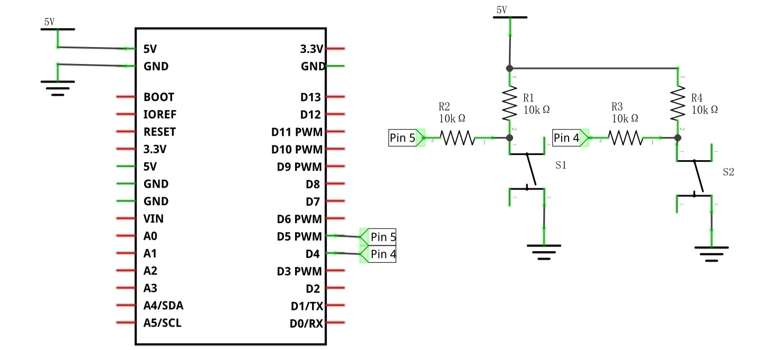
42.2.2. Circuit
Schematic diagram |
|
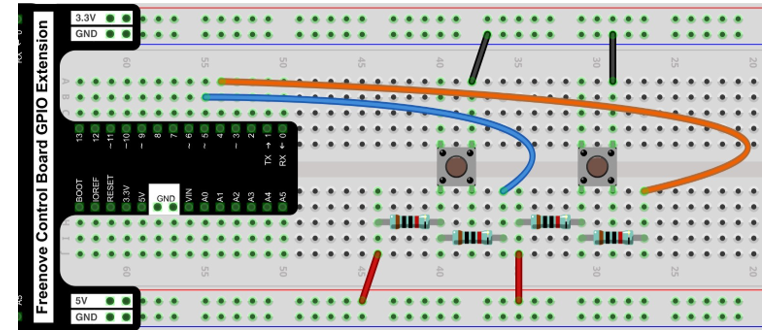
Hardware connection If you need any support, please feel free to contact us via: support@freenove.com |
|
42.2.3. Sketch
42.2.3.1. Sketch_42.2.1
Upload the code to the control board, and you can easily control keyboard input through buttons. Here, two buttons are set up: one for copying (simultaneously pressing the CTRL and C keys on the keyboard), and the other for pasting (simultaneously pressing the CTRL and V keys on the keyboard). We can use these two buttons to complete the copy and paste of text. For example, to copy the text “Freenove.com” from the file “test.txt,” use the mouse to select the text, press the copy button, and then press the paste button to perform the text copy.

The following is the program code:
 1/**********************************************************************
 2  Filename    : Sketch_42.2.1_HID_Keyboard
 3
 4  Description : This code is designed to provide copy and paste functionality using two buttons with an Arduino Uno R4.
 5  When the button connected to pin 4 is pressed, a "copy" command (Ctrl + C) is sent to the computer.
 6  When the button connected to pin 5 is pressed, a "paste" command (Ctrl + V) is sent to the computer.
 7
 8  Auther      : www.freenove.com
 9  Modification: 2024/08/05
10**********************************************************************/
11#include <Keyboard.h>  // Include the Keyboard library to enable keyboard functionalities
12
13const int copyButtonPin = 4;  // Pin number for the copy button
14const int pasteButtonPin = 5; // Pin number for the paste button
15
16void setup() {
17  Keyboard.begin();  // Initialize the Keyboard library
18  pinMode(copyButtonPin, INPUT_PULLUP);  // Set the copy button pin as input
19  pinMode(pasteButtonPin, INPUT_PULLUP); // Set the paste button pin as input
20  delay(1000);       // Wait for 1 second to allow hardware initialization
21}
22
23void loop() {
24  // Check if the copy button is pressed
25  if (digitalRead(copyButtonPin) == LOW) {
26    Keyboard.press(KEY_LEFT_CTRL);  // Press the Ctrl key
27    Keyboard.press('c');            // Press the 'c' key
28    Keyboard.releaseAll();          // Release all keys
29    delay(150);                     // Wait for 200 milliseconds
30  }
31  // Check if the paste button is pressed
32  else if (digitalRead(pasteButtonPin) == LOW) {
33    Keyboard.press(KEY_LEFT_CTRL);  // Press the Ctrl key
34    Keyboard.press('v');            // Press the 'v' key
35    Keyboard.releaseAll();          // Release all keys
36    delay(150);                     // Wait for 200 milliseconds
37  }
38}
Include the Keyboard library to enable keyboard functionalities
1#include <Keyboard.h> // Include the Keyboard library to enable keyboard functionalities
Determine whether a button is pressed, and execute corresponding key input values.
 1if (digitalRead(copyButtonPin) == LOW) {
 2  Keyboard.press(KEY_LEFT_CTRL);  // Press the Ctrl key
 3  Keyboard.press('c');            // Press the 'c' key
 4  Keyboard.releaseAll();          // Release all keys
 5  delay(150);                     // Wait for 200 milliseconds
 6}
 7// Check if the paste button is pressed
 8else if (digitalRead(pasteButtonPin) == LOW) {
 9  Keyboard.press(KEY_LEFT_CTRL);  // Press the Ctrl key
10  Keyboard.press('v');            // Press the 'v' key
11  Keyboard.releaseAll();          // Release all keys
12  delay(150);                     // Wait for 200 milliseconds
13}
For more examples of USB HID, please refer to: